Spring Book Reviews – The Soup Sisters and Broth Brothers Cookbook

Tom Yum Soup

I received a review copy of The Soup Sisters and Broth Brothers Cookbook from Appetite by Random House Canada. Nevertheless, all opinions in the following post are my own.

It’s safe to say that soup season is a year-round phenomenon in Vancouver, even though we get long stretches of sunshine in the summer. There are gazpachos and chilled soups for hot weather, but there are also always rainclouds in our future, so stocking the freezer with comforting soups is a good practice.

One of the best ways to do that is to make a big batch of your favourite soup and then organize a soup swap with friends and neighbours. It’s a fun way to build community while providing one another with at least six meals’ worth of nourishing, delicious food.

(Inter)National Soup Swap Day is held in late January each year, but they provide great information and advice no matter what time of year you decide to hold your own swap. Next year will be the tenth anniversary, so I expect they will have even more recipes, stories, and advice to share.

Our co-op has been holding soup swaps for a number of years now. The regular participants enjoy it so much that we’re even talking about having them twice a year – once at harvest time and another in the coldest part of the year. One to celebrate late summer’s bounty and another to cheer us through winter’s last weeks.

Since I’ve been sharing soup with the same group of people over the years, I’m always on the lookout for new recipes that are delicious, reliable, and out of the ordinary. When I was given the opportunity to review The Soup Sisters and Broth Brothers Cookbook, I knew it was a book that I’d be making good use of for years to come.

The Soup Sisters and Broth Brothers Cookbook is full of flavourful soups borrowed from many cuisines and encompassing such a wide variety of ingredients that it could keep a soup swap group excited for years. The 114 soups are organized by season and the book includes stock recipes and advice on techniques and basics. The recipes come from the organization’s staff and volunteers, along with food writers, chefs, and even a sitting Mayor. Many of the recipes include stories about the soups, just as a soup swap gathering would.

But it’s more than a cookbook. It also tells the story of an organization that shares soup to help heal lives and to show support for people in crisis. The soups that Soup Sisters and Broth Brothers make together go to feed women and children who have suffered domestic abuse, or to youth exiting street life. It takes the concept of building community through sharing food beyond our personal networks and turns it into something that can be transformative.

It’s an inspiring thought. If you’d like to join them in their work, they have branches across Canada and even one in California.

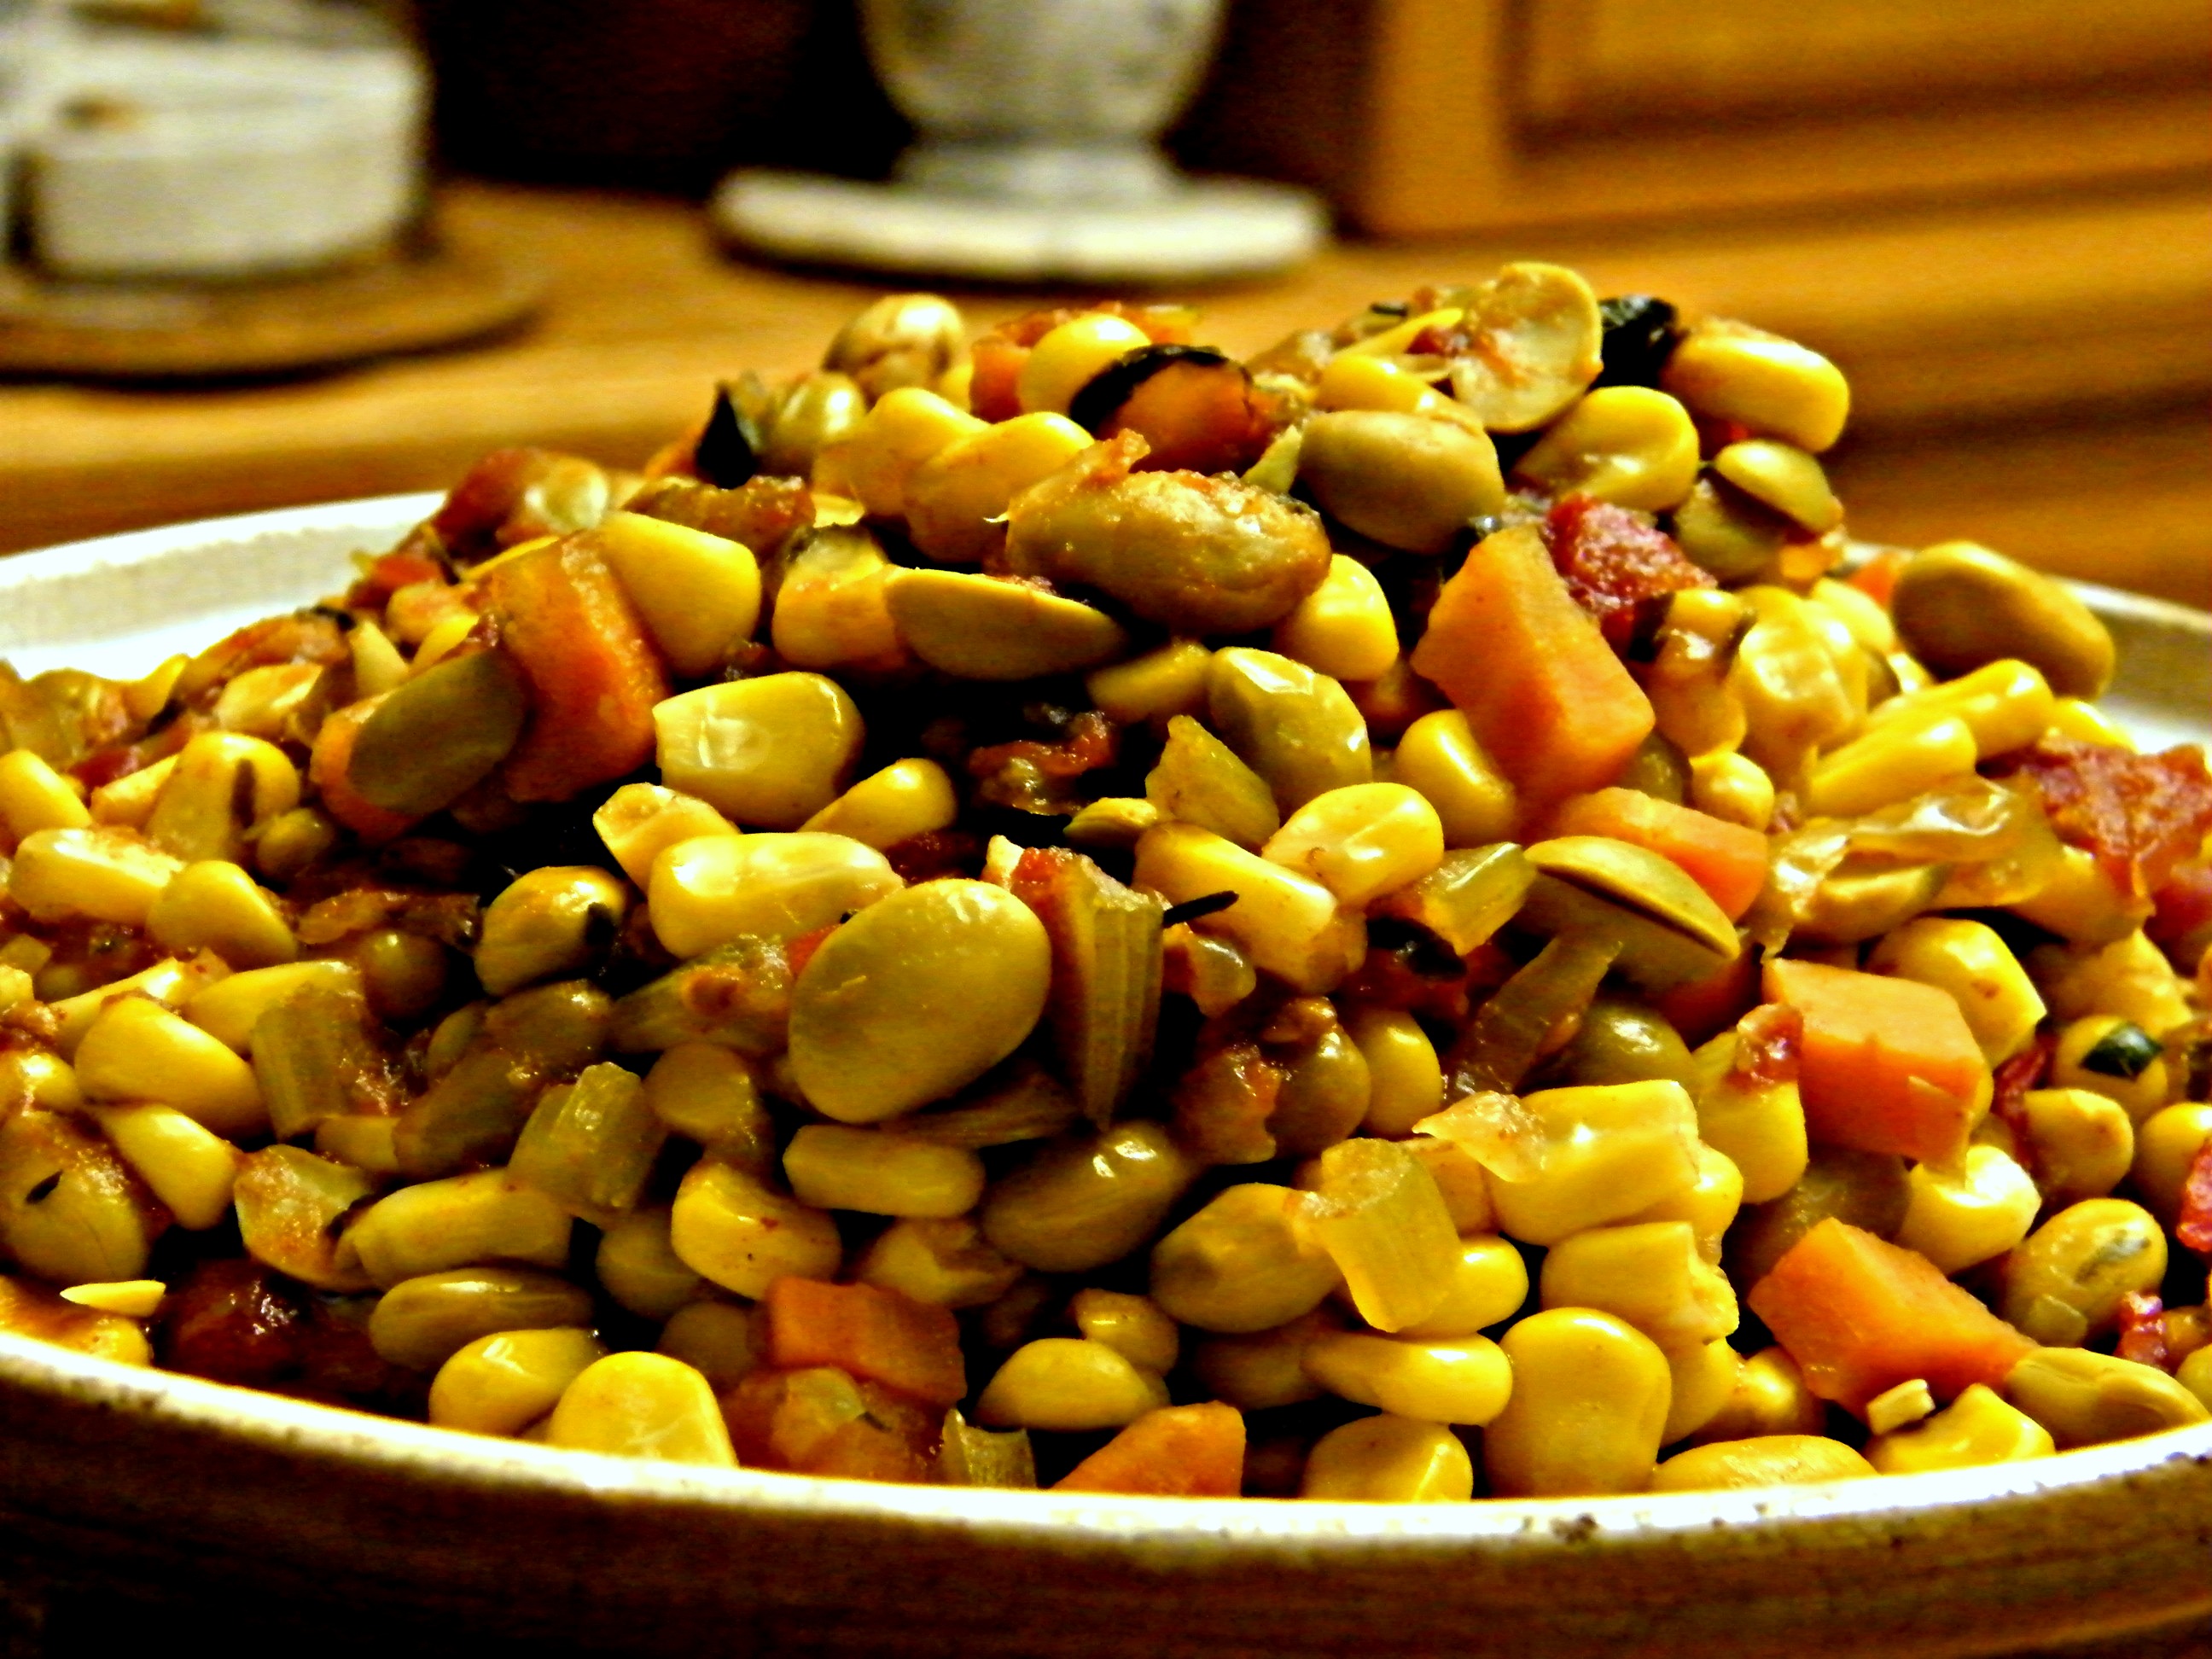
In the meantime, they’ve been kind enough to let me share with you a soup for Spring, fragrant with lemongrass, galangal, makrut, and coconut milk. This Thai classic comes together quickly, but is richly flavoured. I made a vegan, gluten-free version for my partner, so traded fish sauce for a little gluten-free tamari and skipped the meat. I also used a vegan tom yum paste, versions of which are becoming more widely available now.

This soup was so good I wished I’d doubled the recipe. The only change I would make would be to add a dried chili pepper or two, for a little heat.

Tom Yum Soup

Sharon Hapton, Founder, Soup Sisters and Broth Brothers

Makes about 4 servings

4 cups (1 L) chicken or vegetable stock
2 large onions, thinly sliced
2 carrots, peeled and thinly sliced
1 shallot, thinly sliced
2 thick slices fresh ginger
2 thick slices galangal (optional)
1 stalk lemongrass, trimmed, gently bashed with a rolling pin and cut into quarters crosswise
1 to 2 tsp (5 to 10 mL) tom yum paste
3 to 4 kaffir lime leaves
1 clove garlic, minced
20 large raw shrimp, peeled and deveined, or 1 lb (500 g) cubed or diced boneless, skinless chicken (optional)
1 can (14 oz/398 mL) unsweetened coconut milk, well shaken
8 oz (250 g) cremini or white button mushrooms, sliced
2 plum tomatoes, diced
2 to 3 tsp (10 to 15 mL) fish sauce (according to taste)
1 lb (500 g) rice noodles, soaked in cold water for 2 hours then drained (optional)
Finely chopped cilantro for garnish

1. In a large pot, combine the stock, onions, carrots, shallot, ginger, galangal (if using), lemongrass, tom yum paste, lime leaves and garlic. Bring to a boil.

2. Reduce the heat and simmer, uncovered, for 10 minutes for the flavors to develop.

3. Add the shrimp or chicken (if using). Simmer, uncovered, until the shrimp are no longer pink (about 3 minutes) or until the chicken is no longer pink inside (about 10 minutes).

4. Add the coconut milk. Bring the soup back to a simmer.

5. Add the mushrooms and tomatoes. Bring the soup back to a simmer.

6. Remove the ginger, galangal (if using) and lemongrass. Season with fish sauce to taste.

7. If using rice noodles, plunge them into a pot of boiling water to heat through, then drain well.

8. Divide the noodles among the soup bowls, then ladle the soup over the top. Garnish with a flourish of cilantro.

Come back next Thursday for a review of a book that will have you stocking your pantry with long-neglected ingredients.

A Promising Month

IMG_3635

Just a short post tonight, with an update on what you can look forward to in April on the blog, including the Roasted Squash and Shallots with Merguez Chickpeas from River Cottage Veg that you see at the top of the post.

Every Thursday this month, I’ll have a cookbook review for you. And next Tuesday, I’ll let you know how your local supermarket can help you make better decisions about your health and the way you eat.

Along the way, there will be more of the dwindling store of French Fridays recipes, a Cottage Cooking Club update, anticipation of summer farmers’ markets, and an exploration of the Vancouver Biennale.

Who knows what else this month may hold in store?

Holiday Book Reviews – 300 Best Homemade Candy Recipes

Fudge

I don’t know about you, but this is the week when my Christmas shopping always begins in earnest. So, for the second year in a row, I’m bringing you three book reviews to help you cross a few names off your list.

I received a review copy of 300 Best Homemade Candy Recipes from Robert Rose Inc. Nevertheless, all opinions in the following post are my own.

My mother’s aunts were tiny women with very strong arms. That’s because they were raised in an era without stand mixers or food processors to help them in the kitchen. One of the things they used their strength to make, in quantities great enough for the whole extended family, was the French Canadian specialty sucre à la crème. This simple fudge was something we looked forward to at Christmastime and my great-aunt Leona taught me how to make it when I was a teenager. Until very recently, sucre à la crème and truffles were the only candy recipes in my repertoire.

Enter Jane Sharrock’s 300 Best Homemade Candy Recipes. I’ve been curious about candy making for some time now, so when I got the opportunity to review this book, I jumped at it. Sharrock’s cookbook covers most of the categories of candy you can find in a kitchen and some, like lollipops, that I never dreamed you could make at home.

Sharrock began collecting candy recipes when her mother gave her a treasured pressure cooker that was perfect for making candy, along with a small booklet of candy recipes. Sharrock went on to try to preserve the candy recipes from earlier generations, which lends her cookbook an air of nostalgia. Reading through the recipes, I get the sense that these candies populated the tables at church bazaars and community potlucks, in the days before mass-produced sweets took their place.

This means that for the most part, the recipes use ingredients that you’d easily find at the supermarket. The few specialty items, like candy coating, can be found at baking supply stores. But, just because these recipes are old fashioned, doesn’t mean that they’re all unsophisticated. The pralines, divinity, and nougats would make a sweets table shine and even recipes that were thought of as homey, like taffy, seem very impressive these days. You won’t learn skills like tempering chocolate or making marshmallows from scratch, but once you’ve mastered this book, taking your candy making to the next level will be a breeze.

What I like best about this book is that it teaches you a wide range of candy making skills, includes troubleshooting advice and photo demonstrations, and even guides you through the steps you’d need to take if you were trying to recreate a favourite candy without the recipe.

I think after working through some of Sharrock’s categories of sweets, next year’s holiday treat boxes will be the best they’ve ever been. In the meantime, I’m going to give Sharrock’s tuxedo fudge another try. I forgot to put the coconut into the bottom layer and added it to the top, instead. As a result, the bottom is creamy, but the top is a bit dry. Following the instructions should make my next attempt perfect. Thanks to Robert Robert Rose, Inc., I’m sharing the recipe with you. If you’re still on holidays next week, it would be a great way to start filling your freezer with goodies before the New Year’s resolutions set in.

Boxed

Tuxedo Fudge

Makes about 3 1/2 lbs (1.75 kg)

8- or 9-inch (20 or 23 cm) square pan, lined with parchment or buttered
2-quart heavy saucepan
Candy thermometer

Coconut Layer
2 cups (500 mL) granulated sugar
Pinch salt
1/2 cup (125 mL) butter or margarine
1/4 cup (60 mL) light (white) corn syrup
1/2 cup (125 mL) milk
1 tsp (5 mL) vanilla extract
1/2 cup (125 mL) sweetened flaked coconut

Chocolate Layer
2 cups (500 mL) granulated sugar
2 tbsp (30 mL) unsweetened cocoa powder
Pinch salt
1/2 cup (125 mL) butter or margarine
1/4 cup (60 mL) light (white) corn syrup
1/2 cup (125 mL) milk
1 tsp (5 mL) vanilla extract
1/2 cup (125 mL) pecans, in large pieces (optional)

1. To make the coconut layer: In heavy saucepan over low to medium-low heat, bring the sugar, salt, butter, corn syrup and milk to a boil, stirring until the sugar dissolves and the mixture begins to boil. Cover and cook 2 to 3 minutes to dissolve the sugar crystals on the sides of the pan. Remove the lid. Cook, stirring only as needed to prevent scorching, to the soft ball stage (234°F to 240°F/112°C to 116°C, with 236°F/113°C recommended).
2. Remove from the heat. Cool slightly, about 10 minutes. Add the vanilla. Beat by hand until the candy begins to thicken and lose its gloss. Stir in the coconut. Spread the candy into the prepared pan. Cool at room temperature while making the chocolate layer.
3. To make the chocolate layer: In a clean saucepan, combine the sugar and cocoa until well blended. Add the salt, butter, corn syrup and milk. Bring to a boil over low to medium-low heat, stirring until the sugar dissolves and the mixture begins to boil. Cover and cook 2 to 3 minutes to dissolve the sugar crystals on the side of the pan. Remove the lid. Cook, stirring only as needed to prevent scorching, to the soft ball stage (234°F to 240°F/112°C to 116°C, with 236°F/113°C recommended).
4. Remove from the heat. Cool slightly, about 10 minutes. Add the vanilla. Beat by hand until the candy begins to thicken and lose its gloss. Stir in the pecans, if desired. Spread the chocolate layer over the coconut layer in the pan. Cool and cut into squares. Store in an airtight container.

Gift Giver’s Guide: For the sweet tooth, the nostalgic, and the cook who wants to extend their gifts from the kitchen beyond cookies and squares.

You can find the rest of this year’s reviews here and here..

Holiday Book Reviews – Plenty More

/home/wpcom/public_html/wp-content/blogs.dir/ba0/6971813/files/2014/12/img_3269.jpg

I don’t know about you, but this is the week when my Christmas shopping always begins in earnest. So, for the second year in a row, I’m bringing you three book reviews to help you cross a few names off your list.

I received a review copy of Plenty More from Appetite by Random House Canada. Nevertheless, all opinions in the following post are my own.

It’s only been in the last couple of decades that North Americans have rescued vegetables from their role as either abstemious “rabbit food” or underloved sidekick. Even today, many restaurants use vegetables more as a garnish than a true part of the meal on the plate. As much as I love a good steak, I’ve always craved more than a tiny pile of over-steamed carrots to accompany them. I want vegetables to receive the same care and attention, and creativity, that is brought to the proteins and starches in my meal.

At home, there are plenty of great cookbooks that celebrate proteins, side dishes, and desserts, but until recently, scant attention has been paid to vegetables. Yotam Ottolenghi, along with writers like Deborah Madison and Barbara Kafka, has changed all that.

I’ve been a fan of Ottolenghi since I discovered his Guardian column on vegetarian cooking a number of years ago. Not only did he make vegetables the centre of attention in his dishes, but he used them as a canvas for many of the herbs and spices that were just coming to the attention of British, Australasian, and North American eaters. Middle Eastern flavours like za’atar and harissa were showing up with the proteins on restaurant menus. Ottolenghi’s column, then his cookbook Plenty, sent vegetarians and vegetable-lovers to the spice rack, too.

When I found out he was coming out with a sequel to Plenty, I was excited. My copy has seen a lot of use and I was ready for more recipes. Unlike Plenty, which is organized by vegetable type, Plenty More‘s chapters cover techniques, from tossing to roasting to baking. It’s an evolution from exploring vegetables to becoming so comfortable with them that experimentation begins.

When I got my copy of Plenty More, I took the Roasting chapter for a spin, first thing. In the cold damp of a Vancouver winter, roasted meals warm the kitchen and the belly. I started with Squash with Cardamom and Nigella Seeds, which I served with a Moroccan tagine. Then, I tried the recipe I’m sharing with you today.

One of the reasons I think people believe vegetables are boring is because we’re afraid to work with them as vigourously as we do a piece of meat. Even roasted vegetables can be a bit wan if you don’t allow them to brown and caramelize. That’s one lesson Plenty More brings home. Both the recipes I tried allow the dish to develop the smoky, jammy flavours that come only when you roast something fearlessly.

This recipe gives you perfectly tender carrots with a crust of caramelized honey and accompanies it with a fresh yogurt and tahini sauce that provides a wonderful counterpoint to the dish.

/home/wpcom/public_html/wp-content/blogs.dir/ba0/6971813/files/2014/12/img_3270.jpg

Honey-Roasted Carrots with Tahini Yogurt

Serves Four

scant 3 tbsp/60 g honey
2 tbsp olive oil
1 tbsp coriander seeds, toasted and lightly crushed
1 1/2 tsp cumin seeds, toasted and lightly crushed
3 thyme sprigs
12 large carrots, peeled and cut into 3/4 by 2 1/2-inch/2 by 6-cm batons (3 lb/1.3 kg)
1 1/2 tbsp cilantro leaves, coarsely chopped
salt and black pepper

Tahini yogurt sauce
scant 3 tbsp/40 g tahini paste
2/3 cup/130 g Greek yogurt
2 tbsp lemon juice
1 clove garlic, crushed
salt

Preheat the oven to 425°F/220°C.

Place all the ingredients for the tahini sauce in a bowl with a pinch of salt. Whisk together and set aside.

Place the honey, oil, coriander and cumin seeds, and thyme in a large bowl with 1 teaspoon salt and a good grind of black pepper. Add the carrots and mix well until coated, then spread them out on a large baking sheet and roast in the oven for 40 minutes, stirring gently once or twice, until cooked through and glazed.

Transfer the carrots to a large serving platter or individual plates. Serve warm or at room temperature, with a spoonful of sauce on top, scattered with the cilantro.

/home/wpcom/public_html/wp-content/blogs.dir/ba0/6971813/files/2014/12/img_3271.jpg

Once you’ve tried this dish, I suspect that you’ll be buying a copy for yourself as well as the person you were shopping for. I love that I can adapt most of these recipes easily for my vegan partner, while making the meat-eaters at my table forget that they’re being served a vegetarian meal.

Gift Giver’s Guide: For the vegetable lover, the curious cook, the flavour-seeker, and anyone who needs convincing that vegetables can be the star of the show.

Come back Tuesday for a review of a book that will fill your holiday sweets table with goodness.

Holiday Book Reviews – The Healthy Slow Cooker

Closeup

I don’t know about you, but this is the week when my Christmas shopping always begins in earnest. So, for the second year in a row, I’m bringing you three book reviews to help you cross a few names off your list.

I received a review copy of The Healthy Slow Cooker, Second Edition from Robert Rose Inc. Nevertheless, all opinions in the following post are my own.

I know that I post a lot about French food and desserts around here, but most of the time I try to cook healthy meals. It might seem challenging to do so when trying to balance the needs of an omnivore with a vegan-ish, gluten-free eater, but it isn’t really. We never ate very much bread with our meals and there are plenty of great grains that can satisfy our carbohydrate requirements. As for protein, I’ve always been of the mind that meat and dairy shouldn’t be the primary focus of weekly meals, so we were already eating a largely plant-based diet before my partner started his move toward veganism.

What can be challenging is making sure we have enough variety in our diet, so that we’re covering all the nutrient groups as we eat across the week. It’s easy to get into a routine, making the same few dishes over and over, with a little experimentation on the weekends. Much better to find ways to change things up more frequently.

One of my favourite ways to do that is to make use of my slow cooker. Not only can I fill it and forget it for the workday or overnight, having a large slow cooker means that I can make recipes in quantities that allow me to package and freeze several meals’ worth.

Unfortunately, a lot of slow cooker cookbooks focus on heavy meals that cycle through a limited roster of protein-starch-vegetable combinations. So, I was happy to find The Healthy Slow Cooker has a variety of recipes, both meat and plant-based, with a focus on using nutrient-dense ingredients. The best part is that all the recipes are gluten-free.

Judith Finlayson is well-known to Canadians as a writer and editor, but has become especially famous for her prolific publication of useful cookbooks. Many of them are slow cooker cookbooks, focusing on different health needs or dietary practices. The Healthy Slow Cooker is in its second edition, which came out earlier this year. This means that the recipes are updated, but more importantly, the nutrition tips and health information are more current now, too.

Those tips and information boxes, called “Mindful Morsels” and “Natural Wonders” are a welcome feature of Finlayson’s book. There are the kinds of information you might expect, like the sections breaking down the nutritional benefits of mushrooms or bell peppers, which help bring home the reasons for eating a wide variety of foods. But there are also sections that go into more depth, explaining the role of elements like fatty acids and micronutrients in our diets, why some foods which should always be bought from organic sources, or shopping with environmental concerns and sustainability in mind.

The recipes come from a number of culinary traditions, including Caribbean, Indian, Middle Eastern, and Asian flavours. They also make use of common ingredients, without ignoring some of the ingredients (think edamame or sunchokes) that have been showing up more and more in markets. There are lots of vegan or vegetarian dishes, while many of the recipes that weren’t explicitly vegetarian or vegan could easily be converted, like her Sweet Potato Coconut Curry. And most of the truly meat-based meals are freezable, ready for those times when I’m eating solo.

When I was deciding which recipe to share with you, I thought about how much of a boon fresh, vibrant food is on the winter table. Even though summer vegetables are long gone, many of them are available frozen, almost as nutrient-rich as when they were picked. Finlayson’s take on succotash was exactly what I was looking for, incorporating corn, roasted red peppers, tomatoes, and edamame with the warmth of paprika. It’s bright on the table, filling, and a good match for many different main courses. Best of all, it’s freezable, letting you enjoy it across the coldest months. (If you make it in summer, you can use garden-fresh ingredients and freeze some of it for winter.)

New Age Succotash

reprinted with permission from Judith Finlayson’s Healthy Slow Cooker

Serves 8

1 Medium to large (3 1/2 to 5 quart) slow cooker

1 tbsp (15 mL) olive oil
2 onions, finely chopped
4 stalks celery, diced
2 carrots, peeled and diced
4 cloves garlic, minced
1 sprig fresh rosemary or 2 tsp (10 mL) dried rosemary leaves, crumbled
1/2 tsp (2 mL) salt
1/2 tsp (2 mL) cracked black peppercorns
1 can (28 oz/796 mL) no-salt-added tomatoes, including juice, coarsely chopped
1 1/2 cups (375 mL) vegetable stock
4 cups (1 L) frozen shelled edamame
2 tsp (10 mL) paprika, dissolved in 2 tbsp (30 mL) water
4 cups (1 L) corn kernels, thawed if frozen
2 roasted red bell peppers, diced
1/2 cup (125 mL)finely chopped parsley leaves

In a skillet, heat oil over medium heat. Add onions, celery and carrots and cook, stirring, until softened, about 7 minutes. Add garlic, rosemary, salt and peppercorns and cook, stirring, for 1 minute. Stir in tomatoes with juice and vegetable stock and bring to a boil. Transfer to slow cooker stoneware.

Add edamame and stir well. Cover and cook on Low for 8 hours or on High for 4 hours, until mixture is hot and bubbly. Stir in paprika solution. Add corn, roasted red peppers and parsley and stir well. Cover and cook on High for 15 minutes, until corn is tender and mixture is heated through.

Variation
Spicy Succotash: For a livelier dish, stir in 1 can (4.5 oz./127 mL) mild green chiles along with the red peppers.

This is a terrific side for a braised tofu dish, or more traditionally, for a big platter of ribs. Finlayson includes a recipe for a corn and chile polenta in the cookbook, which would be a nice addition to either of these meals. Really, though, this dish would fit whenever you’d otherwise consider serving the usual boiled, steamed (or canned) vegetables.

I’ll be coming back to this cookbook often, both for the recipes and the information.

Gift Giver’s Guide: For the busy, the gluten-free, and those who want variety and flavour in their healthy menus.

Come back tomorrow for a review of a book that brings vegetarian eating to a new level.

Chèvre Redux and a Review of a Classic Cookbook

I received a review copy of The Complete Best of Bridge Cookbooks, Volume 3 from Robert Rose Inc. Nevertheless, all opinions in the following post are my own.

Image courtesy of Robert Rose, Inc.

A couple of weeks ago, I wrote about my cheesemaking adventures, which left me with about two pounds of chèvre. I used some of it for the ice cream I made, but that took care of less than a quarter of it. Candy reminded me about the torteau de chèvre, a cheesecake unlike any other I’ve had before. My chèvre, you might remember, was a little softer than it should have been, but it didn’t seem to make a difference. This treat was as good as I’d remembered it being.

My bowl of chèvre was getting down to a manageable size, so I turned my attention to the other cookbook I’d taken for review from Robert Rose, Volume 3 in the Best of Bridge series. This is a spiral-bound edition, which lays flat when open – a handy feature when you’re bringing it into the kitchen with you. The font (what seems to be Comic Sans in all caps) cuts down on readability and the jokes throughout are dated. The recipes, though, are solid. The reputation of these books is well-deserved.

You won’t find innovative or fashionable cuisine here, but you will find a mixture of old-fashioned recipes and new millennium favourites. There’s also a good mix of dinner party and weekday meal fare across cuisines. The methods are easy enough for new cooks, but there’s still enough variety to keep the attention of more experienced ones. In some recipes, there is a reliance on canned or pre-prepared pantry staples that doesn’t mesh well with today’s focus on fresh, homemade ingredients, but it’s easy enough to make substitutions. It’s the kind of all purpose, old fashioned cookbook that I like to have on my shelves. I’ll likely never make the tuna casserole or the molded salads, but the Citrus Crisps have already made an appearance for a holiday cookie exchange this year and I can also tell that I’m going to find some more new favourites in this book.

Speaking of new favourites, I was pleased to find a recipe that would help me with my abundance of chèvre, an onion and goat cheese pizza that sounded delicious. My niece J, one of the stars of our Baking With Julia endeavours, was on hand and agreed to do the heavy lifting on this dish. She made pizza dough, using the recipe found elsewhere in this cookbook – it’s a great, simple crusty one. Then, she vetoed the pine nuts and spent the next half hour in front of the stove, on a comfortable chair with an iPad in one hand and a spatula in the other. By the time she was done, the onions were dark and jammy. She spread the chèvre on the unbaked pizza crust, added the onions, and ground some pepper on top. After a short time in the oven, it was ready.

Pizza

Even without the pine nuts, this was a complexly flavourful dish. I’d love to serve it in small squares as an appetizer, though it made a great main for dinner that night, too. It reminded me a little of Pissaladière and could easily be dressed up with olives, bacon, or even something sweet like figs.

Robert Rose, Inc. has been kind enough to let me share the recipe with you, so if you experiment with it, let me know. It’s great as is, though.

Caramelized Onion and Chèvre Pizza

1 12-inch (30 cm) pizza crust, homemade or purchased
Olive oil to brush crust

3 medium onions, thinly sliced (use all 3!)
1 Tbsp. (15 mL) butter
2 Tbsp. (30 mL) olive oil
1 Tbsp. (15 mL) granulated sugar
3 Tbsp. (45 mL) balsamic vinegar
2 cups (500 mL) crumbled chèvre (goat’s cheese)
1/2 cup (125 mL) toasted pine nuts
Freshly ground black pepper

Preheat oven to 450°F. Brush crust with olive oil. In a large frying pan over low heat, combine onions, butter, and olive oil Cover and cook, stirring often, until onions are very soft, about 30 minutes. Add sugar and vinegar and continue cooking until vinegar evaporates, about 5 minutes. Add salt to taste. Place cheese on crust, leaving 1/2-inch (1 cm) border. Sprinkle with pine nuts, top with onion mixture and a sprinkle of freshly ground black pepper. Bake 10 to 15 minutes, until crust is golden.

After the tourteau and the pizza, I was left with just enough chèvre to improvise a goat cheese and mushroom quiche, inspired by a suggestion from Betsy and a fridge full of mushrooms. It was a nice way to finish off the batch of precious homemade goat cheese and the mushrooms, fresh thyme, and onions set off the tangy goat cheese nicely.

Quiche

A week of rich eating was at its end and with the help of some friends and a couple of cookbooks, we were well-satisfied.

The Complete Best of Bridge Cookbooks, Volume 3 came out in Fall, 2013. You can find more details here, along with a link to purchase the book.

At Home with Lynn Crawford – A Penguin.ca Daily December Delight

I received a copy of At Home With Lynn Crawford for review from Penguin Canada. Nevertheless, all opinions are my own.

BloggerBadge_Penguin

You may have noticed this jaunty Christmas penguin on my front page. He’s there because I’m participating in Penguin Canada’s Daily December Delights Campaign. Every day in December, there’s a new featured book, with surprises, extras, or contests running for each selection. There’s also $750.00 worth of Penguin titles up for grabs. You can enter and explore, here.

I came late to discovering the joys of Food Network Canada, so for years I had no idea what people were talking about when they were raving about their favourite celebrity chefs. Then, when my parents started downsizing, I went to stay and help out and discovered my television kryptonite. Not only did I finally see Iron Chef and Chopped, but I got to know my first Canadian celebrity chefs since the Urban Peasant was on air. Today’s chefs are a little more sophisticated (I still love the Urban Peasant’s version of 40 cloves of garlic chicken) and I’ve come to love watching Anna Olson, Michael Smith, and Ricardo Larrivée. One of my favourite shows, though, is Lynn Crawford’s Pitchin’ In, with its wacky premise, Chef Lynn’s endless curiosity about ingredients, and the fantastic meals she serves at the end of each episode.

Image courtesy of Penguin Canada

At Home with Lynn Crawford is her second cookbook. The first, Pitchin’ In, was inspired by her television show and replicated the fine dining at home ethos of the meals she served to her hosts on the show. Many of the recipes in her first cookbook were quite technically challenging, especially for inexperienced cooks. Her new cookbook takes a different tack, focusing on easy home recipes, including a wealth of recipes for ingredients like stocks, marinades, spice rubs, and flavoured butters. As a result, this book is perfect for a new cook. Chef Lynn also includes her take on a number of basic recipes like baked beans, potato salad, and chicken noodle soup that make a good starting point for someone learning to cook. There are classic recipes like Coq au Vin, Cioppino, and Porchetta that might seem familiar to older cooks, but will be brand new to many young people. Her recipes run across many cuisines, including Asian, Caribbean, and Indian flavours, which is another good point of entry for new cooks.

But, it’s not all slow lane cooking. Her Sweetbreads recipe requires some finesse and techniques like salt-baking certainly piqued my interest. Most of all, it’s her chef’s eye for detail which makes her recipes interesting. The ingredients are given as much attention as the whole. Something as simple as steak and mushrooms becomes much more sophisticated in her hands, with a rich marinade to start and red wine butter to finish. I like the way that the recipes cover so many categories, too – not just appetizers, mains, sides and desserts, but also jams and spreads, seasoning salts, and a cocktail section that might even get Trevor’s attention.

The book itself is beautiful, with lovely photography and a clean, spare layout. However, this brings me to what I didn’t like about it, which is how space is used in parts of the book. Serving champagne merits two pages and variations are often presented as separate recipes. It’s not a huge problem, but it can promote more hunting around for things you’re trying to find fast. With its emphasis on easy recipes, I’d also like to see more detail in the instructions, which would help new cooks when they might be unfamiliar with even the more simple techniques. But, those are really the only two issues I had with the book.

Cake

I’ve only had a chance to test drive one recipe so far, but I think I chose well. Chef Lynn’s Sweet Potato Bourbon Cake is full of rich ingredients, but it bakes into a cake that’s both substantial and light. The bourbon glaze reminds me of sucre à la crème, but with some smokiness from the alcohol. (I may have to try a boozy version of sucre à la crème this year.) I used squash and Canadian whisky in place of the sweet potato and bourbon, but as Chef Lynn mentions in the recipe, these substitutions work just fine. It’s a big cake, made for sharing, but I suspect that it will keep well, too. You can find a more elaborate version of this recipe here.

I plan on working my way though some of the other recipes, and I might just be handing out a few jars of Chef Lynn’s Old Bay Seasoning at Christmastime, too. If you head over to today’s square on Penguin’s calendar, you can find some sample recipes from the book. And if you’d like to get a taste of Chef Lynn in action, her Pitchin’ In Christmas special is running right now on Food Network Canada.

Cheesemaking – A Book Review, with Recipes

I received a review copy of 200 Easy Homemade Cheese Recipes from Robert Rose Inc. Nevertheless, all opinions in the following post are my own.

Image courtesy of Robert Rose, Inc.

Robert Rose, Inc., a publisher based in Toronto, asked me if I’d like to review any of their new releases and the first one that caught my eye was the second edition of this book. Like a lot of folks these days, I’ve been fascinated with the rediscovery of homemade foods, from preserves to charcuterie and beyond. Cheesemaking seems to be a natural for the fermenting, pickling, curing set. In the case of this book, I was curious to see how many different sorts of cheese could reasonably be made at home and I also wanted to see how well I’d fare trying my hand at it. I was tempted to try Mozzarella or Halloumi, but I decided to stick with a fresh cheese, as suggested by the author, as they’re the easiest and fastest to tackle. Besides, making chèvre doesn’t require anything beyond the active agents, a place to rest, and some cheesecloth. Some of the other cheeses are considerably more involved and I wanted to start slow.

I found the mesophilic culture and liquid rennet that I needed at Gourmet Warehouse and picked up four liters of goat’s milk at our local food co-op. I sterilized all the equipment, and followed the instructions as closely as I could. I have to admit I felt a little frightened at the idea of leaving a pot of milk out for twenty-four hours, then the curds for another six or seven. I read the troubleshooting section for fresh cheeses over and over that evening, just to prepare for the worst.

But, for the most part, everything went exactly as planned. My cream cheese turned out a little softer than it should have been, but not much. Otherwise, in taste, texture, and aroma, it’s exactly what I expect from chèvre. What I wasn’t prepared for, even though I knew the expected weight of the finished cheese would be about two pounds, was just how much chèvre I’d just made. Enough to fill a large mixing bowl. After the delight I felt at discovering I’d been successful, next came the fear that I’d never be able to figure out what to do with all that highly perishable cheese. I figured it out and now there’s just about three-quarters of a cup left in the fridge, ready to be mixed with herbs and spices and used as a spread.

goat cheese

So much for my experience, now on to the review.

This cookbook is comprehensive, not just in its range of recipes, but also in coverage of technique. There are photo guides for each stage of the process for all the categories of cheeses in the book, along with troubleshooting guides and overviews of ingredients, equipment, techniques, safety, and sanitation. As long as you read Amrein-Boyes’ instructions carefully and follow them exactly, I don’t think you can go very wrong.

However, the quantities produced for many of the recipes can be a little overwhelming for the home cook. For instance, her Halloumi recipe requires ten liters of goat’s or sheep’s milk and results in two pounds of cheese. I understand why, as the active ingredients for smaller batches would be miniscule and probably impossible to get right. As a result, I think some people will stick to some of the easier recipes, which produce smaller quantities, like her yogurt and flavoured butter recipes. I suggest getting together with friends or family to tackle some of the larger recipes, both to share ingredient costs and split the cheese.

The other problem with this book for home cooks who live in small spaces is lack of correct conditions for many of the aged cheeses. As much as I’d like to have a cheese cellar, I think my neighbours in the suite below me might have something to say about that. I also think certain categories of these cheeses are really semi-professional. Those are small quibbles, though, and if you were thinking about a career in cheesemaking, this book could serve as your apprenticeship.

Overall, I’m really happy with this book. There are many recipes that I can work my way through even if I can’t try the aged cheeses. There are also a number of recipes for using the cheeses you’ve made, which is a nice feature. I also love the huge variety of recipes Amrein-Boyes provides across all categories of cheeses. It makes for interesting reading.

The second edition of 200 Easy Homemade Cheese Recipes came out in October of this year and I think it might make a great present for the cook in your life who is ready to start experimenting beyond baking and dinner-making. You can find more details here, along with a link to purchase the book.

The publisher is kindly allowing me to share this recipe with you, so that you can try it for yourself. However, I’d strongly recommend buying the book first, or doing a good deal of research before you start, because the safety precautions are very important in cheesemaking.

Here is Debra Amrein-Boyes‘ recipe:

Chèvre

Makes 2 lbs (1 kg)
25% yield

4 quarts (4 litres) goat’s milk
1/4 tsp (1.25 mL) mesophilic culture
1 drop liquid rennet
Pickling (canning) or kosher salt

1. Sterilize all equipment. In a large stainless-steel pot over medium heat, warm milk to 77°F (25°C), stirring gently to prevent scorching. Remove from heat.

2. Sprinkle culture over surface of milk and let stand for about 5 minutes to rehydrate. Using skimmer and an up-and-down motion, gently draw culture down into milk without breaking surface of milk.

3. Dilute rennet in 1 tbsp (15 mL) cool water. Add to milk and, using the same up-and-down motion, draw rennet down into milk until well blended. Cover and let set at room temperature in a draft-free location for 24 hours.

4. Tip pot slightly to drain off collected whey. Using skimmer, ladle curd into a draining bag or cloth-lined colander. Let drain for 6 to 7 hours or until desired thickness is reached. Keep in mind that the cheese will firm up further once refrigerated.

5. Remove cheese from bag and place in a bowl. Weigh cheese, then add 1% of the weight in salt. Store in the refrigerator for up to 2 weeks.

Tip: Fresh cheeses are highly perishible. Store them in the coldest part of the refrigerator for up to 2 weeks.

Just to reiterate, please do some research on sterilization, safety, and troubleshooting before you attempt this recipe. It’s a simple cheese to make, but you’ve got to do it right.

ice cream

And now you’re probably wondering, what did she do with all that chèvre? I made ice cream, of course! And a few other things, which I’ll share with you another time.

I improvised the following recipe with help from several sources. I learned the proportions of milk to yolk and the method from Dorie Greenspan. (I’d buy a copy of Around My French Table if I were you.) Inspirations for honey chèvre ice cream are here, here, and here. Last but not least, my brother the chef gave me some advice on balancing tart, sweet, and acidic flavours for the best result.

Some notes: I happened to have this awesome honey on hand, but you could use plain honey and add some candied ginger instead, or heat plain honey over gentle heat and add some ground ginger yourself. Obviously, traditional ice cream is made with heavy cream and whole milk, but I had some half-and-half to use up and it worked well. I went for a very subtle sweetness, but you could easily amp up the sugars in this recipe. You could use a vanilla bean or vanilla extract in the custard and plain sugar for the strawberries. You could also add a bit of balsamic in place of the lemon juice, too. And you could easily replace the frozen berries with fresh ones (it’s winter here) or change out strawberries for blackberries, blueberries, or stone fruits like peaches.

Ginger-Honey and Strawberry Chèvre Ice Cream

4 cups half-and-half
6 egg yolks
100 g ginger honey
5 oz chèvre
1/2 cup frozen strawberries, mashed with 1/4 to 1/2 cup vanilla sugar and a squeeze of fresh lemon juice

Whisk the egg yolks and honey together.

Bring the half-and-half to a boil in a heavy pot over medium heat, then temper the egg mixture with some of the hot milk before whisking the two together completely.

Stir the mixture with a wooden spoon over medium heat (don’t stop stirring!) until it has thickened a little and coats the spoon sturdily. Remove from the heat and stir in the chèvre a little at a time, letting each addition incorporate before adding the next. Then, strain the custard into a heat-proof bowl. Stir in the strawberries and chill in the fridge or a bowl filled with ice. Once it’s cold, you can finish it in your ice cream maker, according to the manufacturer’s instructions.

I’ll have some more chèvre dishes and another Robert Rose cookbook review for you on Thursday, December 19th. Next Thursday, I’m hoping to have a bit of a surprise for you.

Also, I just noticed that this is my 250th post.