Holiday Book Reviews – Decolonize Your Diet

IMG_5909

I received a review copy of Decolonize Your Diet from Arsenal Pulp Press. Nevertheless, all opinions in the following post are my own.

Decolonize Your Diet is a cookbook, but it is also a history, an exploration of food as medicine, and above all, a counter to the colonialism that runs through the food cultures of the Americas. It’s a reclamation of a food heritage by two Mexican-Americans, in the context of where they live and eat.

The book challenges the limits of what many of us in Canada and the States believe Mexican food to be, identifying indigenous ingredients and those introduced from elsewhere. The recipes spring from Luz Calvo and Catriona Rueda Esquibel’s heritage and from their exploration of the health benefits of the Meso-American diet.

The recipes themselves range from simple and comforting to dinner party fare. They include traditional recipes and contemporary vegetarian meals that incorporate heritage indigenous plants. There are recipes for stocking your refrigerator with salsas, flavoured vinegars, hot sauces, and other condiments. Another chapter covers pantry ingredients, equipment, techniques, and base recipes.

The headnotes for the recipes might share history, health benefits, or politics, alongside serving suggestions and flavour descriptions. But the recipes are playful, meant to encourage creativity in cooking healthy foods. There’s an emphasis on eating what is local, fresh, organic, and available and the authors encourage cooks to adapt their recipes.

For many of us, that playfulness could be satisfied for a long while just by exploring the flavours and techniques shared in this cookbook. You might start out with a simple recipe like their Old School Pinto Beans, then find yourself sourcing cone piloncillo and queso Oaxaca to complement your homemade corn tortillas in their recipe for pumpkin mole enmoladas.

I’ve been given permission to share a recipe with you, for a simple and earthy lentil soup that is full of flavour.

IMG_5908

Abuelitas’ Lentil Soup

Authors

Lentils are not indigenous to the Americas, but both of our grandmothers (abuelitas) made delicious and soul-warming sopa de lentejas. We flavor our soup with yerbaníz (also called “grandmother plant”), which has many medicinal properties, including being good for respiratory conditions and soothing to the stomach. The final squeeze of lemon sends the iron from the lentils to your body and adds brightness to the flavor.

Makes 6 servings

1 large onion, finely chopped
3 tbsp olive oil
2–3 jalapenos, diced
1 carrot, diced
1 bunch green Swiss chard, stems diced, leaves cut into thin ribbons
4 garlic cloves, finely chopped
freshly ground black pepper, to taste
8 cups (2 L) vegetable stock or water
2 cups (500 mL) brown lentils, rinsed
2 tbsp chopped fresh yerbaníz or 1 tbsp dried yerbaníz or 2 tsp dried French tarragon
2 tsp sea salt
1 bunch cilantro, chopped
1 tbsp chia seeds, ground (optional)
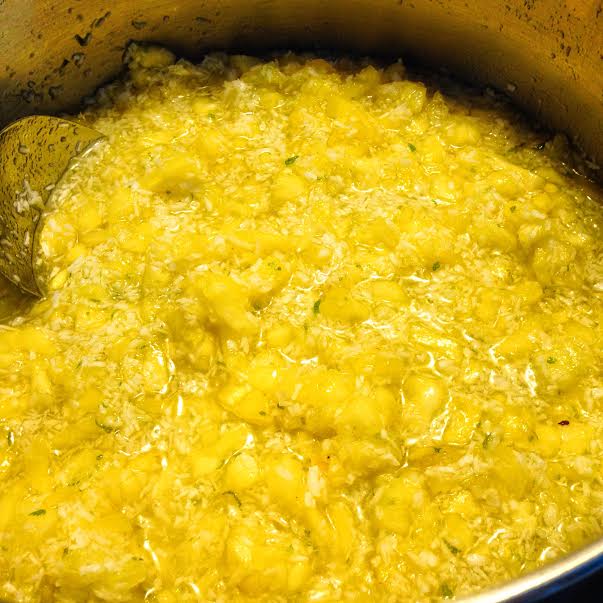
juice of 1–2 lemons, to taste

In a large pot on medium high heat, sauté onions in oil until lightly browned, about 7–8 minutes. Add jalapeño, carrots, and chard stems and cook for 5 minutes, until vegetables soften. Add garlic and freshly ground pepper and cook for 1 minute. Add stock, lentils, and yerbaníz. Bring mixture to a slow boil. Reduce heat, and cook at a slow simmer until lentils are barely tender, about 25 minutes. Add salt, chard leaves, and cilantro and cook, stirring occasionally, until wilted, about 3 minutes. Add ground chia seeds, cover partially, and continue to simmer for 10 more minutes. Stir in lemon juice. Taste and adjust seasonings, adding more salt, pepper, or lemon juice until soup has a nice balance of flavors.

RECIPE CREDIT: Decolonize Your Diet: Plant-Based Mexican-American Recipes for Health and Healing by Luz Calvo & Catriona Rueda Esquibel. Published by Arsenal Pulp Press, 2015.

PHOTOGRAPHS, PROP STYLING & FOOD STYLING CREDITS: Tracey Kusiewicz | Foodie Photography foodiephotography.com

I didn’t follow the recipe precisely, substituting kale for Swiss chard and a mix of marjoram, thyme, and oregano for yerbaníz. I skipped the ground chia seed, as the soup seemed thick and rich enough without it. It’s a filling soup that was welcome in the cold weather we’ve been having here. The flavour is beautifully balanced, with the subtle heat from the jalapeños and the sweet acid of the lemon being especially welcome notes against the earthiness of the lentils. Unlike many soups, it didn’t have me reaching for bread or cheese to complete it. It’s sufficient and satisfying just as it is.

DecolonizeYourDiet

Arsenal Pulp Press has been generous enough to offer a copy of Decolonize Your Diet to a Canadian or American reader. You can find the giveaway here and enter until December 17th: Win a copy of Decolonize Your Diet*

Many peoples, especially communities of colour and indigenous communities, are reclaiming their food heritage alongside their cultures and histories. In a time when the importance of healthy, whole foods is being recognized, along with food systems that promote sustainability and biodiversity, the work of this book’s authors is timely. They stand with people like Bryant Terry and Michael Twitty, and organizations like Vancouver Island’s Indigenous Food Network, documenting and expanding the food histories of this continent beyond the colonial narrative.

Gift Giver’s Guide: For anyone who wants to eat in concert with the the foods indigenous to this continent, but especially for First Nations and Latinx people who want to eat closer to their roots.

Come back next week for a review of a book that will fill your pantry with vegan goodness.

*Terms & Conditions: This giveaway is open to residents of Canada and the United States. You must have a Canadian or US mailing address. Any Canadian winners will be required to answer the following skill testing question: 6 X 8 =_____ This promotion is in no way sponsored, endorsed or administered by, or associated with, Facebook. We hereby release Facebook of any liability. Winner(s) will be contacted by email within 48 hours after the giveaway ends. Entrants must provide a valid email address where they can be reached. Each of the winners must respond to the email announcing their win within 48 hours, or another winner will be chosen. No purchase of any product is required. If you have any additional questions – feel free to send us an email!

Advertisement

Holiday Book Reviews – Pierogi Love

IMG_5815

I received a review copy of Pierogi Love from Raincoast Books. Nevertheless, all opinions in the following post are my own.

The ladies of my mother’s CWL chapter are famous for their food. They get together and cook, for weddings and funerals, community dinners and seniors’ luncheons. They’re mostly over seventy and have decades of experience in the kitchen. They often share the specialties of their backgrounds with each other – they’ve cooked German, Irish, Filipino, Ukrainian, Italian and more together.

Not surprisingly, the most popular dishes they serve are old fashioned comfort favourites. At their annual Christmas craft fair last weekend, they served pierogies with fried onion, thick slices of sausage, and generous helpings of sour cream. They got together a few weeks before the fair and handmade every one. They were delicious, with a perfectly traditional potato and onion filling.

IMG_5719

I’ve always wanted to be there when they have one of their pierogi-making bees, but it hasn’t happened. So, when I was given the opportunity to review Casey Barber‘s new book, Pierogi Love, I jumped on it.

Inside, I found some traditional recipes, like potato and cheddar, sauerkraut, and sour cherry. But the rest of the recipes are a world away from those – spinach, ham, and Gruyère; saag paneer; fig, goat cheese, and black pepper. Barber’s recipes take inspiration from flavours around the world, while making sure there’s something appropriate for occasions from tailgate parties (try her Elvis pierogies) to dinner parties (start with mushroom, goat cheese, and chive). Not all books live up to their subtitles, but this one does. It’s full of “new takes on an old-world comfort food.”

It’s also one of the best-designed cookbooks I’ve had my hands on this year. It’s a compact hardcover, with lovely photos, and patterns and colours that repeat charmingly throughout the book. Most of the recipes don’t require you to turn pages and the book stays open to the page you’ve chosen. Cookbook designers take note.

I was given permission to share one recipe with you and it’s a delightful one. However, if you want the recipe for the dough, you’ll have to buy the book. You really should.

IMG_5816

LEMON CURD PIEROGIES

Making lemon curd is an impossible exercise in patience for me. Though I know beyond a shadow of a doubt that it tastes best when chilled, I absolutely cannot stop myself from sneaking warm spoonfuls fresh from the bowl. (I have the same problem with homemade tapioca pudding.) But the overnight chill process is crucial here to get the curd to the right consistency. Make the curd 1 day before assembling your pierogies, and work quickly when filling them so the curd stays cool and thick. If you see it start to warm and soften, put the curd back in the fridge for 15 minutes or so, then carry on.

Makes approximately 24 pierogies

  • 1 teaspoon cornstarch
  • 1 tablespoon water
  • 1/3 cup fresh lemon juice (from about 2 small to medium lemons)
  • ½ cup (3 ½ ounces, 100 grams) sugar
  • 2 large eggs
  • Zest of 1 lemon
  • 1 tablespoon unsalted butter, cut into 4 small cubes
  • 1 batch Basic Sweet Dough

Whisk cornstarch and water in a bowl. Fill a small saucepan halfway with water and bring to a simmer over medium heat. Whisk lemon juice, sugar, eggs, and zest in a heatproof (stainless steel or Pyrex) bowl. Set bowl atop pan of simmering water; do not let bowl touch water. Whisk until liquid turns from sloshy and translucent to opaque, 3 to 4 minutes. Whisk in cornstarch slurry and continue to cook until liquid thickens into a silken curd consistency, whisking constantly, 1 to 2 minutes—do not let the curd come to a simmer or the eggs will scramble. Remove bowl from heat. Add butter and whisk until completely incorporated. Strain curd through a fine-mesh strainer into a bowl and refrigerate overnight.

Roll out dough and stamp into rounds. Place 1 teaspoon filling on each dough round; brush with egg wash, fold, pinch, and seal as directed. Deep-fry, boil, and/or pan-fry pierogies.

Do Ahead: Filling can be made up to 3 days ahead. Cover and refrigerate.

IMG_5811

What’s not to love about a supple dough that comes together quickly and seals its contents just as easily? I’m not a dumpling pro, but almost all of my pierogies turned out beautifully. Barber’s instructions are thorough and her dough recipes are gold – you should be buying the book for that reason alone.

Only one of my not-quite-expertly constructed pierogies leaked when boiled, and that one only leaked a very little. I cooked about a third of them and the rest are in the freezer. (I’m planning to take them over to my parents’ place to surprise my lemon curd-loving Dad.)

The best pierogies are as enjoyable for their covering as they are for their filling and that’s certainly true here. The lemon curd pierogies use the sweet version of Barber’s basic dough. It’s not overly sweet and caramelizes beautifully when pan-fried.

Lemon curd and I are old friends, but Barber’s instructions are clear enough for a beginner to follow, so there’s no reason for intimidation at all. And the results are wonderful – thick, pillowy, sweet and tart. I have leftovers in the fridge. I’m not sure if they’ll go into a tart or not. Given how many spoons there are just lying around in the kitchen, I might not be able to resist the temptation of eating it straight from the bowl. But that’s a question for later.

IMG_5804

I served the pierogies dusted with icing sugar and lemon zest, but they don’t really need any extra adornment. There is a nice balance between sweet and tart, the crunch of the caramelized dough and the softness underneath.

Image courtesy of Casey Barber
Raincoast Books has been generous enough to offer a copy of Pierogi Love to one Canadian reader. You can find the giveaway here and enter until December 17th: Win a copy of Pierogi Love*

Now that I’ve (mostly) gotten the hang of making pierogies, I’m tempted to start filling the freezer with them. In fact, I had to take my tape flags out of the book, once I realized I’d marked almost every page. Once my freezer is full, I’d love to have a pierogi party, with plates coming out of the kitchen one after another, savoury to sweet, with flavours from around the world.

Gift Giver’s Guide: For the comfort food lover, the tradition-twister, and the party-pleaser.

Come back next week for a review of a book that celebrates the fruits of the land on which we stand.

*Terms & Conditions: This giveaway is open to residents of Canada. You must have a Canadian mailing address. The winner will be required to answer the following skill testing question: 7 X 5 =_____ This promotion is in no way sponsored, endorsed or administered by, or associated with, Facebook. We hereby release Facebook of any liability. Winner(s) will be contacted by email within 48 hours after the giveaway ends. Entrants must provide a valid email address where they can be reached. Each of the winners must respond to the email announcing their win within 48 hours, or another winner will be chosen. No purchase of any product is required. If you have any additional questions – feel free to send us an email!

Holiday Book Reviews – True to Your Roots

IMG_5648

I received a review copy of True to Your Roots from Arsenal Pulp Press. Nevertheless, all opinions in the following post are my own.

I’ve always thought of myself as someone who loves root vegetables, but it’s only been in the last few years that I’ve realized I haven’t made the most of them. There’s a whole world of recipes beyond mashed potatoes, roasted roots, or even celery root purée.

I’ve been trying to correct that over the last while, discovering that sunchokes are fantastic whether they’re roasted or puréed in a soup, roasting radishes or shaving them paper thin onto baguettes thick with butter, shredding beets and carrots for hippie salads or baking them into cakes.

I’ve also been turning to cookbooks for inspiration. Yotam Ottolenghi’s Plenty and Plenty More are favourites and include ideas for working with root vegetables, as does Deborah Madison’s Vegetable Literacy. But Carla Kelly’s True to Your Roots focuses directly on root vegetables, providing a variety and creativity that’s usually reserved for showier fruits and vegetables. It’s also a vegan cookbook.

I’m not vegan, but I’ve striven to make the majority of my meals vegetarian or vegan for most of my adult life. When you’re trying to eat more meatless meals, it can be frustrating to find recipes for vegetable soups, mains, or side dishes relying heavily on meat stocks, eggs, or dairy. Until fairly recently, it was also hard to find vegan recipes that moved beyond a 1970’s palate. True to Your Roots solves both problems.

This is Carla Kelly‘s fourth cookbook – so far, she’s created vegan handbooks to bake sales, slow-cooking, and picnics. This book’s focus on a class of ingredient gives Kelly the freedom to roam across meals, cuisines, and techniques. She includes flavours from across the globe, while providing a range of familiar recipes alongside ones that twist expectations or go in entirely new directions.

I especially appreciate her guides to using vegetables that are often unfamiliar to home cooks in Canada and the U.S. It’s important to know that yuca and tropical yams should never be eaten before they’re fully cooked and it’s useful to know that horseradish is at its best when used shortly after being grated.

Kelly’s recipes go beyond root vegetables’ reputation as heavy, calorie-laden, comfort food material, but there are definitely comforting dishes included in the mix. Her potato biscuits are fluffy and satisfying, her burgers are substantial and flavourful, her soups are rich and homey. I couldn’t resist sharing her twist on a comfort food favourite of mine. Now, I’m thinking about mashing more potatoes just so I can make it again.

KALECANNON & AVOCADO

(gluten-free)

Kalecannon

This is my take on the traditional Irish colcannon. Adding avocado may seem strange, but it’s really yummy and gives a creamy richness to the dish. (If you’re not a fan, simply leave it out.)

Makes 2 servings


1 tsp neutral-flavored oil
1/4 cup (60 mL) sliced onions
2 garlic cloves, minced
1 1/2 cups (375 mL) shredded kale
1 cup (250 mL) leftover mashed potatoes, at room temperature
1/2 ripe avocado, chopped
salt and freshly ground black pepper, to taste

In a large frying pan on medium, heat oil and saute onions and garlic for 5 minutes until lightly browned. Add kale, cover, and steam for 3–5 minutes, until bright green and tender.

Add potatoes and stir to combine. Cook for 5 minutes, until just lightly browned, stirring so potatoes don’t stick or burn. Remove from heat and stir in avocado. Taste and adjust seasoning as desired.

Next time you have mashed potatoes for dinner, cook extra so you’ll be ready to make this dish the next day.

RECIPE CREDIT: True to Your Roots: Vegan Recipes to Comfort and Nourish You by Carla Kelly. Published by Arsenal Pulp Press, 2015.
PHOTO CREDIT: photo by Tracey Kusiewicz | Foodie Photography

IMG_5649

I served the kalecannon with stuffed portabella mushrooms, which made a complete and filling meal. The twist of using kale in place of cabbage brings freshness to a familiar dish, while the addition of avocado makes it creamier and richer than dairy ever could. The avocado didn’t overwhelm the other flavours, as I’d feared. Instead, it subtly melded all the flavours together.

I had some left over, which I heated up in a frying pan the next day. I think I liked it even better – the extra caramelization of the potatoes was especially nice.

TrueToYourRoots

Arsenal Pulp Press has been generous enough to offer a copy of True to Your Roots to a Canadian or American reader. You can find the giveaway here and enter until December 17th: Win a copy of True to Your Roots*

I feel as though I’ve just scratched the surface of what this book has to offer. I’m looking forward to trying condiments enriched with root vegetables (Sesame Horseradish Dipping Sauce), world cuisine favourites reimagined (Yuca Empanadas with Avocado, Plantain & Black Beans), and familiar foods with a twist (Celeriac Brownies).

Gift Giver’s Guide: For the root lover, the root-nostic, the root-phobic, and anyone who wants to eat closer to the earth.

Come back next week for a review of a book that’s full of pockets of goodness.

*Terms & Conditions: This giveaway is open to residents of Canada and the United States. You must have a Canadian or US mailing address. Any Canadian winners will be required to answer the following skill testing question: 5 X 3 =_____ This promotion is in no way sponsored, endorsed or administered by, or associated with, Facebook. We hereby release Facebook of any liability. Winner(s) will be contacted by email within 48 hours after the giveaway ends. Entrants must provide a valid email address where they can be reached. Each of the winners must respond to the email announcing their win within 48 hours, or another winner will be chosen. No purchase of any product is required. If you have any additional questions – feel free to send us an email!

Vegan Stuffed Portabella Mushrooms

IMG_5639

One of the nicest parts of autumn has become recipe sampling for my annual Holiday Cookbook Review series. I’ve been digging into this year’s selections for a while now and I love how the range of what I cook expands, as I learn from each of them. They also inspire me to get more creative on my own, dreaming up accompaniments for some of the recipes I try, based on what’s in the pantry and at the fresh markets.

These portabella mushrooms are a good example. I was looking for something to serve with Carla Kelly’s Kalecannon, from her new cookbook, True to Your Roots. There were some beautiful portabellas in the store where I picked up the ingredients I needed for her dish. I chose some vegetables that would make a nice filling, picked up some Daiya shredded vegan Mozzarella, and seasoned the dish much as my Irish grandmother would her Sunday roast. Well, I’m not sure she would have added chili flakes, but they were a nice addition.

Vegan Stuffed Portabella Mushrooms

4 portabella mushrooms
2 tsp olive oil
1 small onion, finely chopped
2 cloves of garlic, finely chopped
1 tsp fresh (or 1/2 tsp dried) rosemary
1 tsp fresh (or 1/2 tsp dried) thyme
a pinch of chili flakes
1 small zucchini, coarsely diced
1 small red bell pepper, coarsely diced
1 small tomato, coarsely diced
salt and pepper
Shredded vegan cheese

Preheat oven to 350°F. Line a sheet pan with parchment paper.

Clean and trim the mushrooms. If the stems are particularly large, I remove them and dice them with the rest of the stuffing ingredients.

Put the cleaned mushrooms on the prepared pan and bake for 10 minutes.

Meanwhile, heat the olive oil in a frying pan over medium-low heat, add a pinch or two of salt, then cook the onion and garlic until translucent and beginning to brown. Add the rosemary, thyme, and chili flakes, then stir for a minute or so.

Add the zucchini, bell pepper, tomato, and diced mushroom (if using) and cook until the vegetables are beginning to soften. Season with more salt and pepper, if needed. Set aside.

When the mushrooms have baked for 10 minutes, divide the filling equally between them and bake for another 10 minutes, or until the mushrooms are cooked through and tender.

Sprinkle the shredded vegan cheese on each of the filled mushrooms – I like to be generous. Bake for 5 minutes more, or until the cheese has melted.

Serve immediately.

IMG_5638

You’ll note that you get a preview of the Kalecannon from True to Your Roots in the photo above, which I’ll be telling you all about on Thursday. It’s the first of seven weeks of cookbook reviews that will help you cross some names off your gift list, right up until the last minute.

Even better, I’ll be hosting giveaways for five of the seven books, so you could end up with a gift of your own.

Spring Book Reviews – Teatime in Paris!

Tart

This giveaway is now closed. Congratulations to Stephanie of Kitchen Frolic and Kathy of Bakeaway with Me – you’ve each won a copy of Jill’s book!

I received a review copy of Teatime in Paris! from Interlink Publishing. Nevertheless, all opinions in the following post are my own.

There’s something intoxicating about a bakery case. The aromas, of course, help. But it’s the visual feast that is dizzying. Delicate millefeuilles; macarons in all their colour-wheel glory; choux puffs and éclairs stuffed full of cream; cakes, cookies, and tarts in all shapes and flavours – how can one decide?

That’s why high tea is such a pleasure. You can fill your plate with bite-sized versions of all those pastries. The French have their own take on teatime – le goûter. However, unlike high tea, le goûter is an everyday occasion. Children go in for Nutella tartines, but adults take tea or coffee with delicate pastries.

It’s a much better habit than the to-go cups and monstrous, leaden scones that feature in North American afternoon breaks.

Jill Colonna is something of an expert on le goûter and teatime, too. A Scottish transplant to Paris, she’s explored all that city has to offer the discerning mid-afternoon pastry aficionado. So much so that she gives tours of the best pâtisseries and chocolatiers in Paris.

She started her blog, Mad About Macarons, when she began experimenting with making French pastries at home. Her first book, also called Mad About Macarons!, demystifies the process of making these quintessentially French treats. Her macaron recipes range from classic to playful, guaranteeing you’ll never get out of practice.

Her latest book, Teatime in Paris!, just released on June 1st, takes on the rest of the pastry case. There are chapters on choux pastry, millefeuilles, tartlets, and of course, macarons. Each of these begin with an illustrated, step-by-step recipe for the basic version of the pastry, then move on to all sorts of variations. The book also includes recipes for canelés, crepes, little cakes, and more. There are even recipes for a few full-sized desserts and the last chapter sets out recipes for an elegant French tea party.

My family was quite pleased to learn that I’ve got the book bristling with bookmarks and several of them have volunteered to taste-test while I master these pastries. I have to say, it’s started out very well. I made Jill’s Passion Fruit and Lemon Meringue Tartlets last week and they are everything I love about pâtisserie baked goods.

Jill’s pâte sucrée (sweet pastry or sweet tart dough) recipe yields the best pastry cases I’ve ever made. They’re sturdy enough for any filling, but just the right balance of crispy and tender when you bite into them. They also don’t get soggy over time.

Pastry

I could have stopped baking right there, I was so pleased with the pastry cases. I’m very glad I didn’t. The fruit curd filling has a little gelatin in it, giving it a sheen and substance that most homemade curds lack. The topping is a perfectly sweet French meringue that holds up in the oven and then in the refrigerator.

Filled Tarts

The tart, smooth filling contrasts so well against the texture of the pastry case and the sweetness of the meringue. They look beautiful, too. These tartlets are the closest thing to a pâtisserie sweet that I’ve ever made. I made them smaller than called for in the recipe, so that I could share them around in my extended family. It was also an excuse to use my grandmother’s butter tart pans, which are perfect for making tiny pastry cases.

Pans

Jill’s instructions guided me through the whole process easily. I’m looking forward to finally having some success with macarons under her instruction, though it’s her Chocolate-Earl Grey Tartlets with Orange-Liqueur Crumble Puffs that are next on my agenda.

I’ve gotten permission from Jill and Interlink Publishing to share the recipe with you. However, if you want the secret to Jill’s wonderful pâte sucrée, you are just going to have to buy the book. (You should.)

A note to Canadian and American bakers: if you haven’t invested in a digital kitchen scale, now is the time to get one. The ingredients are given in grams, for accuracy and an international readership. And really, what are you waiting for? You will be so pleased when your baked goods come out perfectly, consistently.

Passion Fruit and Lemon Meringue Tartlets

Makes 8 tartlets
Preparation time: 25 minutes
Cooking time: 20 minutes
Chilling time: 2 hours
Temperature: 160°C/320°F fan (Gas 4), then 200°C (400°F, Gas 7)

Ingredients

  • 500g pâte sucrée (sweet pastry)

Filling:

  • Zest of an unwaxed lemon
  • Juice of 2 passion fruits and 1-2 lemons (100g fresh juice)
  • 100g sugar
  • 2 eggs
  • 90g cold butter, cut into chunks
  • 1 x 2g sheet of gelatine

Meringue topping:

  • 60g egg whites (approx. 2 egg whites)
  • 90g sugar (normal sugar, not caster/super-fine)

Method

Tarts

  • Roll out the pastry to 3-4mm (1/8-3/16″) thickness turning regularly on a lightly floured surface. Cut out rounds that are 2cm (3/4″) bigger than your tartlet molds. Gently press each round into a tartlet mould, trimming off excess pastry. Prick the pastry all over with a fork.
  • Bake the tartlets for 10-15 minutes at 160°C/320°F fan (Gas 4). Allow to cool, remove from their moulds and set aside.
  • Soak the gelatine in cold water for 10 minutes and zest the lemon.
  • Strain the juice of two passion fruits using a sieve to remove all the seeds and make up to 100g by adding the juice of 1-2 lemons.
  • In a saucepan, whisk together the passion fruit-lemon juice with the sugar, zest and eggs over a medium heat until the sauce boils, bubbles and thickens.
  • Strain to remove the zest. Take off the heat and whisk in the butter and the gelatine (squeezed of excess water).
  • Pour directly into the tartlet shells and place them in the fridge until ready to serve.
  • To appreciate them at their best, remove from the fridge 10 minutes before serving.

Meringue

  • Whisk the egg whites at medium-high speed with an electric mixer in either a glass or metallic bowl. Just as they start to froth up, gradually add the sugar. Increase to a high speed, continuing with the sugar until the meringue forms strong, glossy, stiff peaks.
  • Spoon (or transfer to a piping bag with a large serrated or plain tip and pipe out) the meringue on top of each tartlet, spreading it as much as possible over the top. If not piping, using the back of a spoon, lift parts of the meringue up into little cones for decoration.
  • Bake in a very hot oven (200°C, 400°F, Gas 7) for about 5 minutes. Alternatively, brown with a culinary blowtorch.
  • Remove and chill until ready to serve.

Tarts

One last thing – don’t be surprised if you find yourself packing this cookbook on your next trip to Paris. One of the loveliest bonus features of the book is the illustrated appendix of Jill’s favourite sweet walks in Paris. It gives you advice about where to find sweets and pastries across a number of Paris’ famous neighbourhoods. And if, like me, you’re not going to Paris anytime soon, this chapter will help you visit vicariously.

You can see all this for yourself if you’re lucky. Interlink Publishing has been kind enough to offer two copies of Teatime in Paris! to my readers. You can enter to win one of them via the link below.

Teatime in Paris

Readers with US or Canadian mailing addresses (with the exclusion of residents of Quebec) can enter to win one of two copies of Teatime in Paris! You can find the giveaway, along with the rules and eligibility requirements, by following this link. The winners will be notified by email on June 20, 2015. Good luck!

That’s it for my Spring Book Review series. It’s practically summer now, after all. I hope you’ve treated yourself to a few of the titles I’ve told you about over the last few weeks. And if you try any of the recipes I’ve shared, I’d love to hear about it! Now, go out and enjoy all the good food summer brings.

Spring Book Reviews – Preservation Society Home Preserves

Canned

I received a review copy of Preservation Society Home Preserves from Robert Rose Inc. Nevertheless, all opinions in the following post are my own.

Canning and preserving aren’t what they used to be. It’s a lost art for many, only some of whom have memories of parents or grandparents putting up dilly beans or pickled beets, strawberry freezer jam or orange marmalade. Those recipes seemed preserved in amber themselves, passed down from one generation to the next without variation.

Not that that’s a bad thing – I love the taste of old fashioned pickles, jams, and preserves. But now, there’s been a a revival of the preservation arts and it’s come with a lot of experimentation. I may love those old school tastes, but it’s the modern flavours that inspire me to get into the kitchen and fire up the canner.

If you feel the same way, Camilla Wynne’s Preservation Society Home Preserves is the book for you.

Her whimsically heart-shaped pickled beets have a juniper berry and peppercorn kick. Her strawberries mingle with currants and rose petals or tequila and triple sec. And her marmalades travel the road from purity to downright decadence.

Many of her recipes are inspired by cocktails and she brings the same kind of attention to flavour and inventiveness that you’d see in a bar that specializes in handcrafted drinks. The range of recipes is nice, too, including syrups, refrigerator preserves, and dishes that use some of the products of the earlier recipes in the book.

Jamming

This book isn’t a comprehensive guide to canning, though. There is a chapter up front that covers canning basics clearly, but if you’re new to it you might want to have a canning reference guide (or even better, an experienced canner) by your side.

I made Wynne’s Piña Colada Jam yesterday and it filled the kitchen with the most wonderful tropical aromas. I tasted it today and it was delicious. Wynne recommends using it as a cake filling, an ice cream topping, or swirled into mascarpone. I could also see it as a surprise at the bottom of a crème brûlée or a tart like this one. To be perfectly honest, it’s great on its own. I sort of ate a small…ish quantity of it with a spoon while I was supposed to be photographing it.

Robert Rose Inc. has been kind enough to allow me to share the recipe with you. If you make it, promise me you’ll follow safe canning guidelines (you could start here, for instance) and read up about how to determine the setting point for jam.

Piña Colada Jam

Makes about five jars (8 oz/250 mL each)

2.9 lbs (1.3 kg) pineapple flesh (from 2 pineapples)
2-1/2 cups (500 g) jam (gelling) sugar
1-2/3 cups (100 g) unsweetened flaked coconut
Grated zest and juice of 2 limes
6 tbsp (90 mL) dark rum, divided

  • Chop the pineapple into fairly small dice.
  • In a large pot or preserving pan, combine the pineapple, sugar, coconut, lime zest and juice and about half the rum. Cover and let stand to macerate for 30 minutes.
  • In the meantime, prepare the jars and lids.
  • Bring the pineapple mixture to a boil over medium-high heat, stirring often. Boil hard, stirring often, until the setting point is reached. Remove from heat and let rest for 5 minutes, stirring occasionally. Stir in the remaining rum.
  • Ladle jam into the hot jars to within 1/4 inch (0.5 cm) of the rim. Remove any air bubbles and wipe rims. Place the lids on the jars and screw the bands on until fingertip-tight. Process in a boiling water canner for 10 minutes.

Canning

For me, the best cookbooks are ones that send me in directions I’d never imagined, whether it’s techniques, cuisines, or ingredients. In this case, it’s combinations and juxtapositions of flavours. Having a pantry full of these homemade ingredients will lead to a more delicious life.

Tasting

Come back next Thursday for the last book in this season’s review series. You’ll be dreaming of Paris and you’ll also have a chance to win one of two copies of Jill Colonna‘s latest book.

Spring Book Reviews – Building Community One Dish at a Time

Cookbooks

I received copies of The Sweetapolita Bakebook and Seven Spoons, courtesy of Appetite by Random House Canada, at book launch celebrations with a group of local bloggers and was under no obligation to review them. All opinions are my own.

It’s easy to think of successful food bloggers as surrounded by the communities they’ve built around their blogs, but it can be a lonely pursuit. That’s why the lovely people at Appetite by Random House Canada have been working with the equally lovely folks at Food Bloggers of Canada to hold book launch celebrations with local bloggers when food bloggers turned cookbook authors visit Vancouver on their book tours.

I was lucky enough to attend two of these gatherings this spring – one with Rosie Alyea of Sweetapolita and another with Tara O’Brady of Seven Spoons.

For those of us that were able to attend the events, it was a chance to meet successful bloggers and cookbook authors we admired, but it was also a chance to connect with local bloggers that we may only have met online. What I hadn’t realized was that the authors themselves were as happy to meet us as we were to meet them.

Authors

Rosie Alyea told us that the ten bloggers in that room were the greater part of all the bloggers she’d ever met and that it was a pleasure to meet people who were as excited as she was about baking and writing about it.

Tara O’Brady has been food blogging almost as long as it’s been possible to do so and has set the standard for the quality of writing in the genre. Even so, she was happy to connect with others who are building community and exploring their own foodways online.

The events were an opportunity to share food from the books, conversation, and a little bubbly together. The publishers, authors, and bloggers alike are passionate about food and cooking, so there was a lot to talk about.

As much as online community-building creates enriching and vibrant engagement, meeting in person feels like a solidification of those connections. Thanks again to the folks at Appetite for providing us with that opportunity.

And now that I’ve had some time to explore each of these cookbooks, I can share my thoughts about them with you:

The Sweetapolita Bakebook

IMG_3800

I’ve been baking since my age was in single digits, but the things I made (at least until I joined French Fridays with Dorie) were homey and old fashioned. I loved going through vintage cookbooks and making cookies, squares, and cakes for my friends and family, but I didn’t think I was capable of bakery-style confections.

I’m still not there, but if any cookbook can help me with that, it’s this one. Rosie Alyea’s recipes are foolproof and her instructions are detailed and precise. They are also fanciful, as it says on the cover. From chalkboard cookies to perfectly charming chocolate robots filled with Pop Rocks to an elegantly tiered cake decorated with a watercolour finish, the book is filled with desserts you’d never imagine you could make at home.

I started small, pairing Rosie’s Simple & Splendid Chocolate Cake with her Glossy Fudge Frosting and filling it with salted caramel ganache. As you can see, I didn’t do it justice. I was a little short on icing sugar. But, I’m going to be baking from this book for years to come – birthdays, anniversaries, or just about any excuse for a party that I can find. I think my decorating will improve over time.

What doesn’t need improvement is the flavour and texture of the cake and the richness of the frosting. The same could be said of the Rainbows & Sprinkles Cake Rosie served at the book launch celebration I attended. The cake uses her Super White Cake recipe and is iced with Swiss Meringue Buttercream, but transforms both with vibrant gel paste food colouring.

It’s a feat she performs over and over again in the book, taking her basic cake recipes and coming up with beautiful variations using the fillings, frostings, and techniques she includes in the book, along with an array of sprinkles, edible papers, and garnishes that she makes herself or sources at baking supply stores. Once you’ve worked your way through all the recipes in the book, you’ll be confident enough to bring your own flights of fancy to life.

Seven Spoons

Blueberry Cake

Everyday cooking sounds a little uninspiring and it certainly can be, if it’s left up to an unadventurous or inexperienced cook. But in the hands of Tara O’Brady, it’s a sumptuous exploration of everything the markets have to offer.

Tara’s blog began not long after taking charge of her own kitchen and trying to incorporate the foodways of her family with that of her partner (now husband), Sean. Hers included the south and north Indian foods her parents grew up with, along with dishes from many other cuisines that her food-loving family explored. His were dishes with Irish and English roots, the kind that filled mid-Century community cookbooks, like the butter tarts that inspired the Walnut Cherry Oat Butter Tart Pie Tara served at her book launch celebration.

Seven Spoons represents their own foodway, the one that they’ll pass on to their children. It includes dishes from each of their heritages, along with ones adapted from the flavours that excite cooks today.

There are dishes for every meal and a selection of staples to spur your own creativity in the kitchen. The flavours come from Indian and British Isles classics, but also from the Middle East, Continental Europe, Latin America, and Asia. The ingredients will take you out of the standard supermarket and to the farmers’ market and international grocery stores, reflecting the cosmopolitan food scene today and its emphasis on eating widely and in season.

For new cooks, it’s a good place to start the explorations that will lead to the creation of their own foodways, while experienced cooks will appreciate the depth of flavour and variety of the recipes.

In my own family, my gluten free and vegan partner quickly marked off several recipes, including the Trail Mix Snack Bars and the Green Beans with Mustard Seeds. I was intrigued by the Rhubarb Rose Gin Gimlet and Halloumi in Chermoula. My mother commented that it’s almost the right time to try the Pickled Strawberry Preserves, then opened the book up to the recipe for Blueberry Poppy Seed Snacking Cake and asked if I’d make it for them to take on the trip they’d planned for the weekend.

I was happy to oblige, though I had to omit the poppy seeds (I put in a bit of ginger, instead). It turned out beautifully and the quarter of a cake I kept for myself disappeared quickly – I just couldn’t keep myself from snacking on it. The rest was eaten just as quickly, by all reports.

I’m glad the binding on this book is sturdily stitched, as it’s going to undergo a lot of wear and tear, stains and creases. I’ll be working my way through its recipes over and over again.

Come back next Thursday for a book that combines the homespun goodness of preserves with the pizazz of the cocktail hour.

Spring Book Reviews – Vanilla Table

Custard

I received an electronic copy of Vanilla Table, for review from Natasha MacAller’s publicist. Nevertheless, all opinions in the following post are my own. 

The single subject cookbook is a trend that’s becoming as important as cookbooks focused on a single cuisine. Whether the focus is a dish or an ingredient, a meal or a piece of equipment, home cooks are seeking out cookbooks that will allow them to dig deeper than the generalist cookbooks they started with.

Natasha MacAller’s Vanilla Table is a perfect example of why this trend is taking off. Vanilla is an ingredient most cooks take for granted, adding it to their sweets and baked goods to enhance the flavours that are the real stars of their dishes. As MacAller says in her introduction to the cookbook: “Vanilla is often used to describe something that is just ordinary, nothing special, no extras — however, vanilla is anything but plain.”

MacAller sets out to make vanilla not just the focus of many of the dishes in the book, but also to provide the tools for home cooks to use vanilla, in all its forms, more creatively and daringly. There’s a short “Vanilla 101” at the beginning of the book that guides the reader through the four varieties of vanilla and their characteristics, then discusses the forms of vanilla that are sold, from pods to powder. At the end of the book, she devotes a whole chapter to staple concoctions that are used in recipes throughout the book, but could serve as a jumping off point for your own ideas. The Vanilla Candied Bacon Bits alone could keep me busy finding savoury and sweet uses for them.

The chapters of the book read like the sections of a restaurant menu and the recipes lean toward haute cuisine. Though there are a few homey recipes, this book is perfect for planning dinner party menus. The recipes in the book are MacAller’s own, along with a selection of recipes from well-known chefs and bakers around the world, including Rose Levy Beranbaum, David Lebovitz, Yotam Ottolenghi, and Nancy Silverton.

MacAller herself became a chef after a career as a professional dancer, learning that she loved working with food when she began catering in her dance companies’ off seasons. She became known as The Dancing Chef and her recipes reflect a cosmopolitan and global perspective on food.

What I especially like about this cookbook is the way that its recipes make use of flavour combinations and layering. It’s something that’s often missing from cookbooks and is especially suitable for bringing a sense of fine dining to the home dining room.

The book also introduces a cornucopia of ingredients and a wealth of techniques, making the most of vanilla while tempting the reader to stretch their palates and practices. Huckleberry gastrique, lychee lime relish, fennel vanilla sausage, homemade labneh – the parts and flourishes of these recipes are as interesting as the whole.

Though the recipes and instructions might be challenging for more inexperienced cooks, this book has more than enough to teach cooks who are comfortable in the kitchen and want to extend their skills. I’d recommend it especially to cooks who like to entertain on an elegant scale.

I’m looking forward to working through the sweets and baked goods chapters, but I thought a good test of the book would be to choose recipes from the savoury section. There are classic vanilla pairings like lobster or dishes set off by a fruity sauce, but there are also some surprising combinations.

I was intrigued by the idea of garlic and vanilla, so I’m sharing MacAller’s recipe for a starter that combines the mellow savoury flavour of caramelized garlic with cheeses and a vanilla-infused custard. It’s a sneaky dish, with a strong vanilla aroma that initially reads as dessert. When you taste it, the garlic, ricotta and Parmesan are at the forefront of its flavour, but then the nutmeg and vanilla come through. It’s complex and delicious, a good starter for an adventurous meal or a classically French one. I served it plain, but I suspect it would be even more interesting with a garnish of green pea pesto (from her recipe for Heirloom Tomato Bisque, which pairs tomato and vanilla to good effect).

Garlic and ricotta custard

Caramelized Garlic & Ricotta Custard Cups

Serves 6

  • 1 garlic head (recipe needs 6 caramelized cloves)
  • 2 tsp (10 mL) oil
  • 1 tsp butter, to grease cups
  • 1 vanilla pod
  • 1 Tbsp (15 mL) apple sauce (or ¼ apple, peeled and grated)
  • ½ cup (120 mL) whipping cream
  • 1 cup (240 mL) milk
  • ½ tsp superfine sugar
  • ½ tsp fine sea salt
  • ¼ tsp white pepper
  • 3 large eggs
  • ½ cup (90 g) ricotta
  • ¼ cup (20 g) Parmesan, finely grated
  • a pinch of ground nutmeg

Caramelized Garlic

Preheat oven to 350 F/180 C.

Cut top off garlic head to expose cloves. Peel away just the outer layer of the garlic bulb skin, leaving the skins of the individual cloves. Wrap loosely in foil and drizzle over the oil. Pinch the foil closed at the top, place in a baking pan and cook in oven 30–35 minutes until squishy, caramelized and golden brown.

Custard Cups

Butter 6 small (4 fl oz/120 ml) custard cups. Set inside a baking dish large enough to hold the cups.

Cut the vanilla pod in half but don’t split and scrape it, to keep the custard ivory colored. Squeeze 6 caramelized garlic cloves into a saucepan and add apple sauce, vanilla pod, cream, milk, sugar, salt and pepper. Bring just to a simmer, turn off heat and cool about 20 minutes.

Turn the oven to 325 F/160 C.

In a large jug, whisk the eggs well, then add ricotta. Place a sieve over the jug and strain the milk mixture into the eggs, pressing the garlic through with the back of a spoon. Discard the vanilla pod or rinse, dry and save for another use. Add Parmesan, salt, pepper, a pinch of nutmeg and whisk together.

Pour custard into cups. Lift pan into the oven, then fill with very hot water to come halfway up the outside of the cups. Bake for 20 minutes until custard has browned and set but is still jiggly in the center.

Serve warm as is or top with a spoonful of green pea pesto.

Vanilla Table shows just how complex and varied its titular ingredient can be, while proving that limiting cookbooks to a single subject doesn’t limit the scope and breadth of its recipes.

Come back Thursday, May 21st for a discussion of two books I was excited to celebrate.

Spring Book Reviews – Mrs. Wheelbarrow’s Practical Pantry

Quickles

Today’s review is for a cookbook from my own shelves, Mrs. Wheelbarrow’s Practical Pantry, and no consideration was received for this post.

I first came across Cathy Barrow’s blog when she started Charcutepalooza with Kim Foster. I followed along, fascinated by the accomplishments of the group of bloggers working their way through Michael Ruhlman’s Charcuterie: The Craft of Salting, Smoking, and Curing. There’s no way meat-curing is going to happen in this apartment, between the tiny dog and M. Vegan, so experiencing charcuterie-making vicariously was just my speed.

I was particularly happy to find Cathy’s blog, Mrs. Wheelbarrow, because she makes better use of the best of each season than just about anyone else. Charcuterie might be the high-wire act of home preserving, but she also engages in earthier pursuits like canning, baking, and cheese-making – well, cheese-making is a bit on the wild side for most of us, too. I know it was pretty exciting territory for me, when I tried it.

I especially liked the way she demystifies home preserving and cooking for people who didn’t grow up with those traditions. My mother made pickles and jams, but home cheese-making and meat-curing weren’t on the radar of anyone we knew. The most exotic thing she made was canned trout, with my grandmother. Reading Mrs. Wheelbarrow made all these things seem possible and even part of a routine in the kitchen. This sensibility follows in Cathy Barrow’s cookbook, too.

In her introduction, she explains that it was a growing concern with food systems, waste, and health that led her first to canning, then to home preserving on a broader scale. Preserving has become a part of her everyday life and her cookbook is filled with the kind of information that makes it seem possible to accomplish that, too.

There are sections on safety, technique, and troubleshooting, but what really makes me want to get into the kitchen are her bonus recipes and her suggestions for using the preserves, pickles, cheeses, and charcuterie you’ll produce. There’s nothing worse that looking at a shining row of freshly canned preserves and wondering what you’re going to do with it all now.

Her base recipes for jams and pickles are worth the cost of the book, alone – they aren’t merely repeats of traditional ones. And once you have the book in hand, who knows? You may work through the meat-curing and cheese-making sections eventually. The gorgeous photos and intriguing descriptions might have you experimenting with gravlax and ricotta, then finding yourself setting up a smoker out back or creating a cheese cave.

At the very least, you can get some nice bacon from the butcher’s and try her Bacon-Onion Jam.

I’m looking forward to trying more of her jams, preserves, and pickles over the course of the summer. And I know I’ll try a simple recipe or two from the other sections. For now, though, I’m anxiously awaiting tomorrow, when I can start dipping into the jar of carrot, red pepper, and onion Quickles I made tonight (a version of which you can find here).

Come back next Thursday, May 7th for a review of a book full of heavenly aromas.

Spring Book Reviews – Bob’s Red Mill Everyday Gluten-Free Cookbook

Amaranth Soup

I received a review copy of Bob’s Red Mill Everyday Gluten-Free Cookbook from Robert Rose Inc. Nevertheless, all opinions in the following post are my own.

A diagnosis of celiac disease can seem like an imposition of broad limitations on one’s diet. And that used to be quite true, in the days when white rice flour was made to stand in for everything from bread flour to cake flour.

These days, though, there are so many great gluten-free alternatives available to people with celiac disease or gluten intolerance. Gluten-free grains and seeds like quinoa have become widely available, along with a wide range of flours. Ingredient lists are starting to shift, too. Where once wheat or barley might be used as a filler, now products like stocks, sauces, and spice-blends are eliminating them when not necessary, or other companies are jumping into the market with their own gluten-free varieties.

Bob’s Red Mill has been a reliable source of gluten-free products for years, dedicating separate production lines to many of their gluten-free grains, seeds, and flours to avoid cross-contamination. I’ve been a fan since my youth, when I was introduced to plenty of crunchy granola vegans and vegetarians. Potluck survival meant mastering veggie cuisine and Bob’s Red Mill provided many of the grains we used.

I’ve never been completely vegan or vegetarian, but eat that way much of the time, especially since my partner has committed to veganism. He’s also the member of the family with celiac disease, so alternatives to wheat, barley, and the rest of the gluten-rich grains are a big part of our daily meals.

I’ve become very familiar with gluten-free alternatives over the years. But like many of us, I’ve got quinoa down and could use a little help making the most of the rest. Amaranth? Teff? Sorghum? Millet? I’ve made a little use of these, but not often enough. Even familiar grains like oats or buckwheat become trickier when they are ground into flours.

So, I was excited to get my hands on a copy of Camilla V. Saulsbury’s Bob’s Red Mill Everyday Gluten-Free Cookbook. It’s full of whole-grain, gluten-free recipes, but just as importantly, it includes a primer with details on how to prepare and store gluten-free grains and flours, what their nutritional properties are, and what other healthful items belong in the gluten-free pantry.

The recipes themselves range from breakfast to dessert and travel across cuisines, many of which can become off-limits to gluten-free eaters. Amaranth Tabbouleh or Sorghum Minestrone satisfy cravings for old favourites, while naturally gluten-free dishes like Persian-Spiced Lentils and Millet make use of less familiar grains to delicious effect.

Many of the recipes are vegetarian or vegan, or easily adaptable, so there are plenty for me to choose from when eating with my partner. I’m especially looking forward to trying the recipe for vegan Nanaimo bars, as I noticed that one of the grocery stores nearby sells popped amaranth.

Today, though, I’ve got permission to share a recipe for a hearty, vibrant soup that reminds me of a pozole verde. It can be served with queso fresco, but we skipped that in favour of lime wedges and found it perfectly satisfying.

Tomatillo, Black Bean and Amaranth Soup

Makes about 6 servings

Equipment: Food Processor

2 cans (each 12 oz/340 mL) whole tomatillos, with juice
1 tbsp/15 mL olive oil
4 cloves garlic, minced
1 tsp/5 mL chipotle chile powder
3/4 cup/175 mL amaranth
2 cans (each 14-19 oz/398-540 mL) black beans, drained and rinsed
3 cups/750 mL ready-to-use GF vegetable or chicken broth
1 cup/250 mL packed fresh cilantro leaves, chopped
Crumbled queso fresco (optional)
2 tbsp/30 mL freshly squeezed lime juice
Lime wedges (optional)

  1. In food processor, purée tomatillos and their juice. Set aside.
  2. In a large pot, heat oil over medium-high heat. Add garlic and chipotle powder; cook, stirring, for 1 minute. Stir in tomatillo purée; cook, stirring for 2 minutes.
  3. Stir in amaranth, beans and broth; bring to a boil. Reduce heat to low, cover and simmer, stirring occasionally, for 15 to 20 minutes or until amaranth is very tender. Stir in cilantro and lime juice. Serve sprinkled with queso fresco (if using), with lime wedges on the side, if desired.

I predict this cookbook will have you stocking your pantry with more grains, seeds, and flours, whether or not you need to follow a gluten-free diet. Variety is the spice of life, but it’s also a good practice for health and a delicious one, at that.

Come back next Thursday for a review of a book that will help you make the most of each season’s bounty.