Dorie Greenspan’s Double-Strawberry and Rose Shortcakes

A shortcake

I was provided with a gift certificate by Driscoll’s to purchase ingredients for this recipe and I received a copy of Baking Chez Moi for participating in the Google+ chat. However, all opinions are my own.

For me, the beginning of summer is marked by the beginning of strawberry season. And the best way to celebrate the start of summer is strawberry shortcake. No wonder June 14th has been declared National Strawberry Shortcake Day. (It might be an American holiday, but I’m choosing to apply it to Canadians, too.)

One of the things I love best about strawberry shortcake is that it can be dressed up or down for any occasion. It’s as at home at a family picnic as it is a formal tea. It’s also a dessert that comes in many incarnations, causing arguments amongst those who champion the sponge cake variety and those who staunchly support the sweet biscuit version. Although I’ll gladly accept a plate of sponge cake smothered in whipped cream and berries, it’s the biscuit version that I think of as the real McCoy.

So, I was excited to be invited to join a Google + Hangout on Air a few weeks ago, to join some fellow bloggers to talk about just that sort of strawberry shortcake with baker extraordinaire Dorie Greenspan. If you’re a regular reader here, you’ll know that I’m a big fan of her recipes and have been working through her last cookbook, Around My French Table, with a great group of bloggers for French Fridays with Dorie. I knew the recipe would be stellar, but I was also looking forward to the opportunity to ask Dorie for tips and tricks for making this shortcake as good as could be.

Dorie told us that she invented this recipe after learning that strawberries are closely related to roses. She also enjoys adding an element of surprise to her desserts, so the subtle flavour of rose and the two textures of the strawberries in this recipe add interest, elegance, and a little playfulness to these shortcakes. I also loved the hint of lemon in the biscuits.

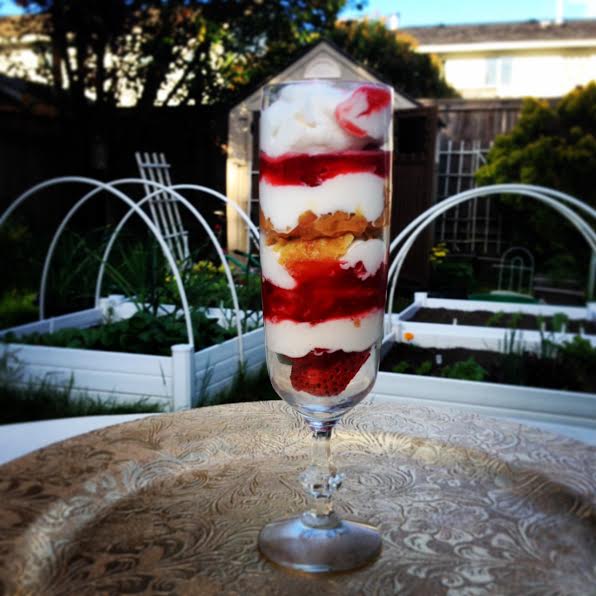
My question for her was whether or not the tops of the biscuits, and the less-than-perfect ones, could be used for a trifle-like dessert. She thought that would work well, layered in a jar, with each layer of biscuit soaked in the juices from the compote. I did a little riff on this idea when I made the shortcakes, layering biscuits, berries, compote, and whipped cream into champagne glasses for a pre-dinner parfait. I even added a layer of rhubarb curd to the middle. It was the best cook’s treat ever.

Parfaits

Here is some more of the advice she shared with us:

  • Rubbing the lemon zest into the sugar releases its oils and helps to distribute the zest’s flavour and aroma throughout the dough.
  • Buttermilk acts with baking soda to make lighter biscuits.
  • Never be forceful with biscuit dough until you begin cutting it. Gently using your hands to mix the ingredients can keep you from overworking the dough, but forceful cutting of the biscuits maintains the layers of butter in the dough that help them rise – use a straight down motion, then twist.
  • Other flavours that complement strawberries are vanilla, black pepper, citrus, or crushed pink peppercorns. Any of these could be used in place of the rose extract.
  • Add a bit of sour cream to whipped cream for an extra layer of flavour and some added stability for piping.


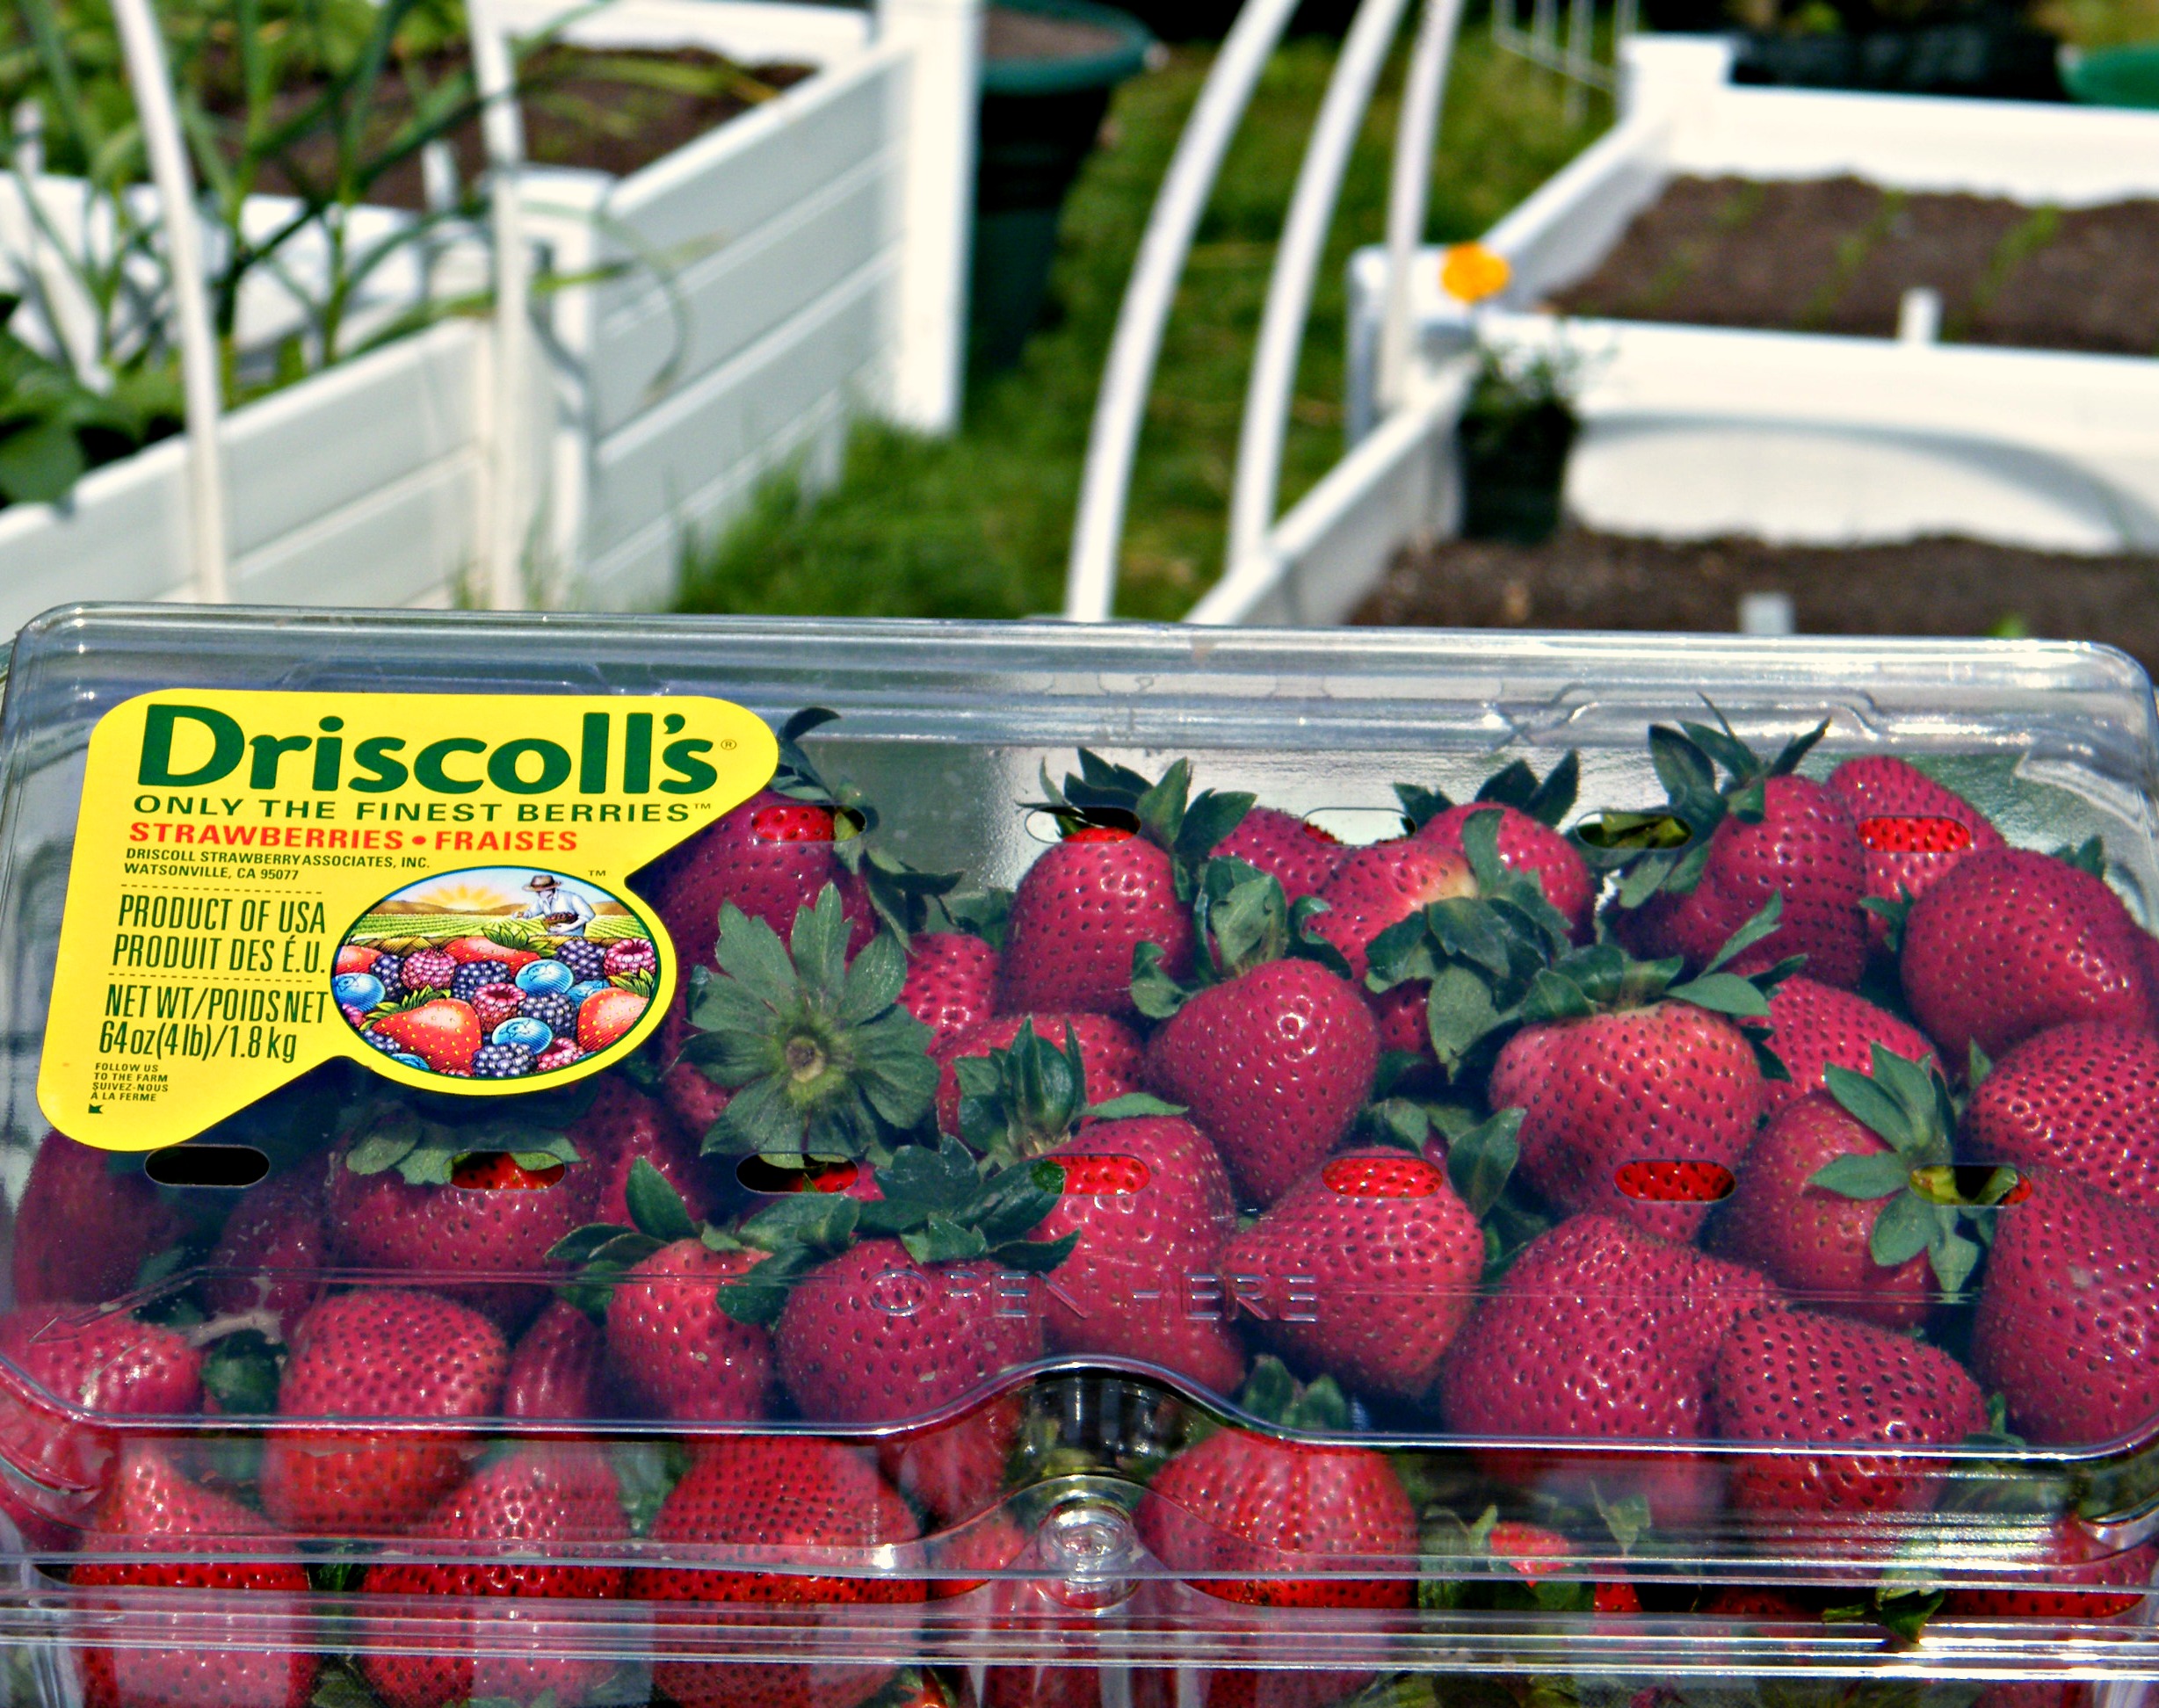
Driscoll’s, the sponsor for our Google + Hangout, kindly provided us with gift certificates to purchase the ingredients for this recipe. Their berries were large, ripe, and incredibly sweet, which sets them apart from most supermarket berries. I would happily buy them again.

Driscolls

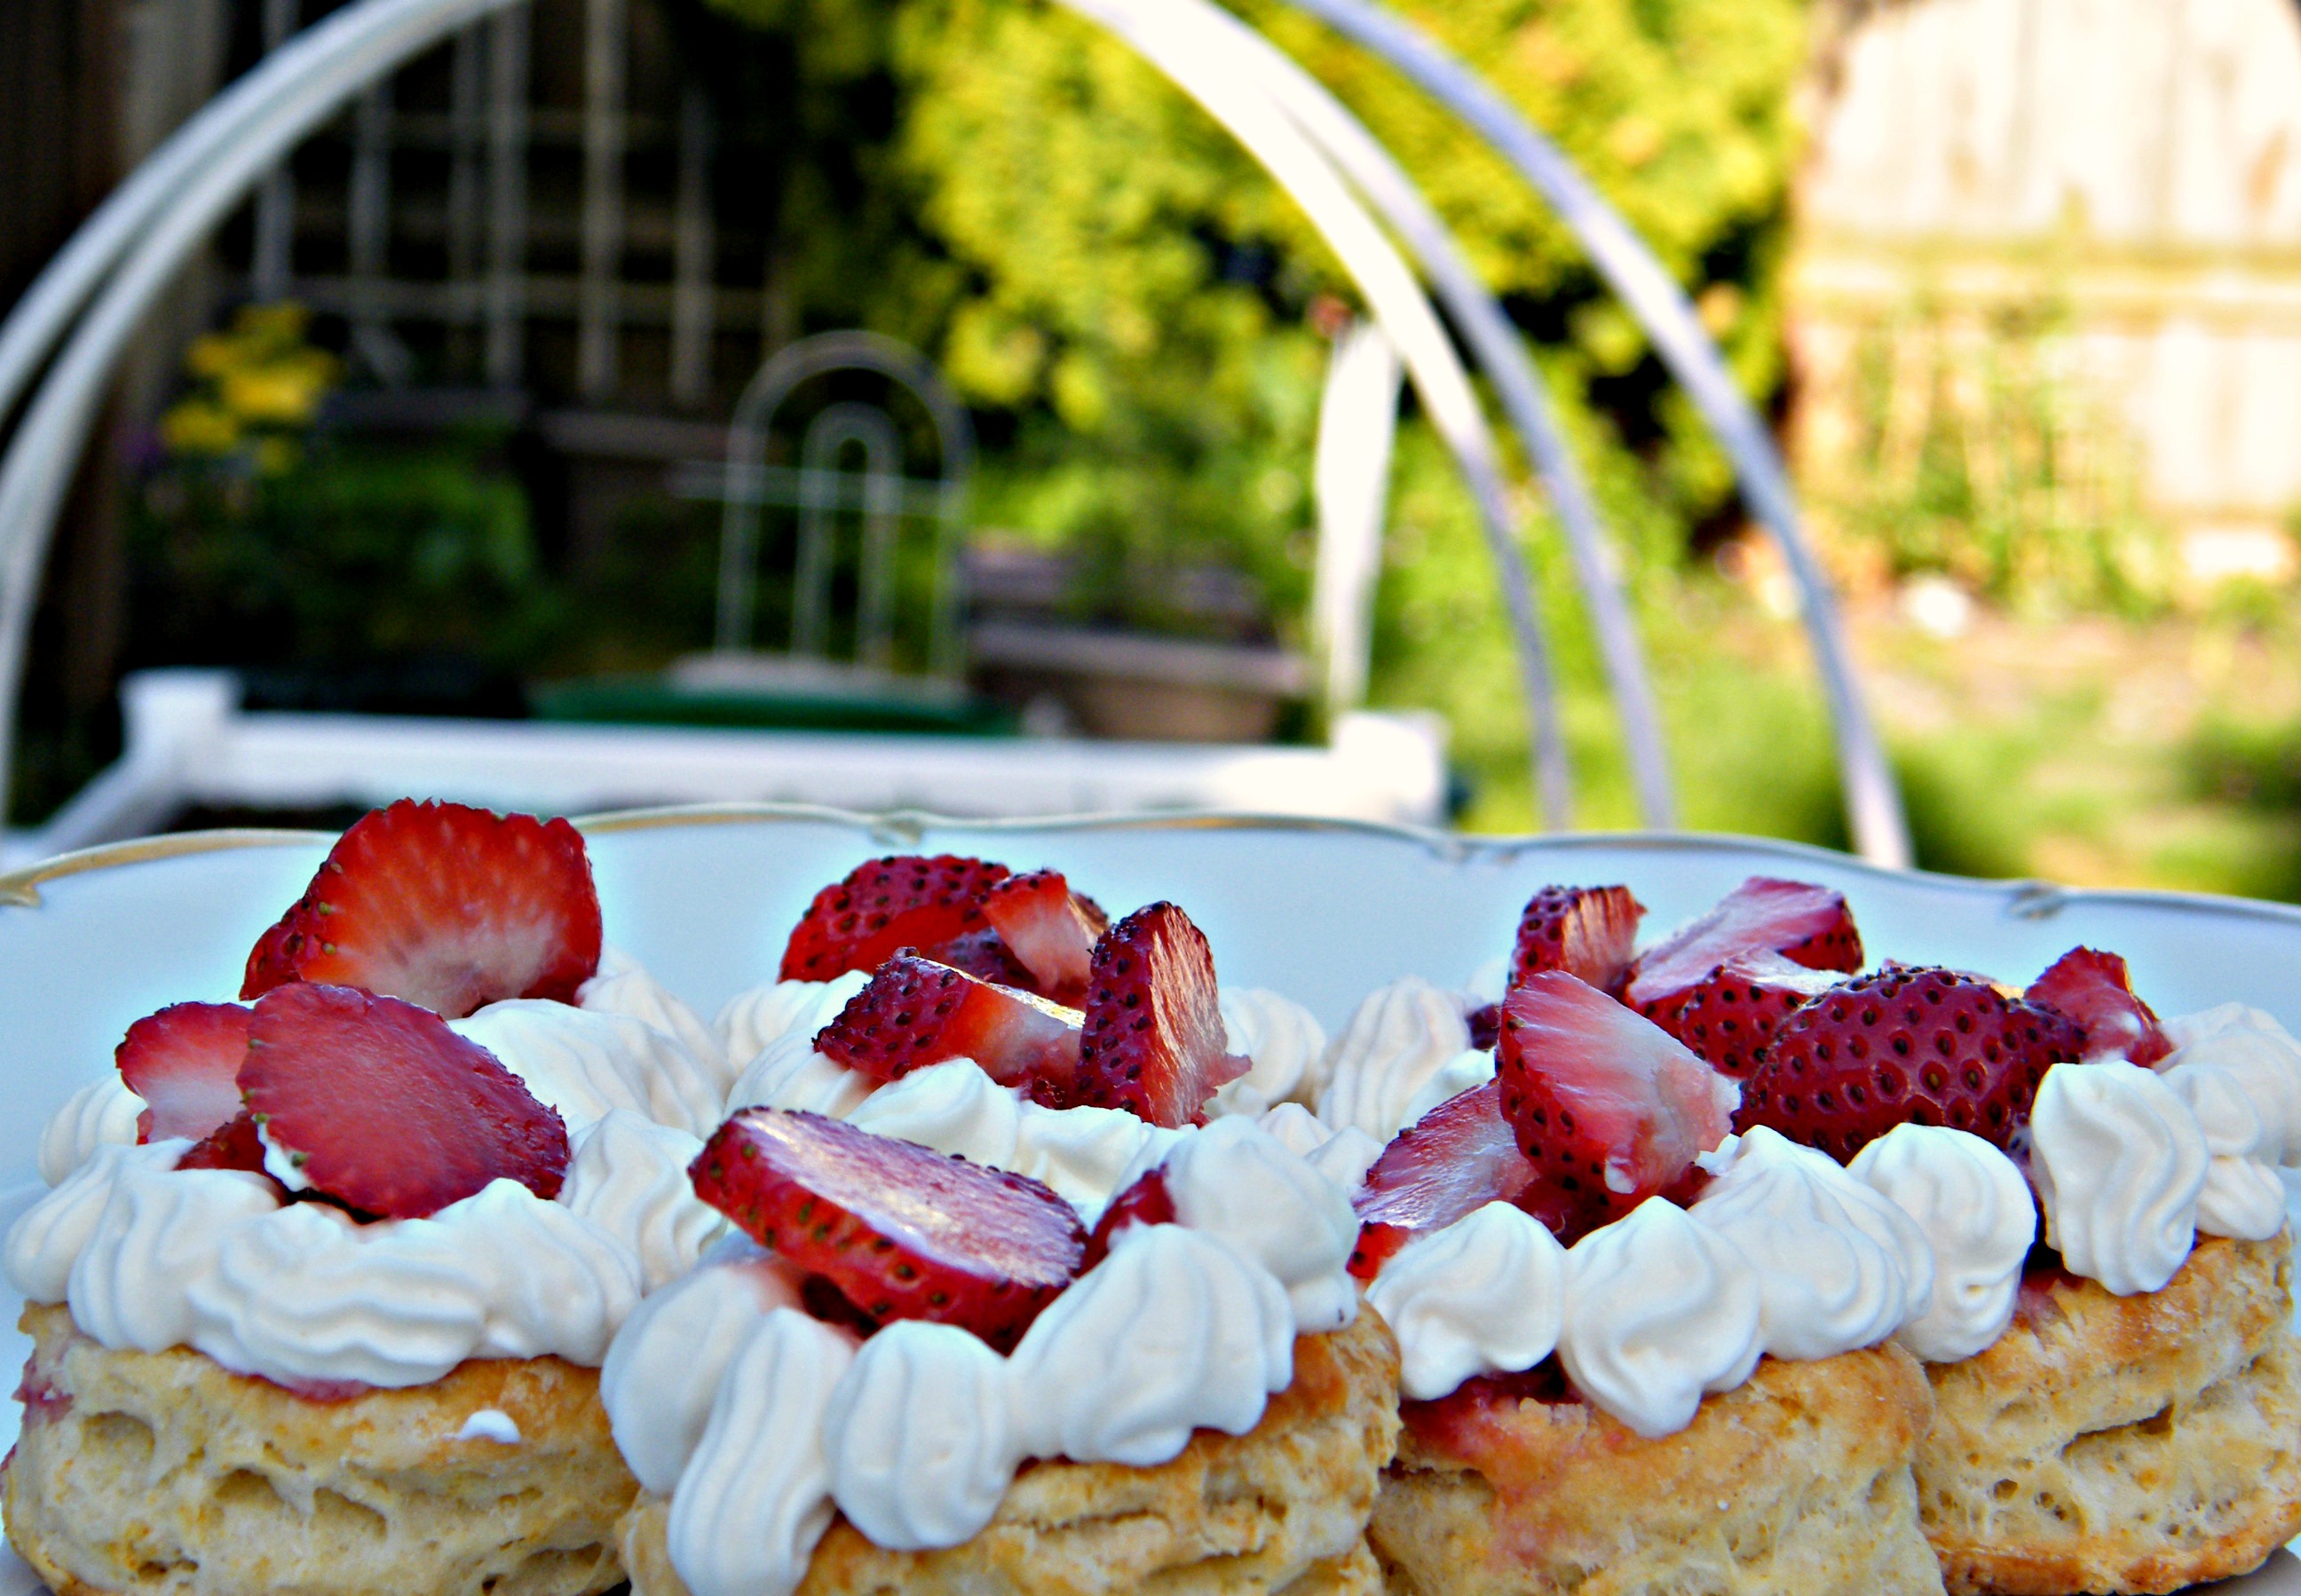
I was quite pleased with how this recipe turned out for me, with Dorie’s tips in hand. My shortcakes rose beautifully. I followed the recipe exactly, though my shortcakes were without the candied roses. My roses are only now starting to bloom, so I will be trying my hand at the candied roses soon. Because, of course, I will be making this recipe again. Dorie’s shortcakes were a huge hit with my family.

Plateful of shortcakes

You can find the recipe on the Driscoll’s website. They’ve also been kind enough to allow me to share it here.

Dorie Greenspan’s Double-Strawberry and Rose Shortcakes

Shared with permission from Driscoll’s Berries and Dorie Greenspan

INGREDIENTS

Rose petal decoration
3 unsprayed roses
1-2 very fresh organic egg whites
granulated sugar
(or store-bought candied rose petals)
Strawberry compote
3/4 pound (about 3 cups) Driscoll’s Strawberries, hulled
1 1/2 tablespoons sugar
3/4 teaspoon pure rose extract

Lemon-buttermilk biscuits
1 1/2 tablespoons sugar (plus more for sprinkling)
freshly grated zest of 1 lemon
2 cups all-purpose flour (plus more for dusting)
1 tablespoon baking powder
1/2 teaspoon fine sea salt
1/4 teaspoon baking soda
6 tablespoons (3/4 stick) cold unsalted butter, cut into
small cubes
3/4 cup cold buttermilk

Whipped Cream
1 cup very cold heavy cream
2 tablespoons confectioners’ sugar, sifted
1 teaspoon pure vanilla extract
3/4 teaspoon pure rose extract
1 tablespoon cold sour cream, optional
red or pink food coloring

Topping
1/2 – 3/4 pound (about 2 to 3 cups) Driscoll’s Strawberries,
hulled

DIRECTIONS

Rose Petal Decoration
Several hours ahead or the day before, separate the rose petals, rinse them quickly in cold water and pat them dry. Put one egg white in a small bowl and whisk until it’s foamy. (You may or may not need the second white.) Put the sugar in another small bowl and place a sheet of parchment paper or a silicone baking mat on the counter. One at a time, dip a petal into the white and let the excess drip back into the bowl. Drag the petal through the sugar to coat both sides very lightly. Dry the petals on the paper or mat in a cool, non-humid place for at least 6 hours or for as long as overnight.

Strawberry Compote
Coarsely chop the berries and toss them into a small saucepan with the sugar. Put the pan over medium heat and cook, stirring, for 5 to 8 minutes, or until the juices are slightly thickened and syrupy. Scrape the berries and syrup into a bowl, stir in the rose extract and cool to room temperature. (You can make the compote up to 3 days ahead and keep it covered in the refrigerator.)

Lemon-Buttermilk Biscuits
Center a rack in the oven and preheat the oven to 425°F. Line a baking sheet with parchment paper or a silicone baking mat.

Put the sugar and lemon zest in a large bowl and, working with your fingertips, rub the ingredients together until the sugar is moist and fragrant. Add the rest of the dry ingredients to the bowl and whisk to combine. Drop in the pieces of cold butter and, again using your fingertips, crush, rub and blend the butter in. You’ll have flakes of butter and small pieces and this is just right. Pour the cold buttermilk over the mixture, switch to a fork and toss and stir everything together until the milk is absorbed – your dough might look like curds, but that’s fine. Don’t stir too much, too vigorously or for too long and if there are a few dry spots in the bottom of the bowl, ignore them. Reach into the bowl and knead the dough gently, folding it over on itself and turning it over 6 to 8 times.

Dust a work surface lightly with flour, turn out the dough and, still using your hands, pat the dough out until it is 1/2 inch thick. (The thickness is what’s important here.) Using a high-sided 2 inch cutter, cut out biscuits and place them on the baking sheet. Pat the scraps together until they’re 1/2 inch thick and cut out as many more biscuits as you can. (The leftover dough can be cut into biscuits, but they won’t rise as high or as evenly as the others – you can keep them as your baker’s treat). Sprinkle tops with sugar.

Bake for 15 to 18 minutes, or until the biscuits have risen gloriously and their tops and bottoms are golden brown. Transfer the baking sheet to a cooling rack and allow the biscuits to cool until they reach room temperature. (The biscuits can be made up to 6 hours ahead; keep them uncovered at room temperature.)

Whipped Cream
Working with an electric mixer, beat the cream just until it mounds softly. Still beating, add the sugar, followed by the vanilla and rose extracts. When the cream is fully whipped and holds firm peaks, quickly beat in the sour cream, if you’re using it. To tint the cream, beat in just one drop of coloring; continue adding coloring a tiny drop at a time until you get the shade of pink you want. (The whipped cream can be made up to 3 hours ahead and kept tightly covered in the refrigerator; whisk a couple of times before using.)

Topping
Just before you’re ready to put the shortcakes together, stand the berries up and, using a thin-bladed knife, cut each berry into 4 or 5 thin slices.

Assembly
If you’d like to pipe the whipped cream, either spoon the cream into a pastry bag fitted with an open star or plain tip, or spoon the cream into a zipper-lock plastic bag and snip off a corner. Alternatively, you can simply spoon on the cream.

Slice off the top of the biscuit to create an even surface for piping the cream. Save the tops to nibble on later. Put a teaspoonful of strawberry compote and syrup in the center of each biscuit. Pipe (or spoon) a circle of whipped cream around the compote, leaving a bit of compote uncovered. Finish each shortcake by pressing two or three slices of strawberry together, fanning them out a little and placing them, broad side down, in the center of each cake. Add a rose petal for the finishing touch. (If you have any extra compote and/or cream, cover and keep in the refrigerator to enjoy at another time.)

Arrange the shortcakes on a platter. Scatter the remaining rose petals around the platter and serve immediately.

Chèvre Redux and a Review of a Classic Cookbook

I received a review copy of The Complete Best of Bridge Cookbooks, Volume 3 from Robert Rose Inc. Nevertheless, all opinions in the following post are my own.

Image courtesy of Robert Rose, Inc.

A couple of weeks ago, I wrote about my cheesemaking adventures, which left me with about two pounds of chèvre. I used some of it for the ice cream I made, but that took care of less than a quarter of it. Candy reminded me about the torteau de chèvre, a cheesecake unlike any other I’ve had before. My chèvre, you might remember, was a little softer than it should have been, but it didn’t seem to make a difference. This treat was as good as I’d remembered it being.

My bowl of chèvre was getting down to a manageable size, so I turned my attention to the other cookbook I’d taken for review from Robert Rose, Volume 3 in the Best of Bridge series. This is a spiral-bound edition, which lays flat when open – a handy feature when you’re bringing it into the kitchen with you. The font (what seems to be Comic Sans in all caps) cuts down on readability and the jokes throughout are dated. The recipes, though, are solid. The reputation of these books is well-deserved.

You won’t find innovative or fashionable cuisine here, but you will find a mixture of old-fashioned recipes and new millennium favourites. There’s also a good mix of dinner party and weekday meal fare across cuisines. The methods are easy enough for new cooks, but there’s still enough variety to keep the attention of more experienced ones. In some recipes, there is a reliance on canned or pre-prepared pantry staples that doesn’t mesh well with today’s focus on fresh, homemade ingredients, but it’s easy enough to make substitutions. It’s the kind of all purpose, old fashioned cookbook that I like to have on my shelves. I’ll likely never make the tuna casserole or the molded salads, but the Citrus Crisps have already made an appearance for a holiday cookie exchange this year and I can also tell that I’m going to find some more new favourites in this book.

Speaking of new favourites, I was pleased to find a recipe that would help me with my abundance of chèvre, an onion and goat cheese pizza that sounded delicious. My niece J, one of the stars of our Baking With Julia endeavours, was on hand and agreed to do the heavy lifting on this dish. She made pizza dough, using the recipe found elsewhere in this cookbook – it’s a great, simple crusty one. Then, she vetoed the pine nuts and spent the next half hour in front of the stove, on a comfortable chair with an iPad in one hand and a spatula in the other. By the time she was done, the onions were dark and jammy. She spread the chèvre on the unbaked pizza crust, added the onions, and ground some pepper on top. After a short time in the oven, it was ready.

Pizza

Even without the pine nuts, this was a complexly flavourful dish. I’d love to serve it in small squares as an appetizer, though it made a great main for dinner that night, too. It reminded me a little of Pissaladière and could easily be dressed up with olives, bacon, or even something sweet like figs.

Robert Rose, Inc. has been kind enough to let me share the recipe with you, so if you experiment with it, let me know. It’s great as is, though.

Caramelized Onion and Chèvre Pizza

1 12-inch (30 cm) pizza crust, homemade or purchased
Olive oil to brush crust

3 medium onions, thinly sliced (use all 3!)
1 Tbsp. (15 mL) butter
2 Tbsp. (30 mL) olive oil
1 Tbsp. (15 mL) granulated sugar
3 Tbsp. (45 mL) balsamic vinegar
2 cups (500 mL) crumbled chèvre (goat’s cheese)
1/2 cup (125 mL) toasted pine nuts
Freshly ground black pepper

Preheat oven to 450°F. Brush crust with olive oil. In a large frying pan over low heat, combine onions, butter, and olive oil Cover and cook, stirring often, until onions are very soft, about 30 minutes. Add sugar and vinegar and continue cooking until vinegar evaporates, about 5 minutes. Add salt to taste. Place cheese on crust, leaving 1/2-inch (1 cm) border. Sprinkle with pine nuts, top with onion mixture and a sprinkle of freshly ground black pepper. Bake 10 to 15 minutes, until crust is golden.

After the tourteau and the pizza, I was left with just enough chèvre to improvise a goat cheese and mushroom quiche, inspired by a suggestion from Betsy and a fridge full of mushrooms. It was a nice way to finish off the batch of precious homemade goat cheese and the mushrooms, fresh thyme, and onions set off the tangy goat cheese nicely.

Quiche

A week of rich eating was at its end and with the help of some friends and a couple of cookbooks, we were well-satisfied.

The Complete Best of Bridge Cookbooks, Volume 3 came out in Fall, 2013. You can find more details here, along with a link to purchase the book.

At Home with Lynn Crawford – A Penguin.ca Daily December Delight

I received a copy of At Home With Lynn Crawford for review from Penguin Canada. Nevertheless, all opinions are my own.

BloggerBadge_Penguin

You may have noticed this jaunty Christmas penguin on my front page. He’s there because I’m participating in Penguin Canada’s Daily December Delights Campaign. Every day in December, there’s a new featured book, with surprises, extras, or contests running for each selection. There’s also $750.00 worth of Penguin titles up for grabs. You can enter and explore, here.

I came late to discovering the joys of Food Network Canada, so for years I had no idea what people were talking about when they were raving about their favourite celebrity chefs. Then, when my parents started downsizing, I went to stay and help out and discovered my television kryptonite. Not only did I finally see Iron Chef and Chopped, but I got to know my first Canadian celebrity chefs since the Urban Peasant was on air. Today’s chefs are a little more sophisticated (I still love the Urban Peasant’s version of 40 cloves of garlic chicken) and I’ve come to love watching Anna Olson, Michael Smith, and Ricardo Larrivée. One of my favourite shows, though, is Lynn Crawford’s Pitchin’ In, with its wacky premise, Chef Lynn’s endless curiosity about ingredients, and the fantastic meals she serves at the end of each episode.

Image courtesy of Penguin Canada

At Home with Lynn Crawford is her second cookbook. The first, Pitchin’ In, was inspired by her television show and replicated the fine dining at home ethos of the meals she served to her hosts on the show. Many of the recipes in her first cookbook were quite technically challenging, especially for inexperienced cooks. Her new cookbook takes a different tack, focusing on easy home recipes, including a wealth of recipes for ingredients like stocks, marinades, spice rubs, and flavoured butters. As a result, this book is perfect for a new cook. Chef Lynn also includes her take on a number of basic recipes like baked beans, potato salad, and chicken noodle soup that make a good starting point for someone learning to cook. There are classic recipes like Coq au Vin, Cioppino, and Porchetta that might seem familiar to older cooks, but will be brand new to many young people. Her recipes run across many cuisines, including Asian, Caribbean, and Indian flavours, which is another good point of entry for new cooks.

But, it’s not all slow lane cooking. Her Sweetbreads recipe requires some finesse and techniques like salt-baking certainly piqued my interest. Most of all, it’s her chef’s eye for detail which makes her recipes interesting. The ingredients are given as much attention as the whole. Something as simple as steak and mushrooms becomes much more sophisticated in her hands, with a rich marinade to start and red wine butter to finish. I like the way that the recipes cover so many categories, too – not just appetizers, mains, sides and desserts, but also jams and spreads, seasoning salts, and a cocktail section that might even get Trevor’s attention.

The book itself is beautiful, with lovely photography and a clean, spare layout. However, this brings me to what I didn’t like about it, which is how space is used in parts of the book. Serving champagne merits two pages and variations are often presented as separate recipes. It’s not a huge problem, but it can promote more hunting around for things you’re trying to find fast. With its emphasis on easy recipes, I’d also like to see more detail in the instructions, which would help new cooks when they might be unfamiliar with even the more simple techniques. But, those are really the only two issues I had with the book.

Cake

I’ve only had a chance to test drive one recipe so far, but I think I chose well. Chef Lynn’s Sweet Potato Bourbon Cake is full of rich ingredients, but it bakes into a cake that’s both substantial and light. The bourbon glaze reminds me of sucre à la crème, but with some smokiness from the alcohol. (I may have to try a boozy version of sucre à la crème this year.) I used squash and Canadian whisky in place of the sweet potato and bourbon, but as Chef Lynn mentions in the recipe, these substitutions work just fine. It’s a big cake, made for sharing, but I suspect that it will keep well, too. You can find a more elaborate version of this recipe here.

I plan on working my way though some of the other recipes, and I might just be handing out a few jars of Chef Lynn’s Old Bay Seasoning at Christmastime, too. If you head over to today’s square on Penguin’s calendar, you can find some sample recipes from the book. And if you’d like to get a taste of Chef Lynn in action, her Pitchin’ In Christmas special is running right now on Food Network Canada.

Cheesemaking – A Book Review, with Recipes

I received a review copy of 200 Easy Homemade Cheese Recipes from Robert Rose Inc. Nevertheless, all opinions in the following post are my own.

Image courtesy of Robert Rose, Inc.

Robert Rose, Inc., a publisher based in Toronto, asked me if I’d like to review any of their new releases and the first one that caught my eye was the second edition of this book. Like a lot of folks these days, I’ve been fascinated with the rediscovery of homemade foods, from preserves to charcuterie and beyond. Cheesemaking seems to be a natural for the fermenting, pickling, curing set. In the case of this book, I was curious to see how many different sorts of cheese could reasonably be made at home and I also wanted to see how well I’d fare trying my hand at it. I was tempted to try Mozzarella or Halloumi, but I decided to stick with a fresh cheese, as suggested by the author, as they’re the easiest and fastest to tackle. Besides, making chèvre doesn’t require anything beyond the active agents, a place to rest, and some cheesecloth. Some of the other cheeses are considerably more involved and I wanted to start slow.

I found the mesophilic culture and liquid rennet that I needed at Gourmet Warehouse and picked up four liters of goat’s milk at our local food co-op. I sterilized all the equipment, and followed the instructions as closely as I could. I have to admit I felt a little frightened at the idea of leaving a pot of milk out for twenty-four hours, then the curds for another six or seven. I read the troubleshooting section for fresh cheeses over and over that evening, just to prepare for the worst.

But, for the most part, everything went exactly as planned. My cream cheese turned out a little softer than it should have been, but not much. Otherwise, in taste, texture, and aroma, it’s exactly what I expect from chèvre. What I wasn’t prepared for, even though I knew the expected weight of the finished cheese would be about two pounds, was just how much chèvre I’d just made. Enough to fill a large mixing bowl. After the delight I felt at discovering I’d been successful, next came the fear that I’d never be able to figure out what to do with all that highly perishable cheese. I figured it out and now there’s just about three-quarters of a cup left in the fridge, ready to be mixed with herbs and spices and used as a spread.

goat cheese

So much for my experience, now on to the review.

This cookbook is comprehensive, not just in its range of recipes, but also in coverage of technique. There are photo guides for each stage of the process for all the categories of cheeses in the book, along with troubleshooting guides and overviews of ingredients, equipment, techniques, safety, and sanitation. As long as you read Amrein-Boyes’ instructions carefully and follow them exactly, I don’t think you can go very wrong.

However, the quantities produced for many of the recipes can be a little overwhelming for the home cook. For instance, her Halloumi recipe requires ten liters of goat’s or sheep’s milk and results in two pounds of cheese. I understand why, as the active ingredients for smaller batches would be miniscule and probably impossible to get right. As a result, I think some people will stick to some of the easier recipes, which produce smaller quantities, like her yogurt and flavoured butter recipes. I suggest getting together with friends or family to tackle some of the larger recipes, both to share ingredient costs and split the cheese.

The other problem with this book for home cooks who live in small spaces is lack of correct conditions for many of the aged cheeses. As much as I’d like to have a cheese cellar, I think my neighbours in the suite below me might have something to say about that. I also think certain categories of these cheeses are really semi-professional. Those are small quibbles, though, and if you were thinking about a career in cheesemaking, this book could serve as your apprenticeship.

Overall, I’m really happy with this book. There are many recipes that I can work my way through even if I can’t try the aged cheeses. There are also a number of recipes for using the cheeses you’ve made, which is a nice feature. I also love the huge variety of recipes Amrein-Boyes provides across all categories of cheeses. It makes for interesting reading.

The second edition of 200 Easy Homemade Cheese Recipes came out in October of this year and I think it might make a great present for the cook in your life who is ready to start experimenting beyond baking and dinner-making. You can find more details here, along with a link to purchase the book.

The publisher is kindly allowing me to share this recipe with you, so that you can try it for yourself. However, I’d strongly recommend buying the book first, or doing a good deal of research before you start, because the safety precautions are very important in cheesemaking.

Here is Debra Amrein-Boyes‘ recipe:

Chèvre

Makes 2 lbs (1 kg)
25% yield

4 quarts (4 litres) goat’s milk
1/4 tsp (1.25 mL) mesophilic culture
1 drop liquid rennet
Pickling (canning) or kosher salt

1. Sterilize all equipment. In a large stainless-steel pot over medium heat, warm milk to 77°F (25°C), stirring gently to prevent scorching. Remove from heat.

2. Sprinkle culture over surface of milk and let stand for about 5 minutes to rehydrate. Using skimmer and an up-and-down motion, gently draw culture down into milk without breaking surface of milk.

3. Dilute rennet in 1 tbsp (15 mL) cool water. Add to milk and, using the same up-and-down motion, draw rennet down into milk until well blended. Cover and let set at room temperature in a draft-free location for 24 hours.

4. Tip pot slightly to drain off collected whey. Using skimmer, ladle curd into a draining bag or cloth-lined colander. Let drain for 6 to 7 hours or until desired thickness is reached. Keep in mind that the cheese will firm up further once refrigerated.

5. Remove cheese from bag and place in a bowl. Weigh cheese, then add 1% of the weight in salt. Store in the refrigerator for up to 2 weeks.

Tip: Fresh cheeses are highly perishible. Store them in the coldest part of the refrigerator for up to 2 weeks.

Just to reiterate, please do some research on sterilization, safety, and troubleshooting before you attempt this recipe. It’s a simple cheese to make, but you’ve got to do it right.

ice cream

And now you’re probably wondering, what did she do with all that chèvre? I made ice cream, of course! And a few other things, which I’ll share with you another time.

I improvised the following recipe with help from several sources. I learned the proportions of milk to yolk and the method from Dorie Greenspan. (I’d buy a copy of Around My French Table if I were you.) Inspirations for honey chèvre ice cream are here, here, and here. Last but not least, my brother the chef gave me some advice on balancing tart, sweet, and acidic flavours for the best result.

Some notes: I happened to have this awesome honey on hand, but you could use plain honey and add some candied ginger instead, or heat plain honey over gentle heat and add some ground ginger yourself. Obviously, traditional ice cream is made with heavy cream and whole milk, but I had some half-and-half to use up and it worked well. I went for a very subtle sweetness, but you could easily amp up the sugars in this recipe. You could use a vanilla bean or vanilla extract in the custard and plain sugar for the strawberries. You could also add a bit of balsamic in place of the lemon juice, too. And you could easily replace the frozen berries with fresh ones (it’s winter here) or change out strawberries for blackberries, blueberries, or stone fruits like peaches.

Ginger-Honey and Strawberry Chèvre Ice Cream

4 cups half-and-half
6 egg yolks
100 g ginger honey
5 oz chèvre
1/2 cup frozen strawberries, mashed with 1/4 to 1/2 cup vanilla sugar and a squeeze of fresh lemon juice

Whisk the egg yolks and honey together.

Bring the half-and-half to a boil in a heavy pot over medium heat, then temper the egg mixture with some of the hot milk before whisking the two together completely.

Stir the mixture with a wooden spoon over medium heat (don’t stop stirring!) until it has thickened a little and coats the spoon sturdily. Remove from the heat and stir in the chèvre a little at a time, letting each addition incorporate before adding the next. Then, strain the custard into a heat-proof bowl. Stir in the strawberries and chill in the fridge or a bowl filled with ice. Once it’s cold, you can finish it in your ice cream maker, according to the manufacturer’s instructions.

I’ll have some more chèvre dishes and another Robert Rose cookbook review for you on Thursday, December 19th. Next Thursday, I’m hoping to have a bit of a surprise for you.

Also, I just noticed that this is my 250th post.

Sucre à la Crème

Sucre à la Crème

I just returned from a lovely visit with a couple of friends this afternoon. I gave them each some sucre à la crème, as one is Québécoise and the other is Scottish and misses having tablet (a very similar confection). We talked about having a little get together so that I could teach them how to make it – it’s much easier than telling, especially since in my family’s tradition there are no candy thermometers involved. I spoke to my mother about it and as it happens, she’s been looking up resources on the internet since we made our last batch. The recipes vary widely and the methods are very different, too. In our family, we use heavy-bottomed soup pots when we make this candy, but most of the videos we found show smaller pots being used. The consistency varies a lot, too, especially when maple syrup or corn syrup are used.

Here are two videos that can give you an idea of how sucre à la crème is made, though the method is a little different than the one we use. They’re both in French, though Ricardo has English recipe resources out there, too. Madame Quintin is the perfect French-Canadian Mémère, don’t you think?

I might have to make a video of my mother making her version. Maybe in time for next Christmas.

A Very Merry Christmas

I hope you’re having a peaceful, happy day today.

I’d like to share the recipe for one of my favourite Christmas treats – sucre à la crème. When I was growing up, my mother and I would make trays and trays of desserts for the big family Christmas meal my parents used to host, along with their Boxing Day open house. Cookies, squares, cakes, and candies, but of them all, we looked forward to sucre à la crème the most, especially if we were lucky enough to have a batch from one of my mother’s aunts back in Manitoba.

My mother is French-Canadian, but her family comes from the francophone communities anchored by St. Boniface. Our Christmas meals have always reflected this and it just wouldn’t be the same if we didn’t have tourtière, boulettes, and sucre à la crème. We’ve even occasionally had a réveillon after Midnight Mass, with goose, then had an anglophone Christmas dinner with my father’s Irish family in the evening.

Cooking the sugar.

Sucre à la crème is a sort of fudge, but it’s nothing like what you’d find in a candy store or market stand. It’s a simple affair of sugar and cream (obviously), versions of which pop up around the world. In Scotland, they’ve got tablet, in Mexico there’s dulce de leche, Italy has penuche, and India has burfi. There are probably tonnes of other examples, too.
The Québécois version uses maple sugar, but those trees are a little rarer on the Prairies, so my family’s recipes use mostly brown sugar. My mother’s aunts were famous for their versions, though my Tante Pauline’s was undisputedly the best, with my Tante Leona’s coming a close second. My mother and I went through their recipes for sucre à la crème recently and realized that they were all a little different and that the versions evolved over the years. When I was a teenager, I learned to make it with two cups of brown sugar, one cup of whipping cream, and a teaspoon of vanilla. When we were looking at the other recipes my mother has, this was what we found:

Tante Pauline’s Version

2 cups brown sugar (1/2 c white)
1 cup heavy whipping cream
1 tsp vanilla
walnuts

Sauce

1 cup brown sugar
1 cup whipping cream

Tante Leona’s Version

3 cups brown sugar
1 cup white sugar
2 cups whipping cream

Mom’s Version

2 cups brown sugar (1/2 c white)
1 1/4 cups whipping cream
1 tsp vanilla

In all cases, combine the sugar and whipping cream, whisk together until well-blended and cook over medium-low heat, stirring often, until the mixture sugars the spoon (a metal one is best) and forms a ball when dropped into a dish of cold water. Remove from heat and stir vigourously, adding the vanilla when the candy is just beginning to stiffen. When the scrapings are becoming solid, it’s time to pour the candy into a buttered square pan. Chill in the fridge for several hours or overnight, then cut into small squares. It keeps for a week in the fridge or several months in the freezer.

Sucre à la Crème

I lost my sucre à la crème making mojo for a few years; for some reason I just couldn’t get it to set. When I went to my mother’s house this year, we made three batches, using my mother’s recipe. All but one was perfect and the imperfect one wasn’t bad. I think what made the difference was the two of us working together, just as we did when I was a child.

What are your favourite holiday traditions?

Roxy under my parents' Christmas tree.

Moose Loaf

Moose Loaf

It’s been a while since I’ve posted and I’ve been mostly neglecting the blogosphere for the past few weeks. I did manage to read Hank Shaw’s thoughtful post on hunting and it inspired me to share a recipe that I’ve been making for years. Though I don’t hunt myself, wild game has always been a part of my diet. My father started hunting as a young man and he’s passed on his skills to my brother, my nieces, and my nephews. When I buy meat, I try to choose organic, humanely raised meat as often as possible, but between the game my family provides and the meat from my parents’ hobby farm, I don’t have to shop for it very often.

Moose meat is one of my favourites, especially when it’s ground. It’s lovely wherever you’d use ground beef, and as I’ve said before, it’s not as scary a proposition as commercial ground beef can sometimes be.

Think of the recipe below as a starting point – I’ve varied it many times over the years. The last time, I used HP Sauce in the mix and then glazed the top with a little more before popping it in the oven. Sage, thyme, and summer savoury made lovely herbal additions to this particular loaf. The rice and milk are important (I used brown rice this time), because moose meat is very lean. The mixture might seem a little wet, but the excess moisture gets absorbed nicely by the rice and allows the loaf to have a nice jus when it’s just out of the oven. That jus will disappear, though, if you have any leftovers – the loaf will reabsorb it, keeping your next servings tender.

Ready to bake.

Moose Loaf

1 lb ground moose meat
1 cup cooked rice
1 small onion
1 cup milk
1 egg
3-5 tsps dried herbs
1 Tbsp Worcestershire sauce or 3 Tbsps HP Sauce
salt and pepper
a clove (or three) of garlic (optional)

Combine ingredients, place in a greased loaf pan, and cook at 325° F for 45 minutes to an hour.

Out of the oven.

I count myself lucky that I’ve had more than my share of humanely raised and wild meat. I think it’s helped me avoid the disconnect between food and its origins that is so ubiquitous in this culture. I know that not everyone has access to food from the sources I’ve had and that for many, ethical eating means vegetarian or vegan eating. I do believe that choosing to eat meat responsibly can be an ethically sound choice and Hank Shaw’s essay is a great explication of how that may be.

FFWD – (Not) Cinnamon-Crunch Chicken

Chicken atop brown rice vermicelli.

Sometimes the stars don’t align when I’m planning to make a recipe. It’s not surprising that this might happen occasionally while participating in a weekly cooking group. This week’s French Fridays recipe, Cinnamon-Crunch Chicken, sounds like a quick, interesting, weeknight dinner choice. Crumbled speculoos coating slices of chicken breast, with crème fraiche for richness – fifteen minutes from preparation to table. Sounds good, except for one thing – I wasn’t able to get any suitable gluten-free cookies and my usual gluten-eating victims taste-testers just weren’t available.

No matter. As Doristas like to say, French Fridays recipes are as much jumping off points as they are road maps. The cinnamon put me in mind of Moroccan flavours, so I marinated slices of chicken breast in safflower oil, lemon juice, cinnamon, sugar, cumin, paprika, and garlic. I left the chicken in the marinade for a couple of hours, then sautéed it in a little chicken stock. Meanwhile, I softened some brown rice vermicelli in hot water. When the chicken was done, I added a little more lemon juice to the pan and gave it a good stir. Then, I fried the vermicelli in the pan juices. Quinoa would have been a closer match for the traditional (and gluten-y) couscous, but I fancied the vermicelli tonight.

Marinating chicken.

As you can see, I’m not much of a recipe writer. I love the term au pif, which Dorie describes as cooking by instinct. It’s an everyday way of making a meal – using what’s on hand and changing the ingredients according to taste. Tonight’s chicken could easily be turned into a stew with the addition of lentils or chickpeas, vegetables and a bit more liquid. It could also be served over any number of starches or some lightly dressed greens. So, not a recipe at all, really.

Sautéing the chicken.

Sometimes, that’s what cookbooks are for – inspiration, not instruction. I learn a lot by following recipes exactly, using techniques and ingredients that are new to me, but the digressions are where creativity lies. I’m looking forward to reading about everyone’s experience with this week’s recipe proper and I’m quite sure I’ll find some other instances where things took a different turn.

You can find many blogged descriptions of this week’s FFWD recipe here: Cinnamon-Crunch Chicken.

You’ve still got a couple of days to check out my 100th post, too – I’ve got a little giveaway happening. The winners will be announced on Tuesday, September 20th.

Roasted Cherries

A dark green bowl full of cherries, atop a brown cutting board with a small pile of basil sitting in a patch of sun.

I never feel I’ve made the best use of summer fruits. No matter how many stone fruit or berries I eat, cook with or freeze, I feel that I could have done more. This year’s been no exception, especially since I was a little out of commission during the best weeks for berries. I did manage to roast cherries though. I’m going to be doing it again before they disappear for another year.

Roasting fruit brings out the sugars and deepens the flavour, without turning it into mush. It’s also a good way to use fruit that’s just past its peak. Mostly, though, it’s just good. I’ve used it in yogurt, over ice cream, and just right out of the jar. My next plan is to use it as a tart filling, perhaps with custard. If I were the sort of person to make cocktails, the syrup would make a great addition. I suppose you could also stir it into soda water. Something like this salad would be really lovely, too.

I sort of improvised these, based on two sources: the kitchn‘s roasted cherry recipe and 101 Cookbooks‘s roasted strawberry recipe.

The cherries, roasted.

I whisked together equal parts of maple syrup and olive oil, with a little bit of sea salt. I then added about a 1/8 tsp. nutmeg and four shredded basil leaves. I tossed the cherries in this and then roasted them at 450° for ten minutes, then added a couple of tablespoons of cognac and put them back in for another five minutes. After they’d cooled, I removed the pits. The cherries keep for a few days in the fridge and freeze well. Slow-roasting is another great method for these, too.

I’m sort of curious to see what would happen if instead of basil and nutmeg, I used a little bit of cocoa powder. Maybe I’d leave the nutmeg in. I’d love to hear your ideas for other flavours that would work well with these, or your experiments with roasting other kinds of fruit.

A closer view of the roasted cherries.

A Childhood Favourite, Improved

Once I’d tasted the Paris Mushroom Soup from last week’s French Fridays With Dorie assignment, I realized that my previous experiences with canned mushroom soup had unfairly prejudiced me against all mushroom soups. Then, my thoughts turned to the one mushroom dish that I could tolerate when I was small, Tuna Rice Casserole. Though it was made with canned mushroom soup, I loved it. Which started me wondering how much better this casserole could be, if it were made with the leftovers of a really good mushroom soup.

I’d cooked a full recipe of the soup, thinking we’d have enough for two meals and another meal’s serving to freeze. Instead, I came up with this recipe:

Tuna Rice Casserole

4 cups cooked brown rice
2 cups grated aged Cheddar (I used Dubliner) mixed with ¼ cup grated parmesan
2 thinly sliced scallions (all but dark green parts)
2 tablespoons finely chopped parsley
1 clove finely chopped garlic
2 cans tuna (in water), drained
2 cups homemade mushroom soup (I used Dorie Greenspan’s Paris Mushroom Soup)
2 tablespoons crème fraiche
1 teaspoon crumbled dried sage leaves
Salt and pepper to taste

Set aside a ½ cup of the cheese. Butter an 8X8 baking dish.. Preheat the oven to 350 °.

Mix the scallions, parsley, garlic and tuna with the rice. Then, stir in 1½ cups of cheese.

In a separate bowl, whisk the crème fraiche into the soup, then stir in the crumbled sage leaves. Stir the soup mixture into the rice mixture. Season with salt and pepper and give the mixture a final stir, then pour into the baking dish and smooth with a spatula. Top the casserole with the reserved cheese and bake for 30 minutes. If you like, you may run the casserole under the broiler for a minute or so to brown the cheese.

Variations: If I’d had more mushrooms on hand, I would have browned some more sage in butter, then sautéed a ½ cup of sliced mushrooms to add to the casserole. You could omit the scallions and sauté some finely chopped shallots with the mushrooms instead. You could also add bread crumbs (gluten-free or no) to the topping, if that’s your thing. Or you could use different herbs or cheeses. And of course, you could substitute another sort of dairy for the crème fraiche (or leave it out altogether).

It’s been at least a decade since I’ve had this dish, but I’m positive that this version is an improvement on the original. I suppose it’s ironic that I gave the Paris Mushroom Soup this treatment, since many people in the cooking group have been remarking what a healthful, low fat antidote the soup has been to all the excesses of December. But, I just had to make it. You could serve it with a salad, though, it pairs nicely.