Baking Chez Moi – Bûche de Noël

buche de noel

My mother’s sister, Lorraine, always brought a bûche de Noël to Christmas dinner. They were traditional chocolate logs from a bakery, but I remember them as being rich, delicious, and perfect. She died when I was an adolescent and bûche de Noël was only an occasional part of our holiday celebrations thereafter, but they’ve been a symbol of the season for me ever since.

I’ve always wanted to make one, so I was happy that one of the recipes chosen for our second month of baking through Baking Chez Moi was Dorie’s Gingerbread Bûche de Noël.

There are a lot of steps in making this dish, but some of the most intimidating parts of the process are also surprisingly easy. The pecan praline wasn’t at all difficult, the cream cheese filling was a snap to whip together, and the marshmallow icing was quite straightforward, once I’d braced myself for the task of pouring hot liquid sugar into the bowl of a running mixer.

My particular Waterloo on this dessert was the making of the sponge. I can’t seem to get sponge cakes quite right. This one didn’t turn out horribly and was quite tasty, but as you can see in the photo below, the cake is about half the height it should be. The batter deflated a lot more than it should have when I folded the butter mixture in. I guess it’s just a matter of getting some more practice, but I admit I was disappointed.

Slice

Luckily, the filling and icing made the bûche look beautiful, even with the imperfections in the cake. I’m going to try again with sponge cake and I think one of my few resolutions for 2015 will be to conquer the roulade. Next year’s bûche will be looking much prettier, I swear.

You can find the rest of the Tuesdays with Dorie crew’s entries on this recipe here: Bûche de Noël. And you can find more Tuesdays with Dorie catch up posts at this link.

Whipped Shortbread and Sucre à la Crème for French Fridays

Shortbread

For the third year in a row, the French Fridays with Dorie crew has exchanged Christmas cards. In the first two years, a few of us have included recipes along with the cards and this year, we’ve made it into a full-fledged virtual recipe exchange. I’ve been receiving cards and recipes from Doristas from around North America and around the world and it’s been nice to come home to a mailbox stuffed full of good wishes over the last week or two. Thanks to Alice, Christy, and Candy for making this such a special event.

We were asked to share one (or more) of the recipes we were sent, or to share the one we included with our card. Because I sent my cards out a bit late, I chose the latter option.

Most of my mother’s family recipes, handed down to her by her mother in a black, coil-bound notebook, have been in storage since my parents moved. So, for the last two years, we’ve been baking other people’s family recipes at Christmastime. Some of the best have come from my mother’s friend Gina, an incredibly creative person. She gardens prolifically, propagating dahlias and fig trees (both of which are now in my yard, thanks to her), and enough produce to feed her extended family and many of the members of her branch of the Catholic Women’s League, too. She bakes, cooks, volunteers, and does any number of other things well. My mother finally got Gina’s shortbread recipe this year, so I’m passing it on to you.

Whipped Shortbread

Bea Hartel/Gina Alary

1 lb butter
½ cup cornstarch
1 cup icing (confectioner’s) sugar
3 cups flour

Beat all ingredients together until consistency of whipped cream.
Drop on greased cookie sheet. (with teaspoon) Press down gently, make edges round if too jagged. Red or green cherries on top.
Bake at 350 for 15 minutes.
Makes 5 – 6 dozen.
Enjoy!

Now, when my mother got the recipe, it was much simpler than this. These ladies come from a generation in which they expect you’ll already know how to go about making cookies. My Mom added some instructions, which you can see above.

I want to elucidate just a little bit more. I whip the butter in my stand mixer first, until it’s light and fluffy. Then, I sift the rest of the ingredients into the bowl of the mixer and run the mixer on low for a bit, just so the dry ingredients don’t go flying everywhere, before bringing it up to medium-high until the dough reaches the consistency of whipped cream. If you’re using the cherries, it’s best to halve or quarter them first. If you prefer not to use glacé cherries, decorate them with something with a little more heft than sprinkles or sanding sugar and keep it simple.

There is also an alternative to the drop method of forming the cookie. You can dust your hands with cornstarch, quickly and gently roll teaspoonfuls of the dough into balls, and press them down with a floured fork (just as you would an old fashioned peanut butter cookie). Then, instead of glacé cherries, you can decorate them with dragées, sprinkles, sanding sugar, edible glitter, or sugar stars. They won’t be quite as melt-in-the-mouth, but they’re still delicious.

And, since I wasn’t able to make any of the Dorista recipes I received for this post, I’m going to update a family recipe that I shared in 2011. Sucre à la crème is a French Canadian favourite that my mother’s family has been making for generations. There are as many versions as family members, it seems, and I’ve finally come up with my own favourite formulation. My mother’s family is Franco-Manitoban, so they use brown sugar in place of the maple sugar that’s more common in Québécois versions. Feel free to experiment with maple sugar if it’s easy to come by for you. You can see the versions I shared in my original post here.

Now, this isn’t the sort of fudge we usually think of in North America, in which you avoid the formation of sugar crystals so that it’s silky smooth. This fudge is more like Scottish tablet, in which the sugar crystals are part of the pleasure. So, you don’t have to worry about sugar crystals forming on the pan and stirring is encouraged.

sucre a la creme

Teresa’s Sucre à la Crème

3 1/2 cups light brown sugar
1/2 cup white sugar
2 cups whipping cream
1 1/2 tsps vanilla

Butter an 11 X 7-inch pan, metal or heat-proof glass work equally well.

Combine the sugars and whipping cream, whisk together until well-blended and cook over medium-low heat, stirring often, until the mixture starts to thicken, sugars the spoon (a metal one is best), and forms a ball when dropped into a dish of cold water. The lower end of the soft ball stage (234-236°F) is just right. Remove the pan from the heat and stir vigourously, adding the vanilla when the candy is just beginning to stiffen. When the scrapings are becoming solid, it’s time to pour the candy into the prepared pan. Chill in the fridge for several hours or overnight, then cut into small squares. It keeps for a week in the fridge or several months in the freezer. Bring to room temperature before serving.

I made some sucre à la crème yesterday, after sharing a Boxing Day meal with my parents. I left most of it there for my Mom to share out with the family and took a small box home to share with a Québécoise friend who hasn’t had the genuine article in some time. There was also a bit for Kevin and me, but that seems to have disappeared. The shortbread is long gone, too, shared at all my parents’ holiday gatherings and even at a cookie swap.

If you try either of these recipes, I’d love to see your results – find me on Facebook, Twitter, or Instagram and share a photo.

I’d like to wish everyone the happiest of holidays and a wonderful 2015. I also want to thank my fellow Doristas for making my weekends brighter with our weekly virtual get-togethers. I’m looking forward to the final few months of Around My French Table with all of you.

You can find the rest of the Dorista recipe exchange fun here: Holiday Card/Recipe Exchange or Makeup.

Holiday Book Reviews – 300 Best Homemade Candy Recipes

Fudge

I don’t know about you, but this is the week when my Christmas shopping always begins in earnest. So, for the second year in a row, I’m bringing you three book reviews to help you cross a few names off your list.

I received a review copy of 300 Best Homemade Candy Recipes from Robert Rose Inc. Nevertheless, all opinions in the following post are my own.

My mother’s aunts were tiny women with very strong arms. That’s because they were raised in an era without stand mixers or food processors to help them in the kitchen. One of the things they used their strength to make, in quantities great enough for the whole extended family, was the French Canadian specialty sucre à la crème. This simple fudge was something we looked forward to at Christmastime and my great-aunt Leona taught me how to make it when I was a teenager. Until very recently, sucre à la crème and truffles were the only candy recipes in my repertoire.

Enter Jane Sharrock’s 300 Best Homemade Candy Recipes. I’ve been curious about candy making for some time now, so when I got the opportunity to review this book, I jumped at it. Sharrock’s cookbook covers most of the categories of candy you can find in a kitchen and some, like lollipops, that I never dreamed you could make at home.

Sharrock began collecting candy recipes when her mother gave her a treasured pressure cooker that was perfect for making candy, along with a small booklet of candy recipes. Sharrock went on to try to preserve the candy recipes from earlier generations, which lends her cookbook an air of nostalgia. Reading through the recipes, I get the sense that these candies populated the tables at church bazaars and community potlucks, in the days before mass-produced sweets took their place.

This means that for the most part, the recipes use ingredients that you’d easily find at the supermarket. The few specialty items, like candy coating, can be found at baking supply stores. But, just because these recipes are old fashioned, doesn’t mean that they’re all unsophisticated. The pralines, divinity, and nougats would make a sweets table shine and even recipes that were thought of as homey, like taffy, seem very impressive these days. You won’t learn skills like tempering chocolate or making marshmallows from scratch, but once you’ve mastered this book, taking your candy making to the next level will be a breeze.

What I like best about this book is that it teaches you a wide range of candy making skills, includes troubleshooting advice and photo demonstrations, and even guides you through the steps you’d need to take if you were trying to recreate a favourite candy without the recipe.

I think after working through some of Sharrock’s categories of sweets, next year’s holiday treat boxes will be the best they’ve ever been. In the meantime, I’m going to give Sharrock’s tuxedo fudge another try. I forgot to put the coconut into the bottom layer and added it to the top, instead. As a result, the bottom is creamy, but the top is a bit dry. Following the instructions should make my next attempt perfect. Thanks to Robert Robert Rose, Inc., I’m sharing the recipe with you. If you’re still on holidays next week, it would be a great way to start filling your freezer with goodies before the New Year’s resolutions set in.

Boxed

Tuxedo Fudge

Makes about 3 1/2 lbs (1.75 kg)

8- or 9-inch (20 or 23 cm) square pan, lined with parchment or buttered
2-quart heavy saucepan
Candy thermometer

Coconut Layer
2 cups (500 mL) granulated sugar
Pinch salt
1/2 cup (125 mL) butter or margarine
1/4 cup (60 mL) light (white) corn syrup
1/2 cup (125 mL) milk
1 tsp (5 mL) vanilla extract
1/2 cup (125 mL) sweetened flaked coconut

Chocolate Layer
2 cups (500 mL) granulated sugar
2 tbsp (30 mL) unsweetened cocoa powder
Pinch salt
1/2 cup (125 mL) butter or margarine
1/4 cup (60 mL) light (white) corn syrup
1/2 cup (125 mL) milk
1 tsp (5 mL) vanilla extract
1/2 cup (125 mL) pecans, in large pieces (optional)

1. To make the coconut layer: In heavy saucepan over low to medium-low heat, bring the sugar, salt, butter, corn syrup and milk to a boil, stirring until the sugar dissolves and the mixture begins to boil. Cover and cook 2 to 3 minutes to dissolve the sugar crystals on the sides of the pan. Remove the lid. Cook, stirring only as needed to prevent scorching, to the soft ball stage (234°F to 240°F/112°C to 116°C, with 236°F/113°C recommended).
2. Remove from the heat. Cool slightly, about 10 minutes. Add the vanilla. Beat by hand until the candy begins to thicken and lose its gloss. Stir in the coconut. Spread the candy into the prepared pan. Cool at room temperature while making the chocolate layer.
3. To make the chocolate layer: In a clean saucepan, combine the sugar and cocoa until well blended. Add the salt, butter, corn syrup and milk. Bring to a boil over low to medium-low heat, stirring until the sugar dissolves and the mixture begins to boil. Cover and cook 2 to 3 minutes to dissolve the sugar crystals on the side of the pan. Remove the lid. Cook, stirring only as needed to prevent scorching, to the soft ball stage (234°F to 240°F/112°C to 116°C, with 236°F/113°C recommended).
4. Remove from the heat. Cool slightly, about 10 minutes. Add the vanilla. Beat by hand until the candy begins to thicken and lose its gloss. Stir in the pecans, if desired. Spread the chocolate layer over the coconut layer in the pan. Cool and cut into squares. Store in an airtight container.

Gift Giver’s Guide: For the sweet tooth, the nostalgic, and the cook who wants to extend their gifts from the kitchen beyond cookies and squares.

You can find the rest of this year’s reviews here and here..

Holiday Book Reviews – Plenty More

/home/wpcom/public_html/wp-content/blogs.dir/ba0/6971813/files/2014/12/img_3269.jpg

I don’t know about you, but this is the week when my Christmas shopping always begins in earnest. So, for the second year in a row, I’m bringing you three book reviews to help you cross a few names off your list.

I received a review copy of Plenty More from Appetite by Random House Canada. Nevertheless, all opinions in the following post are my own.

It’s only been in the last couple of decades that North Americans have rescued vegetables from their role as either abstemious “rabbit food” or underloved sidekick. Even today, many restaurants use vegetables more as a garnish than a true part of the meal on the plate. As much as I love a good steak, I’ve always craved more than a tiny pile of over-steamed carrots to accompany them. I want vegetables to receive the same care and attention, and creativity, that is brought to the proteins and starches in my meal.

At home, there are plenty of great cookbooks that celebrate proteins, side dishes, and desserts, but until recently, scant attention has been paid to vegetables. Yotam Ottolenghi, along with writers like Deborah Madison and Barbara Kafka, has changed all that.

I’ve been a fan of Ottolenghi since I discovered his Guardian column on vegetarian cooking a number of years ago. Not only did he make vegetables the centre of attention in his dishes, but he used them as a canvas for many of the herbs and spices that were just coming to the attention of British, Australasian, and North American eaters. Middle Eastern flavours like za’atar and harissa were showing up with the proteins on restaurant menus. Ottolenghi’s column, then his cookbook Plenty, sent vegetarians and vegetable-lovers to the spice rack, too.

When I found out he was coming out with a sequel to Plenty, I was excited. My copy has seen a lot of use and I was ready for more recipes. Unlike Plenty, which is organized by vegetable type, Plenty More‘s chapters cover techniques, from tossing to roasting to baking. It’s an evolution from exploring vegetables to becoming so comfortable with them that experimentation begins.

When I got my copy of Plenty More, I took the Roasting chapter for a spin, first thing. In the cold damp of a Vancouver winter, roasted meals warm the kitchen and the belly. I started with Squash with Cardamom and Nigella Seeds, which I served with a Moroccan tagine. Then, I tried the recipe I’m sharing with you today.

One of the reasons I think people believe vegetables are boring is because we’re afraid to work with them as vigourously as we do a piece of meat. Even roasted vegetables can be a bit wan if you don’t allow them to brown and caramelize. That’s one lesson Plenty More brings home. Both the recipes I tried allow the dish to develop the smoky, jammy flavours that come only when you roast something fearlessly.

This recipe gives you perfectly tender carrots with a crust of caramelized honey and accompanies it with a fresh yogurt and tahini sauce that provides a wonderful counterpoint to the dish.

/home/wpcom/public_html/wp-content/blogs.dir/ba0/6971813/files/2014/12/img_3270.jpg

Honey-Roasted Carrots with Tahini Yogurt

Serves Four

scant 3 tbsp/60 g honey
2 tbsp olive oil
1 tbsp coriander seeds, toasted and lightly crushed
1 1/2 tsp cumin seeds, toasted and lightly crushed
3 thyme sprigs
12 large carrots, peeled and cut into 3/4 by 2 1/2-inch/2 by 6-cm batons (3 lb/1.3 kg)
1 1/2 tbsp cilantro leaves, coarsely chopped
salt and black pepper

Tahini yogurt sauce
scant 3 tbsp/40 g tahini paste
2/3 cup/130 g Greek yogurt
2 tbsp lemon juice
1 clove garlic, crushed
salt

Preheat the oven to 425°F/220°C.

Place all the ingredients for the tahini sauce in a bowl with a pinch of salt. Whisk together and set aside.

Place the honey, oil, coriander and cumin seeds, and thyme in a large bowl with 1 teaspoon salt and a good grind of black pepper. Add the carrots and mix well until coated, then spread them out on a large baking sheet and roast in the oven for 40 minutes, stirring gently once or twice, until cooked through and glazed.

Transfer the carrots to a large serving platter or individual plates. Serve warm or at room temperature, with a spoonful of sauce on top, scattered with the cilantro.

/home/wpcom/public_html/wp-content/blogs.dir/ba0/6971813/files/2014/12/img_3271.jpg

Once you’ve tried this dish, I suspect that you’ll be buying a copy for yourself as well as the person you were shopping for. I love that I can adapt most of these recipes easily for my vegan partner, while making the meat-eaters at my table forget that they’re being served a vegetarian meal.

Gift Giver’s Guide: For the vegetable lover, the curious cook, the flavour-seeker, and anyone who needs convincing that vegetables can be the star of the show.

Come back Tuesday for a review of a book that will fill your holiday sweets table with goodness.

Holiday Book Reviews – The Healthy Slow Cooker

Closeup

I don’t know about you, but this is the week when my Christmas shopping always begins in earnest. So, for the second year in a row, I’m bringing you three book reviews to help you cross a few names off your list.

I received a review copy of The Healthy Slow Cooker, Second Edition from Robert Rose Inc. Nevertheless, all opinions in the following post are my own.

I know that I post a lot about French food and desserts around here, but most of the time I try to cook healthy meals. It might seem challenging to do so when trying to balance the needs of an omnivore with a vegan-ish, gluten-free eater, but it isn’t really. We never ate very much bread with our meals and there are plenty of great grains that can satisfy our carbohydrate requirements. As for protein, I’ve always been of the mind that meat and dairy shouldn’t be the primary focus of weekly meals, so we were already eating a largely plant-based diet before my partner started his move toward veganism.

What can be challenging is making sure we have enough variety in our diet, so that we’re covering all the nutrient groups as we eat across the week. It’s easy to get into a routine, making the same few dishes over and over, with a little experimentation on the weekends. Much better to find ways to change things up more frequently.

One of my favourite ways to do that is to make use of my slow cooker. Not only can I fill it and forget it for the workday or overnight, having a large slow cooker means that I can make recipes in quantities that allow me to package and freeze several meals’ worth.

Unfortunately, a lot of slow cooker cookbooks focus on heavy meals that cycle through a limited roster of protein-starch-vegetable combinations. So, I was happy to find The Healthy Slow Cooker has a variety of recipes, both meat and plant-based, with a focus on using nutrient-dense ingredients. The best part is that all the recipes are gluten-free.

Judith Finlayson is well-known to Canadians as a writer and editor, but has become especially famous for her prolific publication of useful cookbooks. Many of them are slow cooker cookbooks, focusing on different health needs or dietary practices. The Healthy Slow Cooker is in its second edition, which came out earlier this year. This means that the recipes are updated, but more importantly, the nutrition tips and health information are more current now, too.

Those tips and information boxes, called “Mindful Morsels” and “Natural Wonders” are a welcome feature of Finlayson’s book. There are the kinds of information you might expect, like the sections breaking down the nutritional benefits of mushrooms or bell peppers, which help bring home the reasons for eating a wide variety of foods. But there are also sections that go into more depth, explaining the role of elements like fatty acids and micronutrients in our diets, why some foods which should always be bought from organic sources, or shopping with environmental concerns and sustainability in mind.

The recipes come from a number of culinary traditions, including Caribbean, Indian, Middle Eastern, and Asian flavours. They also make use of common ingredients, without ignoring some of the ingredients (think edamame or sunchokes) that have been showing up more and more in markets. There are lots of vegan or vegetarian dishes, while many of the recipes that weren’t explicitly vegetarian or vegan could easily be converted, like her Sweet Potato Coconut Curry. And most of the truly meat-based meals are freezable, ready for those times when I’m eating solo.

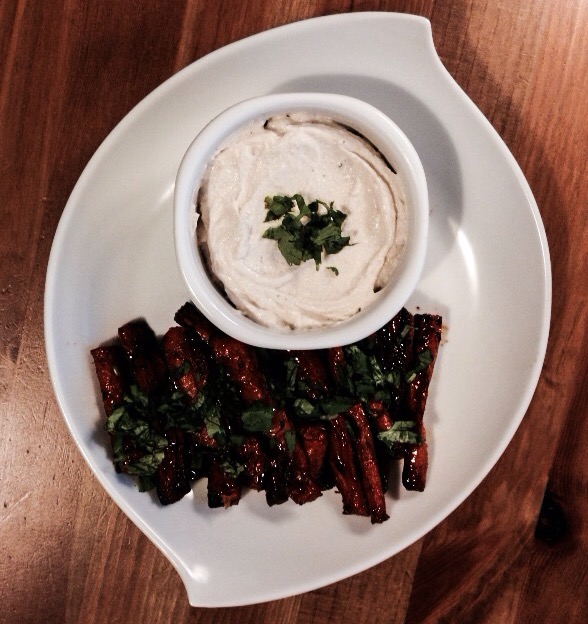
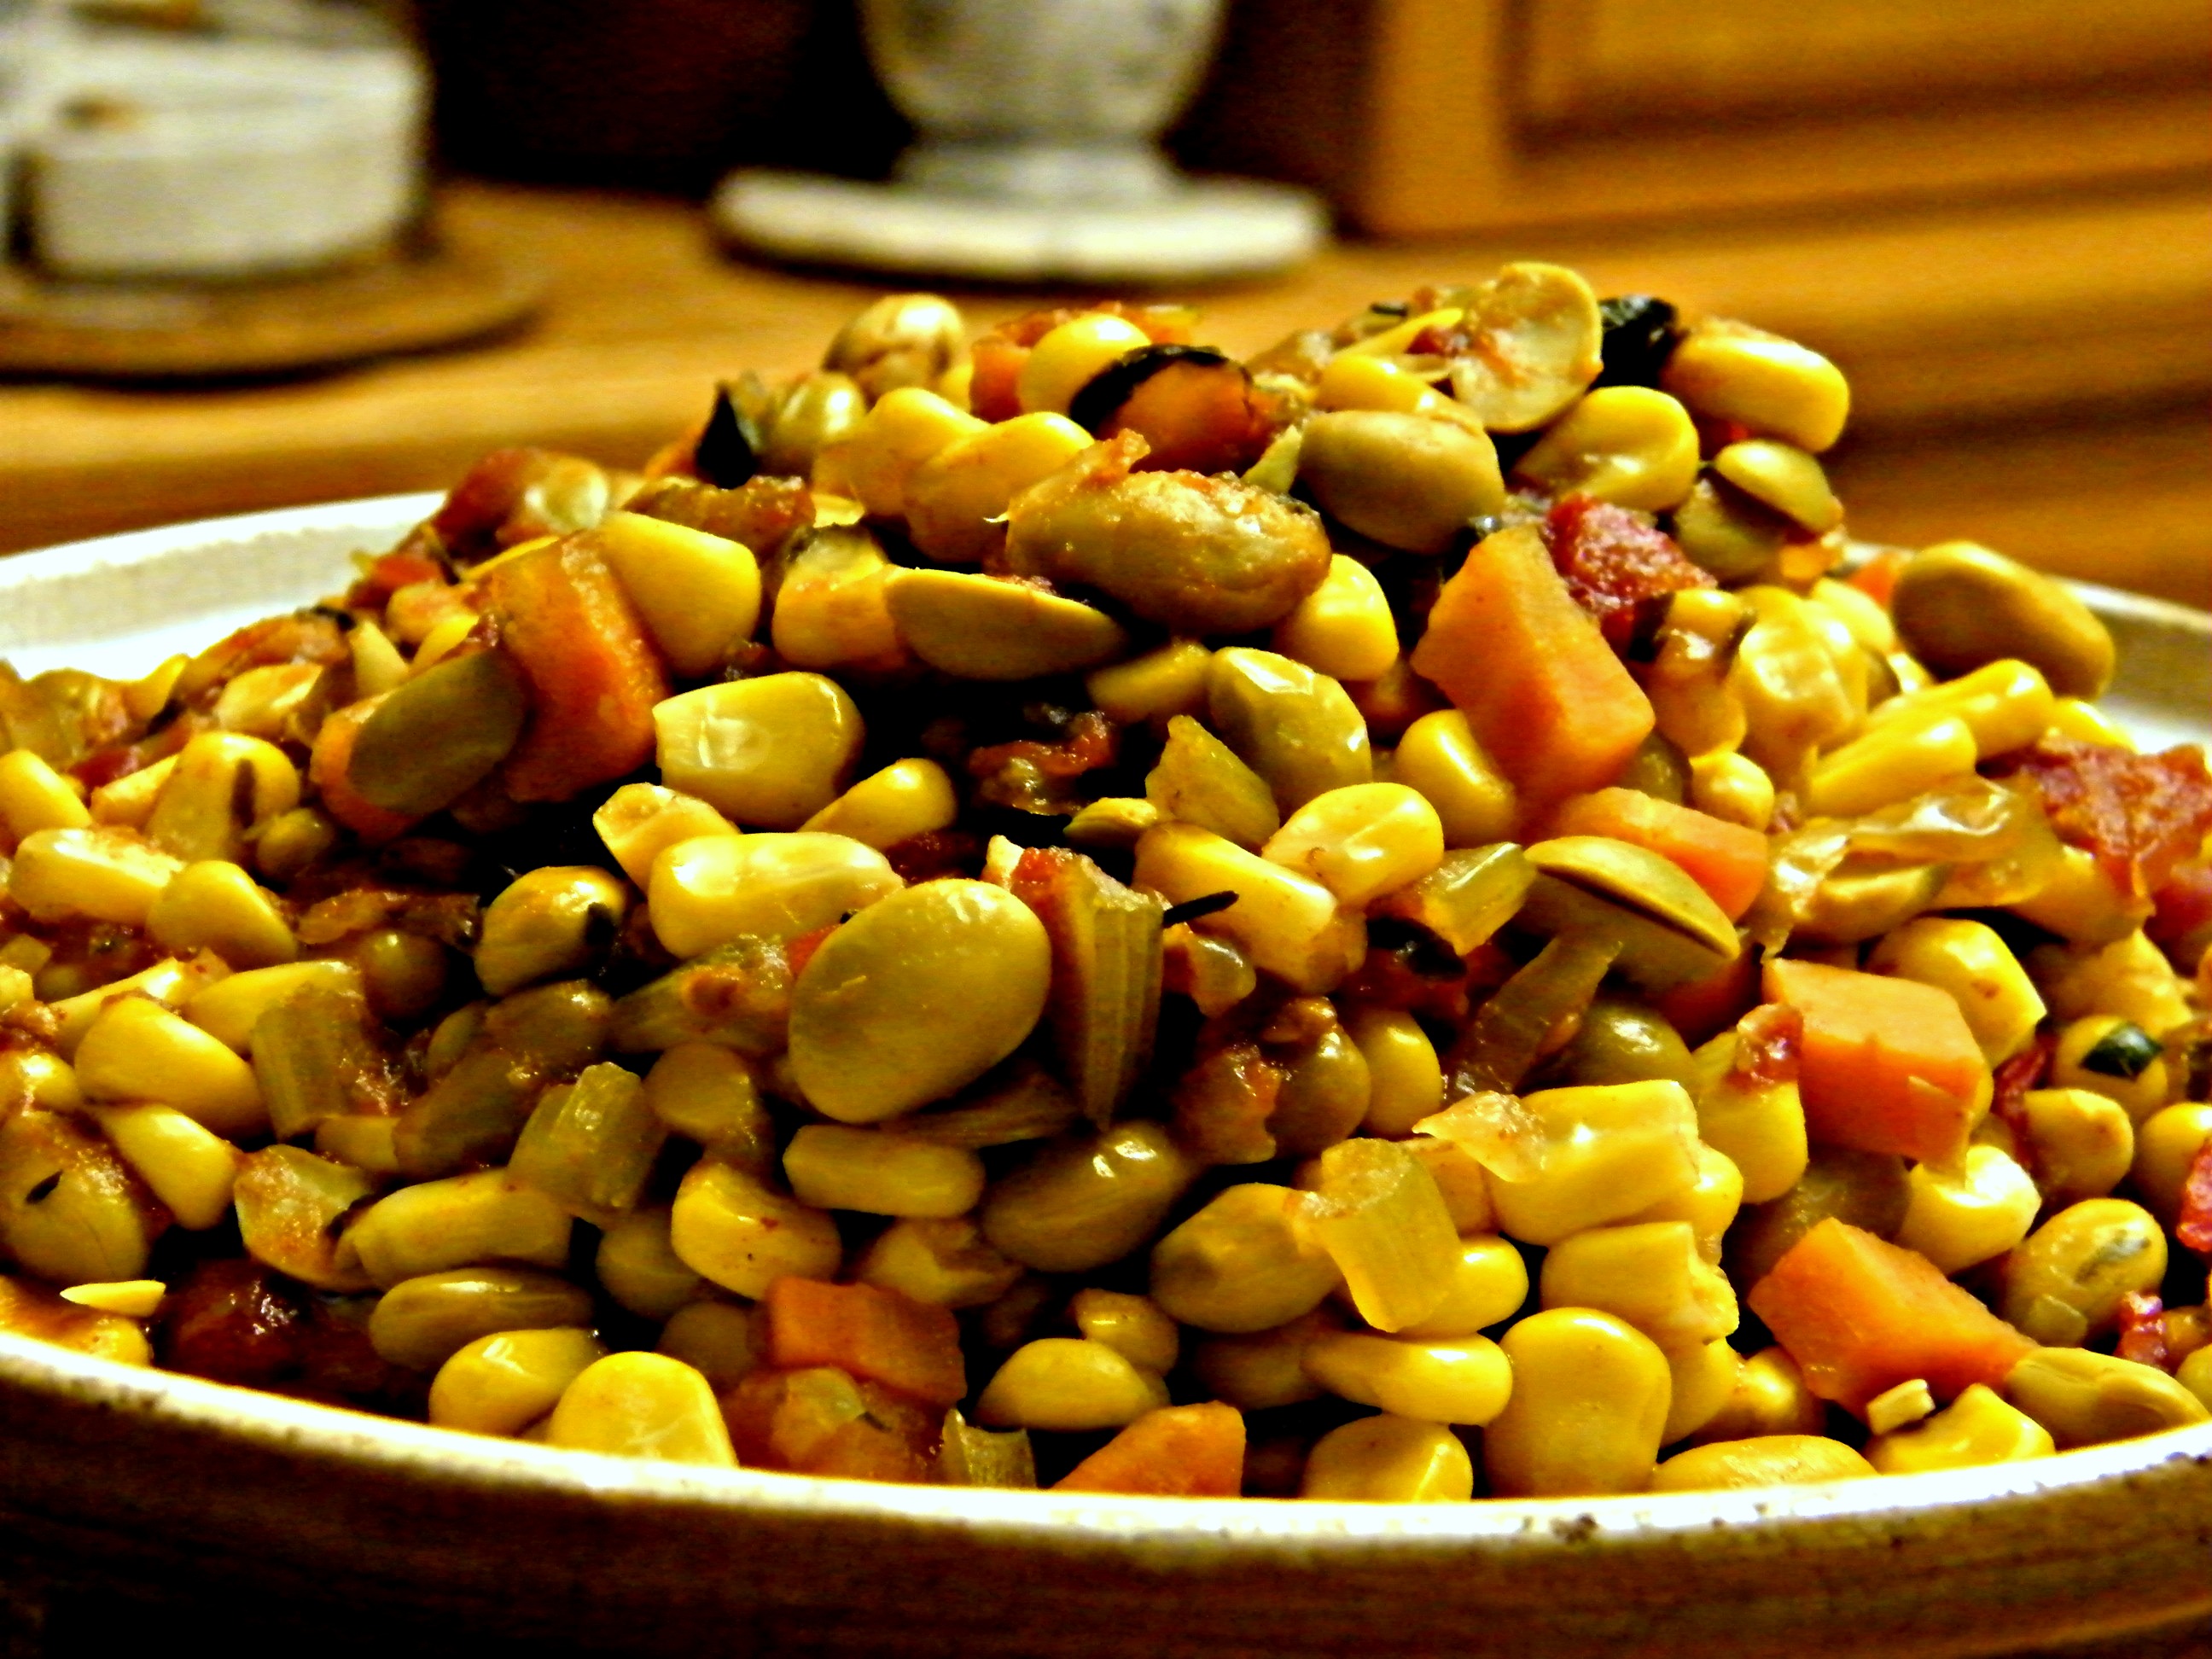
When I was deciding which recipe to share with you, I thought about how much of a boon fresh, vibrant food is on the winter table. Even though summer vegetables are long gone, many of them are available frozen, almost as nutrient-rich as when they were picked. Finlayson’s take on succotash was exactly what I was looking for, incorporating corn, roasted red peppers, tomatoes, and edamame with the warmth of paprika. It’s bright on the table, filling, and a good match for many different main courses. Best of all, it’s freezable, letting you enjoy it across the coldest months. (If you make it in summer, you can use garden-fresh ingredients and freeze some of it for winter.)

New Age Succotash

reprinted with permission from Judith Finlayson’s Healthy Slow Cooker

Serves 8

1 Medium to large (3 1/2 to 5 quart) slow cooker

1 tbsp (15 mL) olive oil
2 onions, finely chopped
4 stalks celery, diced
2 carrots, peeled and diced
4 cloves garlic, minced
1 sprig fresh rosemary or 2 tsp (10 mL) dried rosemary leaves, crumbled
1/2 tsp (2 mL) salt
1/2 tsp (2 mL) cracked black peppercorns
1 can (28 oz/796 mL) no-salt-added tomatoes, including juice, coarsely chopped
1 1/2 cups (375 mL) vegetable stock
4 cups (1 L) frozen shelled edamame
2 tsp (10 mL) paprika, dissolved in 2 tbsp (30 mL) water
4 cups (1 L) corn kernels, thawed if frozen
2 roasted red bell peppers, diced
1/2 cup (125 mL)finely chopped parsley leaves

In a skillet, heat oil over medium heat. Add onions, celery and carrots and cook, stirring, until softened, about 7 minutes. Add garlic, rosemary, salt and peppercorns and cook, stirring, for 1 minute. Stir in tomatoes with juice and vegetable stock and bring to a boil. Transfer to slow cooker stoneware.

Add edamame and stir well. Cover and cook on Low for 8 hours or on High for 4 hours, until mixture is hot and bubbly. Stir in paprika solution. Add corn, roasted red peppers and parsley and stir well. Cover and cook on High for 15 minutes, until corn is tender and mixture is heated through.

Variation
Spicy Succotash: For a livelier dish, stir in 1 can (4.5 oz./127 mL) mild green chiles along with the red peppers.

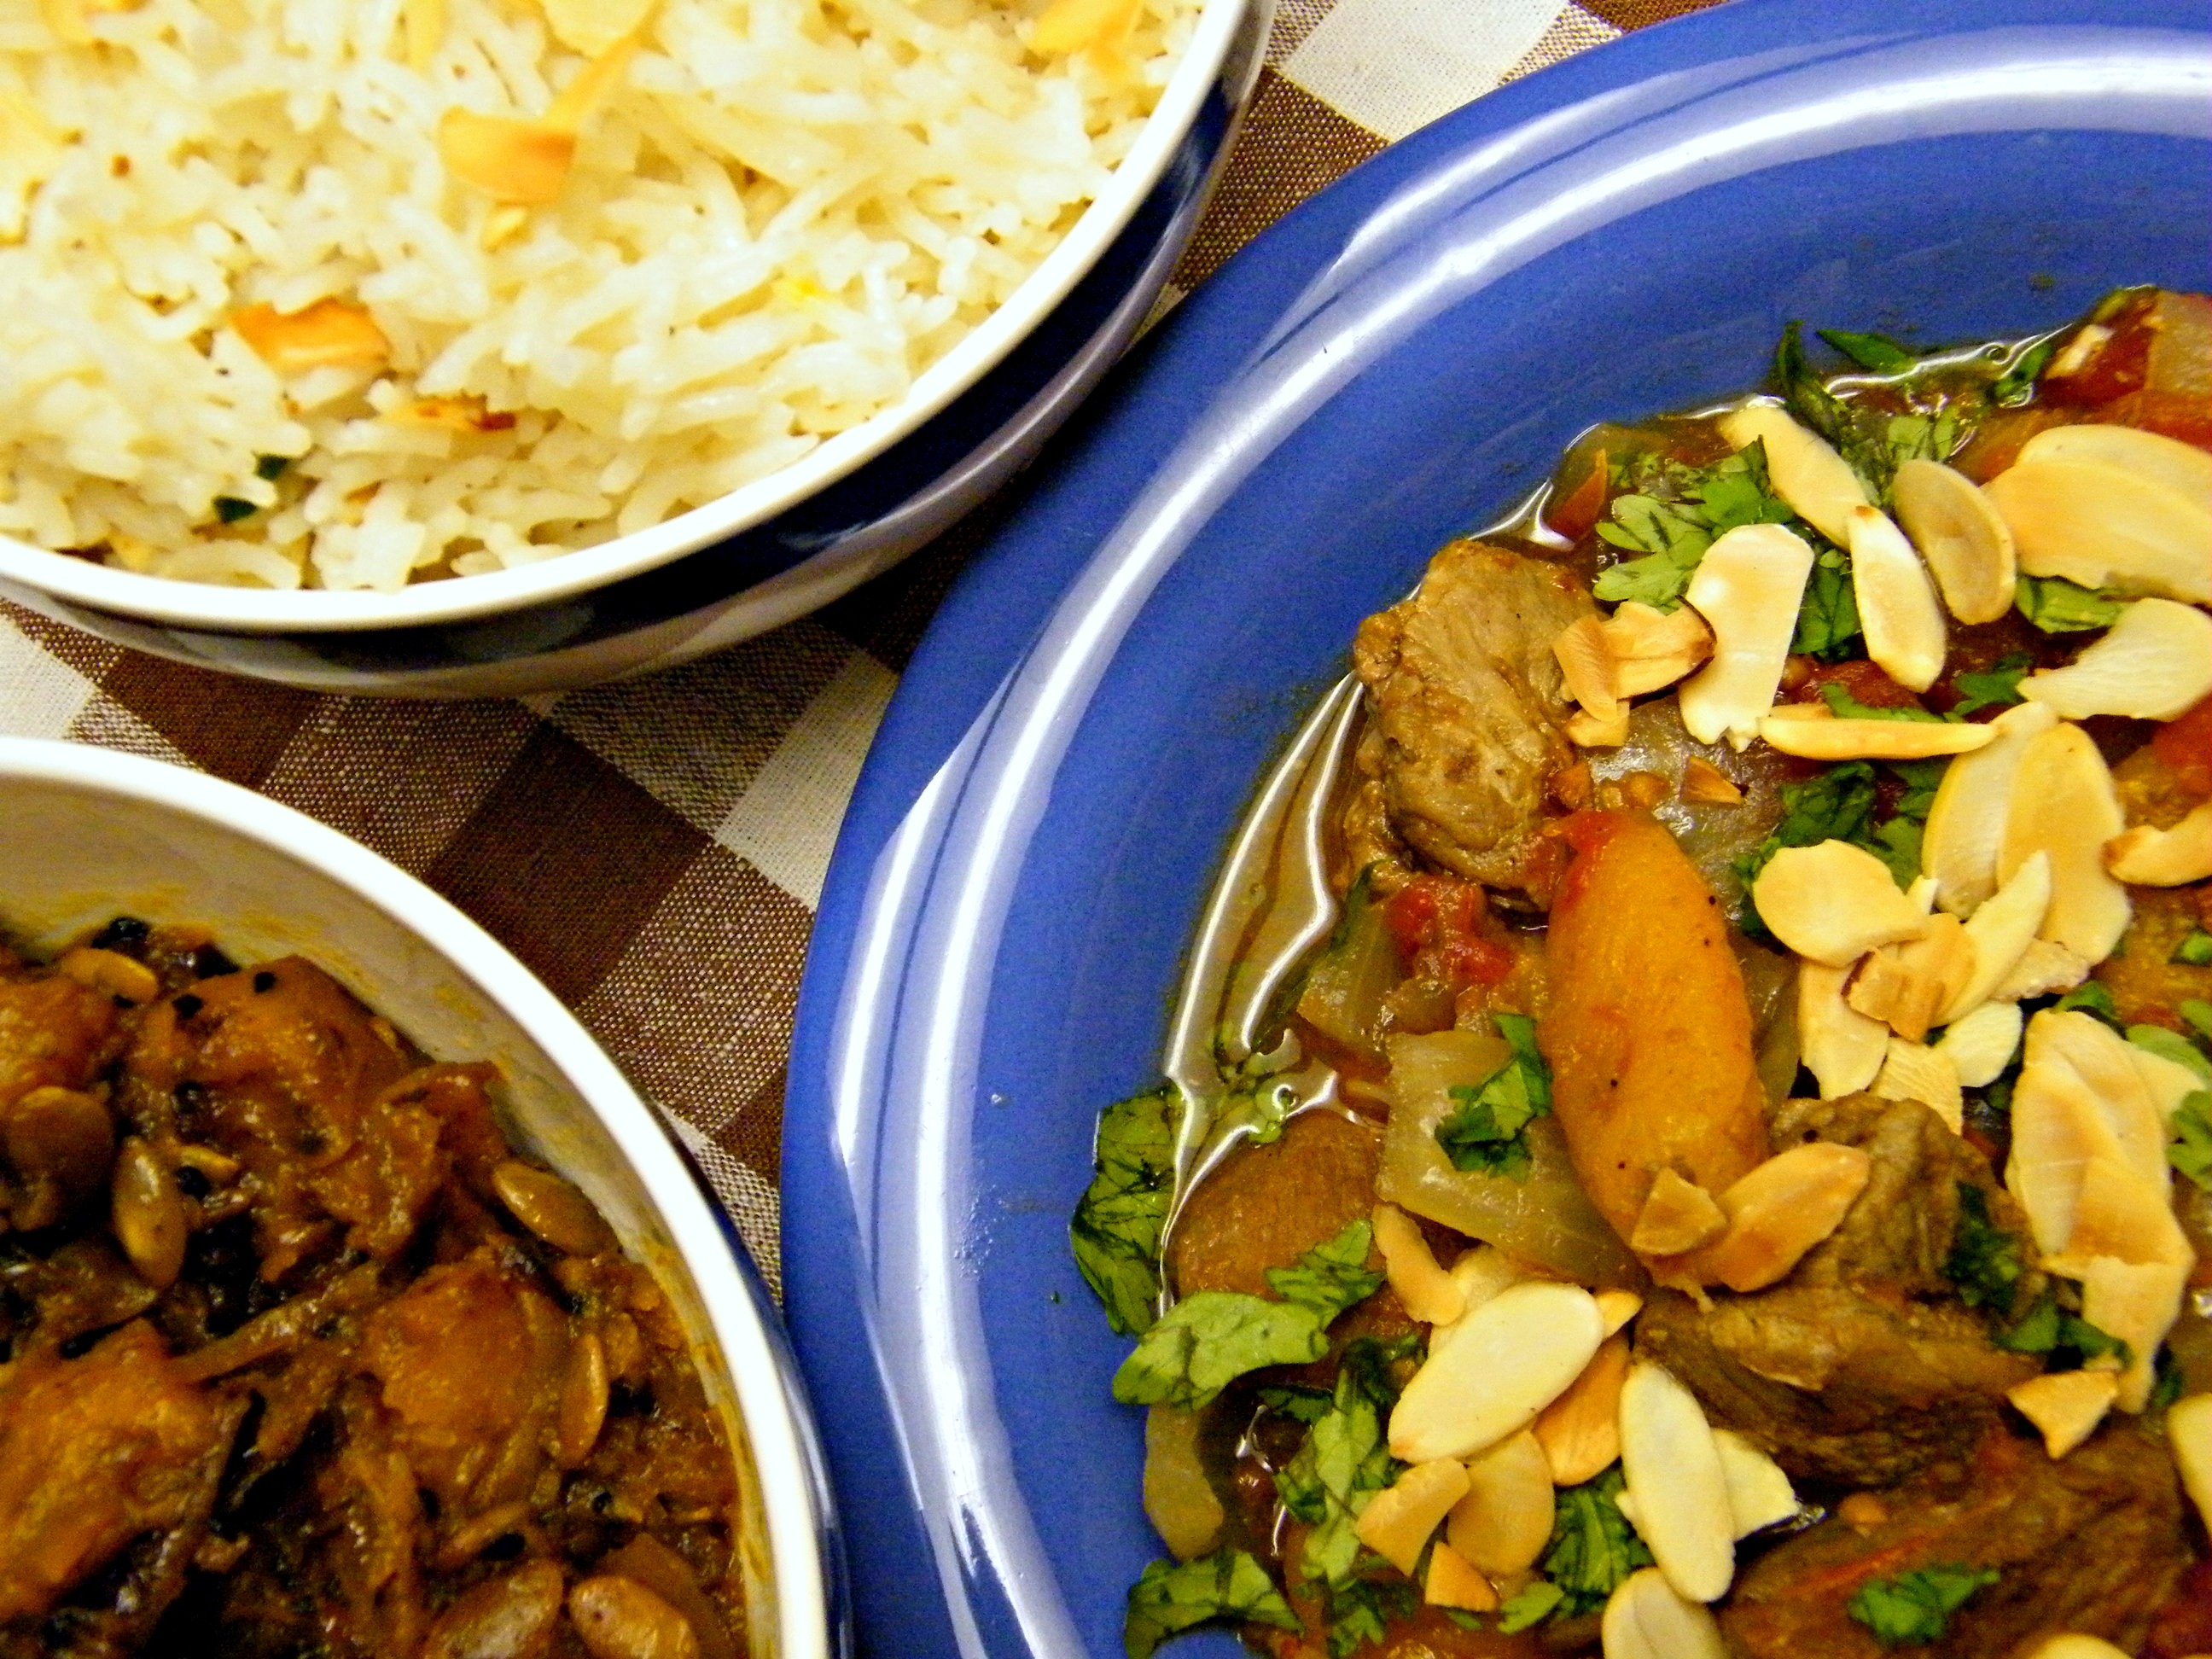
This is a terrific side for a braised tofu dish, or more traditionally, for a big platter of ribs. Finlayson includes a recipe for a corn and chile polenta in the cookbook, which would be a nice addition to either of these meals. Really, though, this dish would fit whenever you’d otherwise consider serving the usual boiled, steamed (or canned) vegetables.

I’ll be coming back to this cookbook often, both for the recipes and the information.

Gift Giver’s Guide: For the busy, the gluten-free, and those who want variety and flavour in their healthy menus.

Come back tomorrow for a review of a book that brings vegetarian eating to a new level.

FFWD – Orange & Olive Salad and Lamb & Dried Apricot Tagine

orange and olive salad

When it comes to the kitchen, December is a weird mix of ambition and ease for me. I make long lists of favourite dishes to make, along with new ones to try that usually involve a new skill to master. There are also many quick and easy meals, most easily forgotten, to accommodate all the rush and bustle (and more complicated works in progress) the holidays bring.

So, I was extra grateful to Santa’s Dorista elves for setting a schedule full of simple, delicious recipes. It’s been a good reminder that quick and easy doesn’t have to mean forgettable.

Orange & Olive Salad

Which brings me to this salad, almost as if I’d planned it. You can see how pretty it is in the photo at the top of the post and you can probably guess how easy it was to put together, too. What the photo won’t tell you is how delicious it was. The idea of orange, olive, and onion in a salad was a bit off-putting for a number of the French Fridays crew this week. But, one by one, almost everybody started posting that they’d loved it.

So, by the time I got around to making it this afternoon, I was pretty confident it was going to be good. Kevin, however, doesn’t get the benefit of Dorista social media chatter, so he was very skeptical when I set it down in front of him. He’s a good sport though. After assuring him that soaking the thinly sliced onion in ice water had rendered it mild and crispy, he dug in. And then ate the whole plateful, making it a hit for both of us. We’ll be having this again and I can hardly wait to introduce it to others. It’s an elegant, surprising dish that would have gone untried if it hadn’t been for this cooking group.

Tagine

Lamb & Dried Apricot Tagine

This dish was never in danger of going untried. I’ve loved Moroccan flavours since my university days, when I discovered the recipe for Moroccan Chicken Stew in the copy of Anne Lindsay’s Lighthearted Everyday Cooking that was a moving-out-on-my-own gift from my mother. I did make it a little easier, though, by cooking it in the slow cooker overnight, then letting it rest in the fridge until dinnertime. When I heated it up, I couldn’t believe that it was even more fragrant than when it had come out of the slow cooker. I served it with saffron rice and Ottolenghi’s Roasted Squash with Cardamom and Nigella, both headily aromatic dishes themselves. It made for a fantastic meal.

The next ten days are going to see a lot of cooking and baking, family visits and celebrations. But, if you have time, drop by over the weekend – I have three last minute shopper’s cookbook reviews for you, from Saturday through Monday. And a happy Chanukah to everyone who is in the midst of celebrating it.

Find links to the rest of the French Fridays crew’s posts on this week’s recipe here: Orange & Olive Salad. Then, see how everyone fared with the Lamb & Dried Apricot Tagine.

Kevin’s Vegan Hash

/home/wpcom/public_html/wp-content/blogs.dir/ba0/6971813/files/2014/12/img_3244.jpg

The Little Potato Company provided me with the potatoes used in this recipe. The recipe and all opinions expressed in the post are my own.

When I was given the opportunity to try The Little Potato Company’s creamer potatoes, I was happy to participate. The company started in Alberta, but now has farms across Canada and the US. They produce creamer potatoes exclusively, which are bred to stay small at maturity, with a thin, tender skin. I was also happy to learn their potatoes are non-GMO.

I spent the last few weeks boiling, baking, frying, and mashing the samples of the two varieties they sent me and I’ve been pleased with them in every application.

Last week, I shared a very meat-forward recipe using Blushing Belles. This week, I’ve got a vegan recipe for you, which uses their Yellow Fingerlings.

My partner, Kevin, wanted me to recreate the kind of breakfast that he’s had at the very few restaurants in town that serve gluten-free, vegan meals. I came up with this hash and he liked it so much, he let me name it after him.

Ingredients

Kevin’s Vegan Hash

Serves 2 generously as a main, 4 as a side

2-3 tbsp olive oil
1 small onion, finely chopped
2 large cloves of garlic, minced
2 small bell peppers, cubed
6 button mushrooms, cubed
12 Little Potato Company Yellow Fingerlings Creamer Potatoes, cubed
175 g extra firm organic tofu, cubed
a pinch of cayenne pepper
2 sage leaves, crumbled (or ½ tsp dried sage)
1 sprig fresh rosemary (or 1 tsp dried rosemary)
¼ tsp smoked paprika
½ cup Daiya Cheddar Style Shreds
salt and pepper

In a large, non-stick skillet or cast iron pan, heat 1 tablespoon of the oil over medium-low heat. Add the onions and salt generously. Fry, stirring occasionally, until the onions soften and start to brown. Add the garlic and turn down the heat to low. Continue to cook until the garlic has softened and the onions are completely browned. Season with pepper (and more salt if needed). Scrape into a bowl and set aside.

Add a little more oil, if needed, then heat the pan to medium-low and add the peppers. Cook until the peppers are soft and a little browned, stirring occasionally, adding a pinch of cayenne pepper when they’re nearly done. Season with salt and pepper, scrape into a bowl and set aside.

Add a little more oil, if needed, then heat the pan to medium-low and add the mushrooms, stirring occasionally. When they begin to release moisture, stir in the sage. When the moisture is fully reabsorbed, season with salt and pepper, scrape into a bowl and set aside.

Add a tablespoon of oil, heat the pan to medium-low and add the potatoes. Season generously with salt and pepper, add the rosemary sprig (or stir in the dried rosemary). Cook, stirring occasionally, until a fork pierces the potato cubes easily. If the potatoes are not fully browned, raise the heat to medium and continue cooking until they are. Check to see if more salt and pepper is needed, discard the rosemary sprig if you used it, then scrape into a bowl and set aside.

Add a little more oil, if needed, then heat the pan to medium-low. Add the tofu and dust the cubes with the smoked paprika, frying until the cubes are cooked through and well browned. Season with salt and pepper, then add the rest of the ingredients back into the pan, stirring until everything is well mixed and heated through.

Take the pan off the heat and add the Daiya shreds, stirring until they are well distributed and melted.

Check for salt and pepper, then serve immediately.

You can visit The Little Potato Company’s website for more recipes.

Baking Chez Moi – The Rugelach That Won Over France

Rugelach

I’ve made rugelach before, over at The Family That Bakes Together with my nieces, so I was curious to see how this recipe compared to that one. Those rugelach were filled with rich apricot lekvar, lots of cinnamon sugar, and a mix of fruit and nuts. My nieces also inadvertently rolled them along the short end, creating pinwheels which were huge – and a huge hit with everyone that tasted them.

So, I was curious to try Dorie’s chocolate version. I used a semisweet chocolate that was a little darker than was called for and substituted dried cranberries for the cherries, but otherwise stuck to the recipe. The dough was surprisingly easy to work with for something that soft, though getting the rolls started needed a little gentle help from my bench scraper. I left three of the rolls in the freezer and sliced and baked the other.

The oven I used seems to run a touch hot, so the rugelach were a bit browner on the bottom than I’d like. Next time, I’ll turn down the heat a touch and perhaps take them out sooner, too.

I was a little disappointed with them when I first tasted them – they seemed a bit dry and the flavours didn’t meld very well. But, the next day the leftovers were terrific. The flavour of the cream cheese dough became more pronounced and the filling was moist and delicious.

I still love the version we made for Baking With Julia best, but I think I’d like to have rolls of both kinds of rugelach in the freezer, to serve together. I’ll just bake this version a day ahead.

A very happy Chanukah to everyone who observes it! I hope these eight days are filled with food, family, and friends.

You can find the rest of the Tuesdays with Dorie crew’s entries on this recipe here: The Rugelach That Won Over France.

Mme. Maman’s Chopped Liver – A French Fridays Catch Up

IMG_3189.JPG

Do you ever have one of those days? You know, the kind that finds you doing everything but the one thing you’d set as a goal?

Well, today was one of those days for me. I made succotash, and rugelach dough, a cranberry crackle tart and extra tart dough. But I didn’t manage to get the lamb stew that was today’s French Fridays assignment into the oven. The lamb languishes in the refrigerator, the apricots wait patiently on the counter. Tomorrow will be their day.

Today, I ate ribs coated with a sauce that my mother made up on the spot, which somehow paired perfectly with butternut squash roasted with cinnamon, nigella, pumpkin seeds, and cardamom. And I dug into this chopped liver, which is humble-looking, but delivers on flavour.

I think it’s the crispy onions and the quatre épices that really make this version of chopped liver special. The onions were almost crispy when they were done. I was worried they’d be too dry, but once mixed with the liver, hard-boiled egg, and some oil from the pan, and left to rest overnight, they melted into the mixture.

This was an unequivocal hit and will be showing up on my buffet table, humble-looking or not.

See how the Doristas fared with this recipe last year, when it came up on the rotation: Mme. Maman’s Chopped Liver. And here’s where you can find links to the rest of the French Fridays crew’s posts on this week’s recipe here: Lamb and Dried Apricot Tagine.

A List of Lists for the Booklover

Old family photo

I’m not much for gift guides. I’d rather visit the multitude of craft fairs and art sales that happen this month. Keeping it local, supporting crafters and artisans, finding unique and special gifts – all those good things.

What I do fall for, every time, are book lists. And the end of the year is full of them.

The Big Picture

The New York Times has released their list of 100 Notable Books of 2014. Not to be left out, the Globe & Mail released their own list of 100. NPR and the CBC put out shorter lists, while the Guardian asked notable writers for their picks instead.

Publisher’s Weekly breaks their list down into categories. I’ve linked to their non-fiction list, because it starts with one of the best books I read this year, but you can click through to their other lists at the top.

Around the World

The Telegraph’s picks for the best travel books of 2014. And the Detroit Free Press’ picks. Shutterstock has a list of their favourite travel photography books and Longitude Books promises titles that will entice you to explore regions around the world.

In the Kitchen

If you’re a little obsessed with cookbooks, like me, there’ are a number of “best cookbooks of all time” lists. Here are a few, from:

Out in the Garden

A British list from Gardens Illustrated. An American one from the American Horticultural Society. One for Canadians from The Star. And finally, another British one that asks whether the subject of gardening has anything more left to be said.

Those should keep you busy, if you weren’t busy enough at this time of year. No shame if you use these lists only when shopping for yourself. Well, not much shame.