Savoury Avocado Cream Bites – An Avo Showdown Recipe

IMG_4556

One of the nicest parts of blogging for me is when the two lenses of my blog, food and community, converge. It’s not a rare occurrence, either – food and community go hand-in-hand.

There are a lot of organizations that connect food bloggers these days – Food Bloggers of Canada, food blogger savvy marketing companies, Meetups, and more. It means I’ve had the opportunity to meet other local bloggers and it’s often in the context of a fun event.

IMG_4641

This summer, I got to do just that, courtesy of Town Hall Brands and Avocados from Mexico.

They organized an Avo Showdown and local bloggers brought their best original avocado recipes to the competition.

I spent some time recipe-testing, consulting my copy of The Vegetarian Flavor Bible for avocado-friendly pairings, and came up with an avocado and coconut cream spread, paired with jalapeño jam and a cucumber and fennel salad. I presented it on Vancouver-favourite, Raincoast Crisps, for two reasons: they’re delicious and I thought they’d hold up well to the very long wait between assembly and presentation to the judges.


Savoury Avocado Cream Bites

Serves a crowd

Fennel Crunch:
  • 5 grams red onions, finely diced and soaked in ice water for 10 minutes
  • 50 grams fennel ( ½ small bulb), excluding fronds, finely diced
  • 50 grams cucumber, peeled, quartered & cored, finely diced
Lime Vinaigrette:
  • 1 tbsp fresh lime juice
  • 3 tbsp olive oil
  • salt and pepper to taste
Avocado Cream:
  • 2 ripe avocados
  • ¼ cup coconut milk
  • 2 tbsp lime juice
  • a generous pinch of cayenne pepper
  • salt and pepper to taste
To Finish:
  • jalapeño jam, store-bought or homemade (I use Camilla Wynne’s recipe)
  • crackers, crostini or rice crackers
  • cilantro (optional)

Prepare the Fennel Crunch and Lime Vinaigrette. Toss the Fennel Crunch in 2 -3 tbsp of the vinaigrette, check for seasoning, and refrigerate.

Halve the avocados, remove the seed, and scoop the meat into the jar of a blender or the bowl of a food processor. Add the remaining ingredients and blend until the mixture is smooth, thick, and free of lumps. Check for seasoning, then refrigerate for 30 minutes.

To assemble, scoop a small quantity of the dressed Fennel Crunch onto the crackers or crostini. Spoon or pipe ½ – 1 tsp. of the Avocado Cream on top. Add a small quantity of jalapeño jam to either side of the Avocado Cream. Garnish with another small sprinkle of Fennel Crunch or a shower of chopped cilantro.

Serve immediately.

Tips: For a gluten-free version, use rice crackers, gluten-free crostini, or even slices of cucumber. This recipe is suitable for vegan or vegetarian eaters.

IMG_4624

My dish was a hit with my family and with a few of the judges, so I’m happy. (Of course the happiest bunch of all were the night’s winners, as you can see in the photo above.)

IMG_4573

The evening was the best reward, anyway. We were treated to mountains of delicious appetizers prepared by the students at the Pacific Institute of Culinary Arts, along with a demonstration of an avocado-shrimp spring roll by PICA’s Executive Culinary Chef Instructor, Darren Clay. (It was fun working in a commercial kitchen alongside fellow bloggers.)

IMG_4606

This was followed up by a demonstration of an Alligator Fizz by Justin Darnes, of Drinks Undressed and prestigious bars around the world and here in Vancouver.

By the time we got to taste each other’s dishes (nineteen in all), we were already a little full. But, they were all so delicious, we managed. And on our way out the door, we got a bag of avocado goodies to take home.

IMG_4634

A wonderful evening all around.

I was given an invitation to the Avo Showdown by Town Hall Brands, along with a small gift bag, but received no other consideration. All opinions are my own.

Spring Book Reviews – Teatime in Paris!

Tart

This giveaway is now closed. Congratulations to Stephanie of Kitchen Frolic and Kathy of Bakeaway with Me – you’ve each won a copy of Jill’s book!

I received a review copy of Teatime in Paris! from Interlink Publishing. Nevertheless, all opinions in the following post are my own.

There’s something intoxicating about a bakery case. The aromas, of course, help. But it’s the visual feast that is dizzying. Delicate millefeuilles; macarons in all their colour-wheel glory; choux puffs and éclairs stuffed full of cream; cakes, cookies, and tarts in all shapes and flavours – how can one decide?

That’s why high tea is such a pleasure. You can fill your plate with bite-sized versions of all those pastries. The French have their own take on teatime – le goûter. However, unlike high tea, le goûter is an everyday occasion. Children go in for Nutella tartines, but adults take tea or coffee with delicate pastries.

It’s a much better habit than the to-go cups and monstrous, leaden scones that feature in North American afternoon breaks.

Jill Colonna is something of an expert on le goûter and teatime, too. A Scottish transplant to Paris, she’s explored all that city has to offer the discerning mid-afternoon pastry aficionado. So much so that she gives tours of the best pâtisseries and chocolatiers in Paris.

She started her blog, Mad About Macarons, when she began experimenting with making French pastries at home. Her first book, also called Mad About Macarons!, demystifies the process of making these quintessentially French treats. Her macaron recipes range from classic to playful, guaranteeing you’ll never get out of practice.

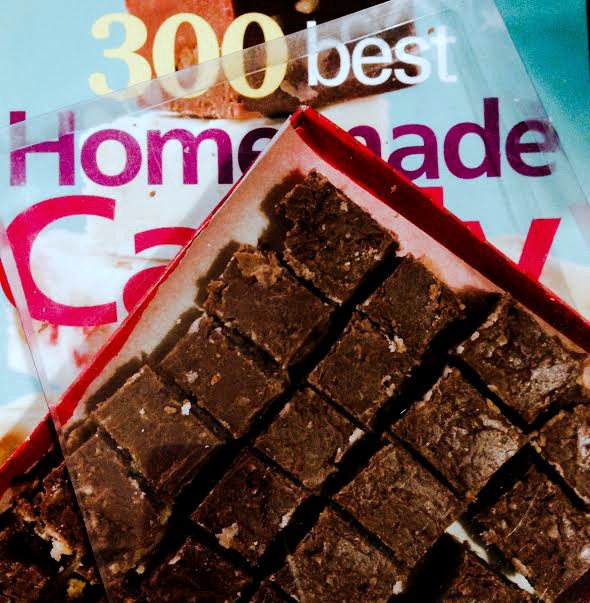
Her latest book, Teatime in Paris!, just released on June 1st, takes on the rest of the pastry case. There are chapters on choux pastry, millefeuilles, tartlets, and of course, macarons. Each of these begin with an illustrated, step-by-step recipe for the basic version of the pastry, then move on to all sorts of variations. The book also includes recipes for canelés, crepes, little cakes, and more. There are even recipes for a few full-sized desserts and the last chapter sets out recipes for an elegant French tea party.

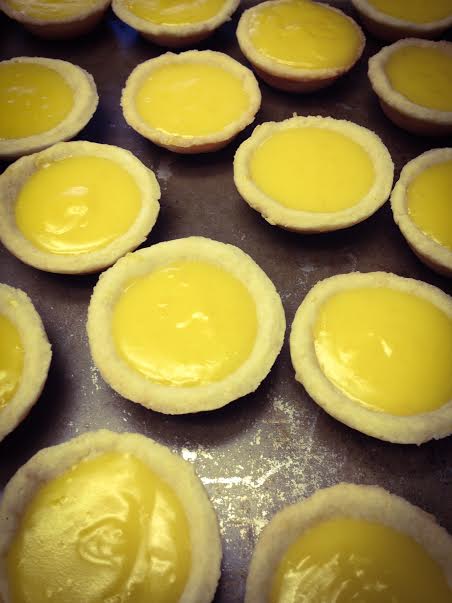
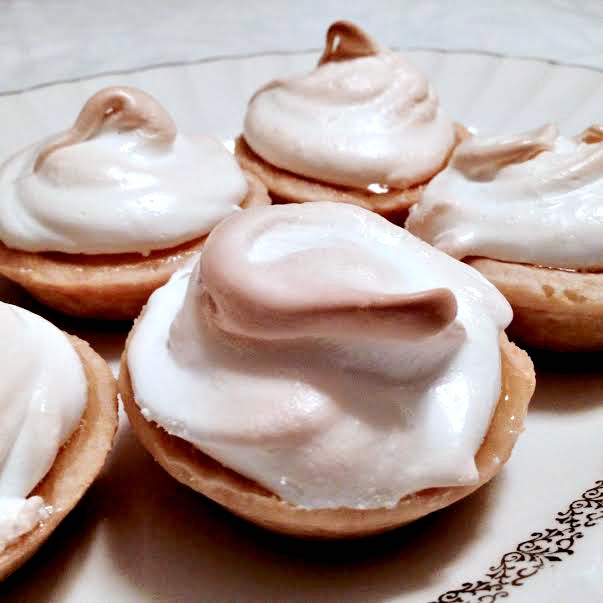
My family was quite pleased to learn that I’ve got the book bristling with bookmarks and several of them have volunteered to taste-test while I master these pastries. I have to say, it’s started out very well. I made Jill’s Passion Fruit and Lemon Meringue Tartlets last week and they are everything I love about pâtisserie baked goods.

Jill’s pâte sucrée (sweet pastry or sweet tart dough) recipe yields the best pastry cases I’ve ever made. They’re sturdy enough for any filling, but just the right balance of crispy and tender when you bite into them. They also don’t get soggy over time.

Pastry

I could have stopped baking right there, I was so pleased with the pastry cases. I’m very glad I didn’t. The fruit curd filling has a little gelatin in it, giving it a sheen and substance that most homemade curds lack. The topping is a perfectly sweet French meringue that holds up in the oven and then in the refrigerator.

Filled Tarts

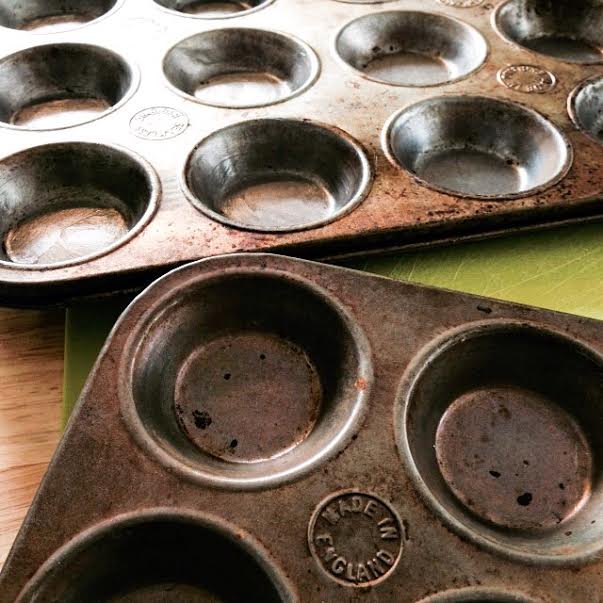
The tart, smooth filling contrasts so well against the texture of the pastry case and the sweetness of the meringue. They look beautiful, too. These tartlets are the closest thing to a pâtisserie sweet that I’ve ever made. I made them smaller than called for in the recipe, so that I could share them around in my extended family. It was also an excuse to use my grandmother’s butter tart pans, which are perfect for making tiny pastry cases.

Pans

Jill’s instructions guided me through the whole process easily. I’m looking forward to finally having some success with macarons under her instruction, though it’s her Chocolate-Earl Grey Tartlets with Orange-Liqueur Crumble Puffs that are next on my agenda.

I’ve gotten permission from Jill and Interlink Publishing to share the recipe with you. However, if you want the secret to Jill’s wonderful pâte sucrée, you are just going to have to buy the book. (You should.)

A note to Canadian and American bakers: if you haven’t invested in a digital kitchen scale, now is the time to get one. The ingredients are given in grams, for accuracy and an international readership. And really, what are you waiting for? You will be so pleased when your baked goods come out perfectly, consistently.

Passion Fruit and Lemon Meringue Tartlets

Makes 8 tartlets
Preparation time: 25 minutes
Cooking time: 20 minutes
Chilling time: 2 hours
Temperature: 160°C/320°F fan (Gas 4), then 200°C (400°F, Gas 7)

Ingredients

  • 500g pâte sucrée (sweet pastry)

Filling:

  • Zest of an unwaxed lemon
  • Juice of 2 passion fruits and 1-2 lemons (100g fresh juice)
  • 100g sugar
  • 2 eggs
  • 90g cold butter, cut into chunks
  • 1 x 2g sheet of gelatine

Meringue topping:

  • 60g egg whites (approx. 2 egg whites)
  • 90g sugar (normal sugar, not caster/super-fine)

Method

Tarts

  • Roll out the pastry to 3-4mm (1/8-3/16″) thickness turning regularly on a lightly floured surface. Cut out rounds that are 2cm (3/4″) bigger than your tartlet molds. Gently press each round into a tartlet mould, trimming off excess pastry. Prick the pastry all over with a fork.
  • Bake the tartlets for 10-15 minutes at 160°C/320°F fan (Gas 4). Allow to cool, remove from their moulds and set aside.
  • Soak the gelatine in cold water for 10 minutes and zest the lemon.
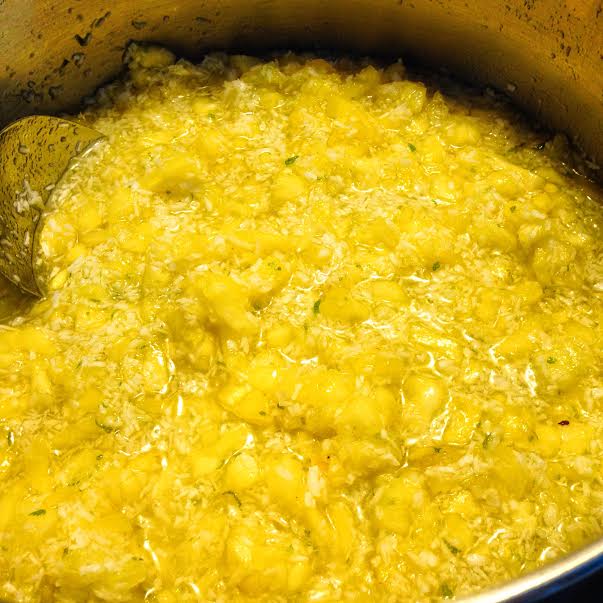
  • Strain the juice of two passion fruits using a sieve to remove all the seeds and make up to 100g by adding the juice of 1-2 lemons.
  • In a saucepan, whisk together the passion fruit-lemon juice with the sugar, zest and eggs over a medium heat until the sauce boils, bubbles and thickens.
  • Strain to remove the zest. Take off the heat and whisk in the butter and the gelatine (squeezed of excess water).
  • Pour directly into the tartlet shells and place them in the fridge until ready to serve.
  • To appreciate them at their best, remove from the fridge 10 minutes before serving.

Meringue

  • Whisk the egg whites at medium-high speed with an electric mixer in either a glass or metallic bowl. Just as they start to froth up, gradually add the sugar. Increase to a high speed, continuing with the sugar until the meringue forms strong, glossy, stiff peaks.
  • Spoon (or transfer to a piping bag with a large serrated or plain tip and pipe out) the meringue on top of each tartlet, spreading it as much as possible over the top. If not piping, using the back of a spoon, lift parts of the meringue up into little cones for decoration.
  • Bake in a very hot oven (200°C, 400°F, Gas 7) for about 5 minutes. Alternatively, brown with a culinary blowtorch.
  • Remove and chill until ready to serve.

Tarts

One last thing – don’t be surprised if you find yourself packing this cookbook on your next trip to Paris. One of the loveliest bonus features of the book is the illustrated appendix of Jill’s favourite sweet walks in Paris. It gives you advice about where to find sweets and pastries across a number of Paris’ famous neighbourhoods. And if, like me, you’re not going to Paris anytime soon, this chapter will help you visit vicariously.

You can see all this for yourself if you’re lucky. Interlink Publishing has been kind enough to offer two copies of Teatime in Paris! to my readers. You can enter to win one of them via the link below.

Teatime in Paris

Readers with US or Canadian mailing addresses (with the exclusion of residents of Quebec) can enter to win one of two copies of Teatime in Paris! You can find the giveaway, along with the rules and eligibility requirements, by following this link. The winners will be notified by email on June 20, 2015. Good luck!

That’s it for my Spring Book Review series. It’s practically summer now, after all. I hope you’ve treated yourself to a few of the titles I’ve told you about over the last few weeks. And if you try any of the recipes I’ve shared, I’d love to hear about it! Now, go out and enjoy all the good food summer brings.

Spring Book Reviews – Preservation Society Home Preserves

Canned

I received a review copy of Preservation Society Home Preserves from Robert Rose Inc. Nevertheless, all opinions in the following post are my own.

Canning and preserving aren’t what they used to be. It’s a lost art for many, only some of whom have memories of parents or grandparents putting up dilly beans or pickled beets, strawberry freezer jam or orange marmalade. Those recipes seemed preserved in amber themselves, passed down from one generation to the next without variation.

Not that that’s a bad thing – I love the taste of old fashioned pickles, jams, and preserves. But now, there’s been a a revival of the preservation arts and it’s come with a lot of experimentation. I may love those old school tastes, but it’s the modern flavours that inspire me to get into the kitchen and fire up the canner.

If you feel the same way, Camilla Wynne’s Preservation Society Home Preserves is the book for you.

Her whimsically heart-shaped pickled beets have a juniper berry and peppercorn kick. Her strawberries mingle with currants and rose petals or tequila and triple sec. And her marmalades travel the road from purity to downright decadence.

Many of her recipes are inspired by cocktails and she brings the same kind of attention to flavour and inventiveness that you’d see in a bar that specializes in handcrafted drinks. The range of recipes is nice, too, including syrups, refrigerator preserves, and dishes that use some of the products of the earlier recipes in the book.

Jamming

This book isn’t a comprehensive guide to canning, though. There is a chapter up front that covers canning basics clearly, but if you’re new to it you might want to have a canning reference guide (or even better, an experienced canner) by your side.

I made Wynne’s Piña Colada Jam yesterday and it filled the kitchen with the most wonderful tropical aromas. I tasted it today and it was delicious. Wynne recommends using it as a cake filling, an ice cream topping, or swirled into mascarpone. I could also see it as a surprise at the bottom of a crème brûlée or a tart like this one. To be perfectly honest, it’s great on its own. I sort of ate a small…ish quantity of it with a spoon while I was supposed to be photographing it.

Robert Rose Inc. has been kind enough to allow me to share the recipe with you. If you make it, promise me you’ll follow safe canning guidelines (you could start here, for instance) and read up about how to determine the setting point for jam.

Piña Colada Jam

Makes about five jars (8 oz/250 mL each)

2.9 lbs (1.3 kg) pineapple flesh (from 2 pineapples)
2-1/2 cups (500 g) jam (gelling) sugar
1-2/3 cups (100 g) unsweetened flaked coconut
Grated zest and juice of 2 limes
6 tbsp (90 mL) dark rum, divided

  • Chop the pineapple into fairly small dice.
  • In a large pot or preserving pan, combine the pineapple, sugar, coconut, lime zest and juice and about half the rum. Cover and let stand to macerate for 30 minutes.
  • In the meantime, prepare the jars and lids.
  • Bring the pineapple mixture to a boil over medium-high heat, stirring often. Boil hard, stirring often, until the setting point is reached. Remove from heat and let rest for 5 minutes, stirring occasionally. Stir in the remaining rum.
  • Ladle jam into the hot jars to within 1/4 inch (0.5 cm) of the rim. Remove any air bubbles and wipe rims. Place the lids on the jars and screw the bands on until fingertip-tight. Process in a boiling water canner for 10 minutes.

Canning

For me, the best cookbooks are ones that send me in directions I’d never imagined, whether it’s techniques, cuisines, or ingredients. In this case, it’s combinations and juxtapositions of flavours. Having a pantry full of these homemade ingredients will lead to a more delicious life.

Tasting

Come back next Thursday for the last book in this season’s review series. You’ll be dreaming of Paris and you’ll also have a chance to win one of two copies of Jill Colonna‘s latest book.

Spring Book Reviews – Vanilla Table

Custard

I received an electronic copy of Vanilla Table, for review from Natasha MacAller’s publicist. Nevertheless, all opinions in the following post are my own. 

The single subject cookbook is a trend that’s becoming as important as cookbooks focused on a single cuisine. Whether the focus is a dish or an ingredient, a meal or a piece of equipment, home cooks are seeking out cookbooks that will allow them to dig deeper than the generalist cookbooks they started with.

Natasha MacAller’s Vanilla Table is a perfect example of why this trend is taking off. Vanilla is an ingredient most cooks take for granted, adding it to their sweets and baked goods to enhance the flavours that are the real stars of their dishes. As MacAller says in her introduction to the cookbook: “Vanilla is often used to describe something that is just ordinary, nothing special, no extras — however, vanilla is anything but plain.”

MacAller sets out to make vanilla not just the focus of many of the dishes in the book, but also to provide the tools for home cooks to use vanilla, in all its forms, more creatively and daringly. There’s a short “Vanilla 101” at the beginning of the book that guides the reader through the four varieties of vanilla and their characteristics, then discusses the forms of vanilla that are sold, from pods to powder. At the end of the book, she devotes a whole chapter to staple concoctions that are used in recipes throughout the book, but could serve as a jumping off point for your own ideas. The Vanilla Candied Bacon Bits alone could keep me busy finding savoury and sweet uses for them.

The chapters of the book read like the sections of a restaurant menu and the recipes lean toward haute cuisine. Though there are a few homey recipes, this book is perfect for planning dinner party menus. The recipes in the book are MacAller’s own, along with a selection of recipes from well-known chefs and bakers around the world, including Rose Levy Beranbaum, David Lebovitz, Yotam Ottolenghi, and Nancy Silverton.

MacAller herself became a chef after a career as a professional dancer, learning that she loved working with food when she began catering in her dance companies’ off seasons. She became known as The Dancing Chef and her recipes reflect a cosmopolitan and global perspective on food.

What I especially like about this cookbook is the way that its recipes make use of flavour combinations and layering. It’s something that’s often missing from cookbooks and is especially suitable for bringing a sense of fine dining to the home dining room.

The book also introduces a cornucopia of ingredients and a wealth of techniques, making the most of vanilla while tempting the reader to stretch their palates and practices. Huckleberry gastrique, lychee lime relish, fennel vanilla sausage, homemade labneh – the parts and flourishes of these recipes are as interesting as the whole.

Though the recipes and instructions might be challenging for more inexperienced cooks, this book has more than enough to teach cooks who are comfortable in the kitchen and want to extend their skills. I’d recommend it especially to cooks who like to entertain on an elegant scale.

I’m looking forward to working through the sweets and baked goods chapters, but I thought a good test of the book would be to choose recipes from the savoury section. There are classic vanilla pairings like lobster or dishes set off by a fruity sauce, but there are also some surprising combinations.

I was intrigued by the idea of garlic and vanilla, so I’m sharing MacAller’s recipe for a starter that combines the mellow savoury flavour of caramelized garlic with cheeses and a vanilla-infused custard. It’s a sneaky dish, with a strong vanilla aroma that initially reads as dessert. When you taste it, the garlic, ricotta and Parmesan are at the forefront of its flavour, but then the nutmeg and vanilla come through. It’s complex and delicious, a good starter for an adventurous meal or a classically French one. I served it plain, but I suspect it would be even more interesting with a garnish of green pea pesto (from her recipe for Heirloom Tomato Bisque, which pairs tomato and vanilla to good effect).

Garlic and ricotta custard

Caramelized Garlic & Ricotta Custard Cups

Serves 6

  • 1 garlic head (recipe needs 6 caramelized cloves)
  • 2 tsp (10 mL) oil
  • 1 tsp butter, to grease cups
  • 1 vanilla pod
  • 1 Tbsp (15 mL) apple sauce (or ¼ apple, peeled and grated)
  • ½ cup (120 mL) whipping cream
  • 1 cup (240 mL) milk
  • ½ tsp superfine sugar
  • ½ tsp fine sea salt
  • ¼ tsp white pepper
  • 3 large eggs
  • ½ cup (90 g) ricotta
  • ¼ cup (20 g) Parmesan, finely grated
  • a pinch of ground nutmeg

Caramelized Garlic

Preheat oven to 350 F/180 C.

Cut top off garlic head to expose cloves. Peel away just the outer layer of the garlic bulb skin, leaving the skins of the individual cloves. Wrap loosely in foil and drizzle over the oil. Pinch the foil closed at the top, place in a baking pan and cook in oven 30–35 minutes until squishy, caramelized and golden brown.

Custard Cups

Butter 6 small (4 fl oz/120 ml) custard cups. Set inside a baking dish large enough to hold the cups.

Cut the vanilla pod in half but don’t split and scrape it, to keep the custard ivory colored. Squeeze 6 caramelized garlic cloves into a saucepan and add apple sauce, vanilla pod, cream, milk, sugar, salt and pepper. Bring just to a simmer, turn off heat and cool about 20 minutes.

Turn the oven to 325 F/160 C.

In a large jug, whisk the eggs well, then add ricotta. Place a sieve over the jug and strain the milk mixture into the eggs, pressing the garlic through with the back of a spoon. Discard the vanilla pod or rinse, dry and save for another use. Add Parmesan, salt, pepper, a pinch of nutmeg and whisk together.

Pour custard into cups. Lift pan into the oven, then fill with very hot water to come halfway up the outside of the cups. Bake for 20 minutes until custard has browned and set but is still jiggly in the center.

Serve warm as is or top with a spoonful of green pea pesto.

Vanilla Table shows just how complex and varied its titular ingredient can be, while proving that limiting cookbooks to a single subject doesn’t limit the scope and breadth of its recipes.

Come back Thursday, May 21st for a discussion of two books I was excited to celebrate.

Made With Love

Chili

Not long after his 60th birthday, my Dad was getting ready for work and told my mother he had to sit down for a minute before leaving. Luckily, my Mom recognized the signs of a heart attack and got him to the hospital so quickly that they were able to stabilize him before it was too late. He’d always congratulated himself on marrying a nurse, who could help him with whatever ailed him, and now she’d saved his life.

When he got home, there were exercise regimens and eating restrictions to follow. And my father counted himself lucky once again, because my mother is not only a fabulous cook, but she is also one of the most determined people on earth when she puts her mind to it. He was going to eat a healthy diet if it – well, even if it pained him.

She came up with an arsenal of heart-healthy recipes so delicious that the rest of the family started hoping some of the leftovers would show up at our doors. My Dad recovered, then thrived.

Ten years later, my partner Kevin started on his own path to better health and decided that veganism was going to be a big part of it. My mother started sending over freezer containers full of the chili she’d developed for my Dad. It’s vegan and gluten-free, but more importantly, it’s one of Kevin’s favourite meals.

It took a while for her to share the recipe with me, not because she’s secretive, but because she’s always busy – volunteering, meeting with friends old and new, or spending time with her grandchildren.

When I finally had the recipe, I whipped up a batch of the chili and immediately realized that my chili powder had much, much more cayenne pepper in it than the brand my mother uses. Her chili has a warming burn, while mine was five-alarm fiery. Taste, don’t trust is a good motto for adding chili powder. Lesson learned. I’ve amended that line of the recipe accordingly – it’s a range now, not the 6 tablespoons that she uses. (I think her chili powder must be mostly cumin.)

Tonight, I brought a whole batch to a meeting of our housing co-op. I came home with only one small bowl’s worth. Not quite enough for a meal, but enough to remind me to make it again soon.

And now you can share it with those you love, too, whether it’s your family or a community you care about.

Jeannine’s Spicy Vegetable Chili

By Jeannine McCarthy

Serves a crowd

1 tbsp olive oil
4 large garlic cloves – sliced
1 large onion – sliced and quartered
2 carrots – sliced into medium coins
2 small stalks of celery – sliced
1 cup water

1 can diced tomatoes 28 oz – low salt
1 can tomato sauce 680 ml – low salt

1 small green pepper – sliced into chunks
1 small red pepper – sliced into chunks
1 small orange or yellow pepper – sliced into chunks

1 can organic tomato paste 5.5 oz
2 cans red kidney beans 28 oz each – low salt
1 can black beans 19oz – no salt
1 can romano beans 19oz – no salt

1-4 tbsp chili powder*
1 tbsp cumin
3 tbsp white vinegar
1 tsp black pepper
1 tsp salt

  • Coat bottom of a large soup pot with olive oil. On low heat, add garlic and onions; cook until starting to look translucent. Add carrots, celery, and water. Cook until carrots are slightly tender.
  • Add tomatoes and tomato sauce. Add chili powder, cumin, vinegar, pepper and salt, then stir. Continue cooking on medium heat for 5 minutes.
  • Add tomato paste, kidney beans, black beans, and Romano beans. Cook for 5 minutes, then add green, red, and yellow peppers.
  • Cook on medium heat for 45 minutes to 1 hour.

This is a large recipe. After the first meal, ladle left-overs into freezer containers (enough for one meal) and freeze.

*Start on the low range when you add the chili powder and then add a little at a time until you reach the level of heat you like. There can be a lot of variation in strength amongst chili powders. 1 1/2 tablespoons seems about right for us, with the brand we use.

Spring Book Reviews – Bob’s Red Mill Everyday Gluten-Free Cookbook

Amaranth Soup

I received a review copy of Bob’s Red Mill Everyday Gluten-Free Cookbook from Robert Rose Inc. Nevertheless, all opinions in the following post are my own.

A diagnosis of celiac disease can seem like an imposition of broad limitations on one’s diet. And that used to be quite true, in the days when white rice flour was made to stand in for everything from bread flour to cake flour.

These days, though, there are so many great gluten-free alternatives available to people with celiac disease or gluten intolerance. Gluten-free grains and seeds like quinoa have become widely available, along with a wide range of flours. Ingredient lists are starting to shift, too. Where once wheat or barley might be used as a filler, now products like stocks, sauces, and spice-blends are eliminating them when not necessary, or other companies are jumping into the market with their own gluten-free varieties.

Bob’s Red Mill has been a reliable source of gluten-free products for years, dedicating separate production lines to many of their gluten-free grains, seeds, and flours to avoid cross-contamination. I’ve been a fan since my youth, when I was introduced to plenty of crunchy granola vegans and vegetarians. Potluck survival meant mastering veggie cuisine and Bob’s Red Mill provided many of the grains we used.

I’ve never been completely vegan or vegetarian, but eat that way much of the time, especially since my partner has committed to veganism. He’s also the member of the family with celiac disease, so alternatives to wheat, barley, and the rest of the gluten-rich grains are a big part of our daily meals.

I’ve become very familiar with gluten-free alternatives over the years. But like many of us, I’ve got quinoa down and could use a little help making the most of the rest. Amaranth? Teff? Sorghum? Millet? I’ve made a little use of these, but not often enough. Even familiar grains like oats or buckwheat become trickier when they are ground into flours.

So, I was excited to get my hands on a copy of Camilla V. Saulsbury’s Bob’s Red Mill Everyday Gluten-Free Cookbook. It’s full of whole-grain, gluten-free recipes, but just as importantly, it includes a primer with details on how to prepare and store gluten-free grains and flours, what their nutritional properties are, and what other healthful items belong in the gluten-free pantry.

The recipes themselves range from breakfast to dessert and travel across cuisines, many of which can become off-limits to gluten-free eaters. Amaranth Tabbouleh or Sorghum Minestrone satisfy cravings for old favourites, while naturally gluten-free dishes like Persian-Spiced Lentils and Millet make use of less familiar grains to delicious effect.

Many of the recipes are vegetarian or vegan, or easily adaptable, so there are plenty for me to choose from when eating with my partner. I’m especially looking forward to trying the recipe for vegan Nanaimo bars, as I noticed that one of the grocery stores nearby sells popped amaranth.

Today, though, I’ve got permission to share a recipe for a hearty, vibrant soup that reminds me of a pozole verde. It can be served with queso fresco, but we skipped that in favour of lime wedges and found it perfectly satisfying.

Tomatillo, Black Bean and Amaranth Soup

Makes about 6 servings

Equipment: Food Processor

2 cans (each 12 oz/340 mL) whole tomatillos, with juice
1 tbsp/15 mL olive oil
4 cloves garlic, minced
1 tsp/5 mL chipotle chile powder
3/4 cup/175 mL amaranth
2 cans (each 14-19 oz/398-540 mL) black beans, drained and rinsed
3 cups/750 mL ready-to-use GF vegetable or chicken broth
1 cup/250 mL packed fresh cilantro leaves, chopped
Crumbled queso fresco (optional)
2 tbsp/30 mL freshly squeezed lime juice
Lime wedges (optional)

  1. In food processor, purée tomatillos and their juice. Set aside.
  2. In a large pot, heat oil over medium-high heat. Add garlic and chipotle powder; cook, stirring, for 1 minute. Stir in tomatillo purée; cook, stirring for 2 minutes.
  3. Stir in amaranth, beans and broth; bring to a boil. Reduce heat to low, cover and simmer, stirring occasionally, for 15 to 20 minutes or until amaranth is very tender. Stir in cilantro and lime juice. Serve sprinkled with queso fresco (if using), with lime wedges on the side, if desired.

I predict this cookbook will have you stocking your pantry with more grains, seeds, and flours, whether or not you need to follow a gluten-free diet. Variety is the spice of life, but it’s also a good practice for health and a delicious one, at that.

Come back next Thursday for a review of a book that will help you make the most of each season’s bounty.

Spring Book Reviews – The Soup Sisters and Broth Brothers Cookbook

Tom Yum Soup

I received a review copy of The Soup Sisters and Broth Brothers Cookbook from Appetite by Random House Canada. Nevertheless, all opinions in the following post are my own.

It’s safe to say that soup season is a year-round phenomenon in Vancouver, even though we get long stretches of sunshine in the summer. There are gazpachos and chilled soups for hot weather, but there are also always rainclouds in our future, so stocking the freezer with comforting soups is a good practice.

One of the best ways to do that is to make a big batch of your favourite soup and then organize a soup swap with friends and neighbours. It’s a fun way to build community while providing one another with at least six meals’ worth of nourishing, delicious food.

(Inter)National Soup Swap Day is held in late January each year, but they provide great information and advice no matter what time of year you decide to hold your own swap. Next year will be the tenth anniversary, so I expect they will have even more recipes, stories, and advice to share.

Our co-op has been holding soup swaps for a number of years now. The regular participants enjoy it so much that we’re even talking about having them twice a year – once at harvest time and another in the coldest part of the year. One to celebrate late summer’s bounty and another to cheer us through winter’s last weeks.

Since I’ve been sharing soup with the same group of people over the years, I’m always on the lookout for new recipes that are delicious, reliable, and out of the ordinary. When I was given the opportunity to review The Soup Sisters and Broth Brothers Cookbook, I knew it was a book that I’d be making good use of for years to come.

The Soup Sisters and Broth Brothers Cookbook is full of flavourful soups borrowed from many cuisines and encompassing such a wide variety of ingredients that it could keep a soup swap group excited for years. The 114 soups are organized by season and the book includes stock recipes and advice on techniques and basics. The recipes come from the organization’s staff and volunteers, along with food writers, chefs, and even a sitting Mayor. Many of the recipes include stories about the soups, just as a soup swap gathering would.

But it’s more than a cookbook. It also tells the story of an organization that shares soup to help heal lives and to show support for people in crisis. The soups that Soup Sisters and Broth Brothers make together go to feed women and children who have suffered domestic abuse, or to youth exiting street life. It takes the concept of building community through sharing food beyond our personal networks and turns it into something that can be transformative.

It’s an inspiring thought. If you’d like to join them in their work, they have branches across Canada and even one in California.

In the meantime, they’ve been kind enough to let me share with you a soup for Spring, fragrant with lemongrass, galangal, makrut, and coconut milk. This Thai classic comes together quickly, but is richly flavoured. I made a vegan, gluten-free version for my partner, so traded fish sauce for a little gluten-free tamari and skipped the meat. I also used a vegan tom yum paste, versions of which are becoming more widely available now.

This soup was so good I wished I’d doubled the recipe. The only change I would make would be to add a dried chili pepper or two, for a little heat.

Tom Yum Soup

Sharon Hapton, Founder, Soup Sisters and Broth Brothers

Makes about 4 servings

4 cups (1 L) chicken or vegetable stock
2 large onions, thinly sliced
2 carrots, peeled and thinly sliced
1 shallot, thinly sliced
2 thick slices fresh ginger
2 thick slices galangal (optional)
1 stalk lemongrass, trimmed, gently bashed with a rolling pin and cut into quarters crosswise
1 to 2 tsp (5 to 10 mL) tom yum paste
3 to 4 kaffir lime leaves
1 clove garlic, minced
20 large raw shrimp, peeled and deveined, or 1 lb (500 g) cubed or diced boneless, skinless chicken (optional)
1 can (14 oz/398 mL) unsweetened coconut milk, well shaken
8 oz (250 g) cremini or white button mushrooms, sliced
2 plum tomatoes, diced
2 to 3 tsp (10 to 15 mL) fish sauce (according to taste)
1 lb (500 g) rice noodles, soaked in cold water for 2 hours then drained (optional)
Finely chopped cilantro for garnish

1. In a large pot, combine the stock, onions, carrots, shallot, ginger, galangal (if using), lemongrass, tom yum paste, lime leaves and garlic. Bring to a boil.

2. Reduce the heat and simmer, uncovered, for 10 minutes for the flavors to develop.

3. Add the shrimp or chicken (if using). Simmer, uncovered, until the shrimp are no longer pink (about 3 minutes) or until the chicken is no longer pink inside (about 10 minutes).

4. Add the coconut milk. Bring the soup back to a simmer.

5. Add the mushrooms and tomatoes. Bring the soup back to a simmer.

6. Remove the ginger, galangal (if using) and lemongrass. Season with fish sauce to taste.

7. If using rice noodles, plunge them into a pot of boiling water to heat through, then drain well.

8. Divide the noodles among the soup bowls, then ladle the soup over the top. Garnish with a flourish of cilantro.

Come back next Thursday for a review of a book that will have you stocking your pantry with long-neglected ingredients.

Vegan Easter Dinner with a Ricardo Cuisine Recipe

IMG_3621

I was provided a subscription to Ricardo Magazine for review, but received no other consideration for this post.

The best part of any holiday is sharing food with family and friends. Sometimes, that means making sure that family favourites are on the table (like my mother’s five cup salad). Sometimes, it means experimenting with new dishes that may just become favourites for the next generation. In my house, it always means making sure that everyone has enough food to enjoy, no matter what their dietary restrictions or aversions.

That can get a little tricky these days, with so many folks suffering from allergies, while others follow diets restricted for health reasons or ethical considerations. It’s not impossible, though, and today’s table offers people much better fare than that dished out when I was growing up.

Back then, a vegetarian was lucky if they got a baked potato with some vegetables on the side, unless they brought their own meal. Now, greater awareness ensures that there are staple dishes to satisfy vegetarians, vegans, and gluten-free folks, with no one thinking twice about it. Some of them are even favourites for everyone at the table.

When I was asked to review Ricardo Cuisine‘s Easter recipe collection, my thoughts naturally turned to finding ones that would work for my gluten-free and vegan partner. He has celiac disease and has recently begun eating a completely vegan diet, as well. So, finding holiday dishes that satisfy his requirements and are enjoyable for everyone is always a priority.

Right away, I landed on Ricardo’s Roasted Fennel and Fingerling Potatoes recipe. It’s the kind of dish that’s likely to become a yearly tradition, because it’s more interesting than the usual starch and vegetable sides. This roasted vegetable combination relies on the onions and fennel for flavour as well as fibre. So, it makes a good complement to other dishes at Easter dinner, then the leftovers become a great base for more meals. I like to make this sort of recipe in larger quantities than I need, for just that reason.

IMG_3623

This dish will satisfy the vegetarians, vegans, and gluten-free, but it’s also a nice choice for diabetics, because it combines the starch of potatoes with the fibre of onions and fennel, while avoiding the heaviness of many butter and milk rich potato dishes. And the unrestricted omnivores at the table will be happy it’s so delicious.

Combined with other dishes, like Ricardo’s Asparagus with Lemon Gremolata or a vegan version of his Maple-Braised Endives, you’re well on your way to happy guests. Just add a protein – like a really good slice of lentil loaf – and you’ve got a complete meal for those who aren’t partaking in the Easter ham or roast.

IMG_3622

You can find more of Ricardo’s Easter recipes here. You’ll find some to suit any of your Easter guests, from the appetizer course through dessert.

I’ve been a big fan of Ricardo since my Francophone mother introduced me to his French language television program years ago. Though I can follow along with the French instructions reasonably well, I’m happy that he’s expanding his English language presence, too.

Ricardo Cuisine was kind enough to let me reproduce their recipe here. Once you’ve tried it, I predict it’s going to become a staple at your holiday table and perhaps year-round, too.

Roasted Fennel and Fingerling Potatoes

Preparation time: 25 min
Cooking time: 1 h
Output: 6 to 8 servings

INGREDIENTS

  • 675 g (1 ½ lb) fingerling or baby potatoes
  • 2 bulbs fennel, each cut into 8 wedges
  • 60 ml (¼ cup) olive oil
  • 3 small onions, cut into 1.5 cm (½-inch) thick slices
  • Salt and pepper

PREPARATION

  • With the rack in the middle position, preheat the oven to 200 °C (400 °F).

  • In a large pot of salted boiling water, cook the potatoes until cooked but still slightly firm, about 15 minutes. Drain and set aside.

  • In a non-stick skillet, brown the fennel in half of the oil (30 ml / 2 tbsp). Set the fennel aside in a baking dish. In the same skillet, brown the onions for about 2 minutes. Add to the fennel with the potatoes and the remaining oil. Toss well. Season with salt and pepper.

  • Bake for about 30 minutes or until the fennel and potatoes are cooked tender. Serve with the Pork Roast with Maple Sauce.


Whipped Shortbread and Sucre à la Crème for French Fridays

Shortbread

For the third year in a row, the French Fridays with Dorie crew has exchanged Christmas cards. In the first two years, a few of us have included recipes along with the cards and this year, we’ve made it into a full-fledged virtual recipe exchange. I’ve been receiving cards and recipes from Doristas from around North America and around the world and it’s been nice to come home to a mailbox stuffed full of good wishes over the last week or two. Thanks to Alice, Christy, and Candy for making this such a special event.

We were asked to share one (or more) of the recipes we were sent, or to share the one we included with our card. Because I sent my cards out a bit late, I chose the latter option.

Most of my mother’s family recipes, handed down to her by her mother in a black, coil-bound notebook, have been in storage since my parents moved. So, for the last two years, we’ve been baking other people’s family recipes at Christmastime. Some of the best have come from my mother’s friend Gina, an incredibly creative person. She gardens prolifically, propagating dahlias and fig trees (both of which are now in my yard, thanks to her), and enough produce to feed her extended family and many of the members of her branch of the Catholic Women’s League, too. She bakes, cooks, volunteers, and does any number of other things well. My mother finally got Gina’s shortbread recipe this year, so I’m passing it on to you.

Whipped Shortbread

Bea Hartel/Gina Alary

1 lb butter
½ cup cornstarch
1 cup icing (confectioner’s) sugar
3 cups flour

Beat all ingredients together until consistency of whipped cream.
Drop on greased cookie sheet. (with teaspoon) Press down gently, make edges round if too jagged. Red or green cherries on top.
Bake at 350 for 15 minutes.
Makes 5 – 6 dozen.
Enjoy!

Now, when my mother got the recipe, it was much simpler than this. These ladies come from a generation in which they expect you’ll already know how to go about making cookies. My Mom added some instructions, which you can see above.

I want to elucidate just a little bit more. I whip the butter in my stand mixer first, until it’s light and fluffy. Then, I sift the rest of the ingredients into the bowl of the mixer and run the mixer on low for a bit, just so the dry ingredients don’t go flying everywhere, before bringing it up to medium-high until the dough reaches the consistency of whipped cream. If you’re using the cherries, it’s best to halve or quarter them first. If you prefer not to use glacé cherries, decorate them with something with a little more heft than sprinkles or sanding sugar and keep it simple.

There is also an alternative to the drop method of forming the cookie. You can dust your hands with cornstarch, quickly and gently roll teaspoonfuls of the dough into balls, and press them down with a floured fork (just as you would an old fashioned peanut butter cookie). Then, instead of glacé cherries, you can decorate them with dragées, sprinkles, sanding sugar, edible glitter, or sugar stars. They won’t be quite as melt-in-the-mouth, but they’re still delicious.

And, since I wasn’t able to make any of the Dorista recipes I received for this post, I’m going to update a family recipe that I shared in 2011. Sucre à la crème is a French Canadian favourite that my mother’s family has been making for generations. There are as many versions as family members, it seems, and I’ve finally come up with my own favourite formulation. My mother’s family is Franco-Manitoban, so they use brown sugar in place of the maple sugar that’s more common in Québécois versions. Feel free to experiment with maple sugar if it’s easy to come by for you. You can see the versions I shared in my original post here.

Now, this isn’t the sort of fudge we usually think of in North America, in which you avoid the formation of sugar crystals so that it’s silky smooth. This fudge is more like Scottish tablet, in which the sugar crystals are part of the pleasure. So, you don’t have to worry about sugar crystals forming on the pan and stirring is encouraged.

sucre a la creme

Teresa’s Sucre à la Crème

3 1/2 cups light brown sugar
1/2 cup white sugar
2 cups whipping cream
1 1/2 tsps vanilla

Butter an 11 X 7-inch pan, metal or heat-proof glass work equally well.

Combine the sugars and whipping cream, whisk together until well-blended and cook over medium-low heat, stirring often, until the mixture starts to thicken, sugars the spoon (a metal one is best), and forms a ball when dropped into a dish of cold water. The lower end of the soft ball stage (234-236°F) is just right. Remove the pan from the heat and stir vigourously, adding the vanilla when the candy is just beginning to stiffen. When the scrapings are becoming solid, it’s time to pour the candy into the prepared pan. Chill in the fridge for several hours or overnight, then cut into small squares. It keeps for a week in the fridge or several months in the freezer. Bring to room temperature before serving.

I made some sucre à la crème yesterday, after sharing a Boxing Day meal with my parents. I left most of it there for my Mom to share out with the family and took a small box home to share with a Québécoise friend who hasn’t had the genuine article in some time. There was also a bit for Kevin and me, but that seems to have disappeared. The shortbread is long gone, too, shared at all my parents’ holiday gatherings and even at a cookie swap.

If you try either of these recipes, I’d love to see your results – find me on Facebook, Twitter, or Instagram and share a photo.

I’d like to wish everyone the happiest of holidays and a wonderful 2015. I also want to thank my fellow Doristas for making my weekends brighter with our weekly virtual get-togethers. I’m looking forward to the final few months of Around My French Table with all of you.

You can find the rest of the Dorista recipe exchange fun here: Holiday Card/Recipe Exchange or Makeup.

Holiday Book Reviews – 300 Best Homemade Candy Recipes

Fudge

I don’t know about you, but this is the week when my Christmas shopping always begins in earnest. So, for the second year in a row, I’m bringing you three book reviews to help you cross a few names off your list.

I received a review copy of 300 Best Homemade Candy Recipes from Robert Rose Inc. Nevertheless, all opinions in the following post are my own.

My mother’s aunts were tiny women with very strong arms. That’s because they were raised in an era without stand mixers or food processors to help them in the kitchen. One of the things they used their strength to make, in quantities great enough for the whole extended family, was the French Canadian specialty sucre à la crème. This simple fudge was something we looked forward to at Christmastime and my great-aunt Leona taught me how to make it when I was a teenager. Until very recently, sucre à la crème and truffles were the only candy recipes in my repertoire.

Enter Jane Sharrock’s 300 Best Homemade Candy Recipes. I’ve been curious about candy making for some time now, so when I got the opportunity to review this book, I jumped at it. Sharrock’s cookbook covers most of the categories of candy you can find in a kitchen and some, like lollipops, that I never dreamed you could make at home.

Sharrock began collecting candy recipes when her mother gave her a treasured pressure cooker that was perfect for making candy, along with a small booklet of candy recipes. Sharrock went on to try to preserve the candy recipes from earlier generations, which lends her cookbook an air of nostalgia. Reading through the recipes, I get the sense that these candies populated the tables at church bazaars and community potlucks, in the days before mass-produced sweets took their place.

This means that for the most part, the recipes use ingredients that you’d easily find at the supermarket. The few specialty items, like candy coating, can be found at baking supply stores. But, just because these recipes are old fashioned, doesn’t mean that they’re all unsophisticated. The pralines, divinity, and nougats would make a sweets table shine and even recipes that were thought of as homey, like taffy, seem very impressive these days. You won’t learn skills like tempering chocolate or making marshmallows from scratch, but once you’ve mastered this book, taking your candy making to the next level will be a breeze.

What I like best about this book is that it teaches you a wide range of candy making skills, includes troubleshooting advice and photo demonstrations, and even guides you through the steps you’d need to take if you were trying to recreate a favourite candy without the recipe.

I think after working through some of Sharrock’s categories of sweets, next year’s holiday treat boxes will be the best they’ve ever been. In the meantime, I’m going to give Sharrock’s tuxedo fudge another try. I forgot to put the coconut into the bottom layer and added it to the top, instead. As a result, the bottom is creamy, but the top is a bit dry. Following the instructions should make my next attempt perfect. Thanks to Robert Robert Rose, Inc., I’m sharing the recipe with you. If you’re still on holidays next week, it would be a great way to start filling your freezer with goodies before the New Year’s resolutions set in.

Boxed

Tuxedo Fudge

Makes about 3 1/2 lbs (1.75 kg)

8- or 9-inch (20 or 23 cm) square pan, lined with parchment or buttered
2-quart heavy saucepan
Candy thermometer

Coconut Layer
2 cups (500 mL) granulated sugar
Pinch salt
1/2 cup (125 mL) butter or margarine
1/4 cup (60 mL) light (white) corn syrup
1/2 cup (125 mL) milk
1 tsp (5 mL) vanilla extract
1/2 cup (125 mL) sweetened flaked coconut

Chocolate Layer
2 cups (500 mL) granulated sugar
2 tbsp (30 mL) unsweetened cocoa powder
Pinch salt
1/2 cup (125 mL) butter or margarine
1/4 cup (60 mL) light (white) corn syrup
1/2 cup (125 mL) milk
1 tsp (5 mL) vanilla extract
1/2 cup (125 mL) pecans, in large pieces (optional)

1. To make the coconut layer: In heavy saucepan over low to medium-low heat, bring the sugar, salt, butter, corn syrup and milk to a boil, stirring until the sugar dissolves and the mixture begins to boil. Cover and cook 2 to 3 minutes to dissolve the sugar crystals on the sides of the pan. Remove the lid. Cook, stirring only as needed to prevent scorching, to the soft ball stage (234°F to 240°F/112°C to 116°C, with 236°F/113°C recommended).
2. Remove from the heat. Cool slightly, about 10 minutes. Add the vanilla. Beat by hand until the candy begins to thicken and lose its gloss. Stir in the coconut. Spread the candy into the prepared pan. Cool at room temperature while making the chocolate layer.
3. To make the chocolate layer: In a clean saucepan, combine the sugar and cocoa until well blended. Add the salt, butter, corn syrup and milk. Bring to a boil over low to medium-low heat, stirring until the sugar dissolves and the mixture begins to boil. Cover and cook 2 to 3 minutes to dissolve the sugar crystals on the side of the pan. Remove the lid. Cook, stirring only as needed to prevent scorching, to the soft ball stage (234°F to 240°F/112°C to 116°C, with 236°F/113°C recommended).
4. Remove from the heat. Cool slightly, about 10 minutes. Add the vanilla. Beat by hand until the candy begins to thicken and lose its gloss. Stir in the pecans, if desired. Spread the chocolate layer over the coconut layer in the pan. Cool and cut into squares. Store in an airtight container.

Gift Giver’s Guide: For the sweet tooth, the nostalgic, and the cook who wants to extend their gifts from the kitchen beyond cookies and squares.

You can find the rest of this year’s reviews here and here..